How To
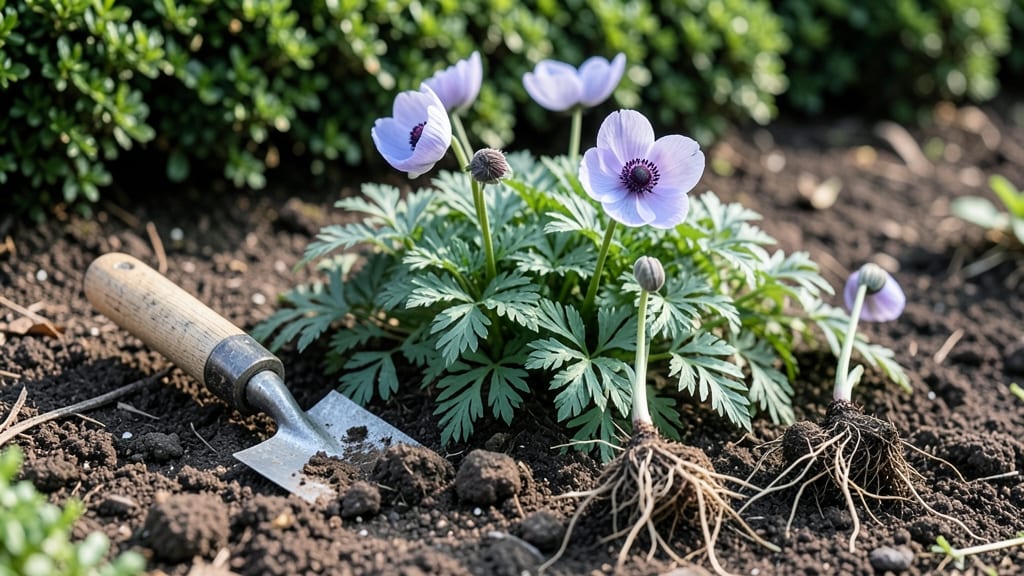
Planting Anemone blanda in fall unlocks spring blooms that feel like magic. ✨ I’ve watched these delicate windflowers transform shady corners into carpets of blue, purple, and white—something most perennials can’t pull off.
The key is timing: get them in the ground 6-8 weeks before your first frost, and they’ll reward you with early-season color when little else is blooming.
You’ll need well-draining soil (they hate soggy roots), partial to full shade, and a spot where they can spread naturally. Dig holes twice as wide as the root ball but only as deep—burying them too deep smothers their delicate stems.
Space plants 8-12 inches apart for a lush, natural look, and water them in thoroughly after planting.
Once established, Anemone blanda thrives with almost no fuss—just 1 inch of water per week and a 2-inch layer of mulch to protect roots in winter. The real secret?
They multiply underground like crazy, filling in gaps every year. By spring, you’ll have a self-sustaining woodland display that keeps giving long after other shade plants fade.
Here’s the part beginners mess up: don’t overwater after planting (they rot easily) and avoid fertilizing—these plants prefer lean soil. With the right spot, they’ll naturalize like a dream, returning year after year with minimal effort. Let’s get those bulbs in the ground!
📚 In This Guide
- What you need
- Instructions
- Tips and common mistakes
- Wrapping up and next steps
What you need
- ● Anemone blanda plants: 3–5 tubers or potted plants (choose healthy ones with firm roots or buds).
- ● Well-draining soil: Mix equal parts garden soil, compost, and perlite or coarse sand (1 part each) for optimal aeration.
- ● Organic mulch: 2–3 inches of shredded bark, pine needles, or straw to retain moisture and suppress weeds.
- ● Garden trowel or transplant spade: For digging holes (6-inch depth recommended).
- ● Watering can or hose with a gentle spray nozzle: Avoid overwatering during planting.
- ● Garden gloves: Protect your hands from soil and thorns (if handling bare-root tubers).
- ● Slow-release fertilizer: 1 tbsp of balanced 10-10-10 or bone meal per planting hole for a nutrient boost.
- ● Epsom salt: 1 tsp dissolved in water to prevent magnesium deficiency (especially in clay soils).
- ● Plant markers: Label sticks or stones to track varieties (helpful if planting multiple types!).
- ● Shade cloth (temporary): For newly planted tubers if your area gets intense afternoon sun.
Step-by-step instructions for planting Anemone blanda
Here's how to establish these elegant perennials with minimal fuss—perfect for adding texture and seasonal interest.
🌱 Step 1: Choose the Right Planting Location and Time
Anemone blanda thrives in partial to full shade, making it ideal for woodland gardens or under trees where other plants struggle. Select a spot that receives dappled sunlight—think 3-6 hours of morning sun with afternoon shade in hotter climates. These perennials tolerate USDA zones 3-8, so timing matters less than soil conditions.
Spring is the ideal planting window—late March to early May—when soil warms but isn’t yet scorching. If you must plant in fall, do so 6-8 weeks before your first frost to allow roots to establish before winter. Avoid planting in summer heat, which stresses the delicate roots and slows acclimation.
🪴 Step 2: Prepare the Soil for Optimal Growth
Anemone blanda prefers well-draining, humus-rich soil with a slightly acidic to neutral pH (6.0-7.0). If your soil is heavy clay, amend it with 2-3 inches of compost or leaf mold mixed into the top 12 inches of soil. Avoid fresh manure, which can burn the roots and disrupt the plant’s natural growth rhythm.
Loosen the soil in a 12-inch diameter circle around each planting spot with a garden fork or trowel. Break up any compacted layers to encourage root penetration. If your soil is sandy, add 1 part peat moss to the mix to retain moisture without suffocating the roots. The goal is a loose, crumbly texture that mimics the forest floor where these perennials naturally thrive.
🌿 Step 3: Plant Crowns at the Correct Depth
Dig a hole twice as wide as the root ball but only as deep as the crown—the point where the roots meet the stems. Anemone blanda crowns should sit just below soil level, never buried deeper than ½ inch. Planting too deep suffocates the crown and invites rot, while planting too shallow exposes it to temperature swings.
Gently tease out any circling roots and place the plant in the hole, ensuring the crown faces outward. Fill the hole with soil, pressing lightly to eliminate air pockets but avoiding compaction. Water deeply until moisture seeps 2-3 inches below the surface. Mulch with 2-3 inches of shredded bark or leaf litter to retain moisture and regulate soil temperature, but keep mulch 2 inches away from the crown to prevent rot.
💧 Step 4: Water and Monitor for Establishment
Keep the soil evenly moist but not soggy for the first 4-6 weeks after planting. Water deeply once a week if rainfall is minimal, aiming for 1-1.5 inches of moisture per week. Overwatering is the biggest mistake—these perennials despise soggy roots. You’ll know you’re on track when the soil feels damp 2 inches down but not waterlogged.
After the initial establishment period, reduce watering to once every 2-3 weeks, allowing the top 1-2 inches of soil to dry out between sessions. Anemone blanda develops deep roots over time, making it drought-tolerant once established. Watch for wilting leaves or yellowing foliage—these are signs of either underwatering or overwatering.
✂️ Step 5: Prune and Maintain for Long-Term Beauty
Deadhead spent blooms in late spring to encourage a second flush of flowers, but leave the seed heads for winter interest. In early spring, cut back the previous year’s foliage to 2-3 inches above the ground once new growth emerges. This prevents disease and allows sunlight to reach the crown, promoting vigorous regrowth.
Divide clumps every 3-4 years in early spring when shoots are 2-3 inches tall. Lift the entire plant, separate into smaller sections with 3-5 shoots each, and replant immediately. This rejuvenates the plant and prevents overcrowding, which leads to weaker blooms. Fertilize lightly in early spring with a balanced 10-10-10 fertilizer if your soil is poor, but avoid heavy feeding—anemones prefer lean conditions.
Tips & tricks for perfect Anemone blanda planting
These pro-level strategies will help you establish your shade-loving perennials with confidence—and avoid the common pitfalls that turn beautiful plants into struggling survivors.
Location Secret: That 3-6 hours of morning sun recommendation is critical because anemones need just enough light to thrive without scorching. In hotter climates, I've seen them struggle with afternoon sun—look for spots where sunlight filters through tree canopies rather than direct exposure. If you're unsure, test the location for a week first by observing how much light reaches the ground at different times of day.
Soil Prep Game-Changer: When amending heavy clay soil with 2-3 inches of compost, I always mix in a handful of perlite or coarse sand to improve drainage while maintaining moisture. The goal is that loose, crumbly texture that mimics the forest floor—this prevents the compacted soil from suffocating those delicate roots. Don't skip this step if your soil feels dense when you squeeze a handful!
Planting Depth Rescue: I've buried crowns too deep more times than I'd like to admit, which leads to rot. Here's my foolproof method: After placing the crown in the hole, gently press soil around it until it's just covered. Then, take a ruler and measure from the soil surface to the crown—it should be no more than ½ inch. This simple check prevents all the guesswork.
Watering Wisdom: The 4-6 week establishment period is when most people overwater, thinking more moisture is better. Instead, focus on consistent moisture—water deeply when the top 2 inches of soil feel dry to the touch. I use a moisture meter in my garden to track this precisely, but even a simple finger test works. The key is avoiding soggy conditions that invite rot while keeping roots hydrated.
Pro Tips for Anemone Blanda Planting
- These pro-level strategies will help you establish your shade-loving perennials with confidence—and avoid the common pitfalls that turn beautiful plants into struggling survivors.
- Location Secret: That 3-6 hours of morning sun recommendation is critical because anemones need just enough light to thrive without scorching.
- Soil Prep Game-Changer: When amending heavy clay soil with 2-3 inches of compost, I always mix in a handful of perlite or coarse sand to improve drainage while maintaining moisture.
Frequently asked questions
Got questions about planting Anemone blanda? You're not alone!
Here are answers to the most common concerns—from timing to troubleshooting—so you can grow these shade-loving beauties with confidence.
When is the best time to plant Anemone blanda?
The ideal window is early fall or early spring (4–6 weeks before your last frost). Planting in fall gives roots time to establish before winter, while spring ensures they thrive before summer heat. Avoid planting in peak summer—the heat can stress young plants.
Can Anemone blanda survive winter in cold climates?
These hardy perennials tolerate USDA Zones 3–9. In colder regions, mulch with 2–3 inches of organic matter (like shredded leaves or straw) after the first frost to protect roots. They’ll often re-emerge early in spring, sometimes even through snow!
What’s the best companion plant for Anemone blanda?
Pair it with shade-tolerant plants like Hosta, Ferns, or Bleeding Heart (Dicentra) for a lush woodland garden. Avoid aggressive spreaders (e.g., mint or ginger) that could crowd them out. Anemone blanda also plays well with Allium for height contrast!
Why aren’t my Anemone blanda flowers blooming?
Common culprits: too much shade (they need partial shade with dappled light), over-fertilizing (they prefer lean soil), or crowded roots. Try dividing clumps every 3–4 years and ensure they get 4+ hours of indirect light daily. Patience helps—some take 2–3 years to bloom reliably!
Are there non-toxic alternatives if I have pets?
Yes! Anemone blanda is mildly toxic if ingested (can cause stomach upset), but safer shade-loving swaps include Lungwort (Pulmonaria), Japanese Painted Fern (Athyrium), or Sweet Woodruff (Galium odoratum). Always monitor pets near new plants!
Pro Tip:
Mark your Anemone blanda spots with pebbles or flags—their foliage dies back in summer, making them easy to forget! A little reminder ensures you don’t accidentally dig them up when redoing the garden.
Wrapping up and next steps
Planting Anemone blanda is a rewarding way to add year-round charm and effortless beauty to your shade garden. With the right soil, timing, and care, these delicate perennials will thrive, offering stunning blooms and lush foliage with minimal fuss.
Now that you’re equipped with the know-how, roll up your sleeves and transform your garden into a serene, ever-evolving masterpiece!
🌱 Next step: Mark your calendar for early fall planting and gather your supplies—then watch your shade garden come alive with Anemone blanda’s magic! 🌿