Fertilization
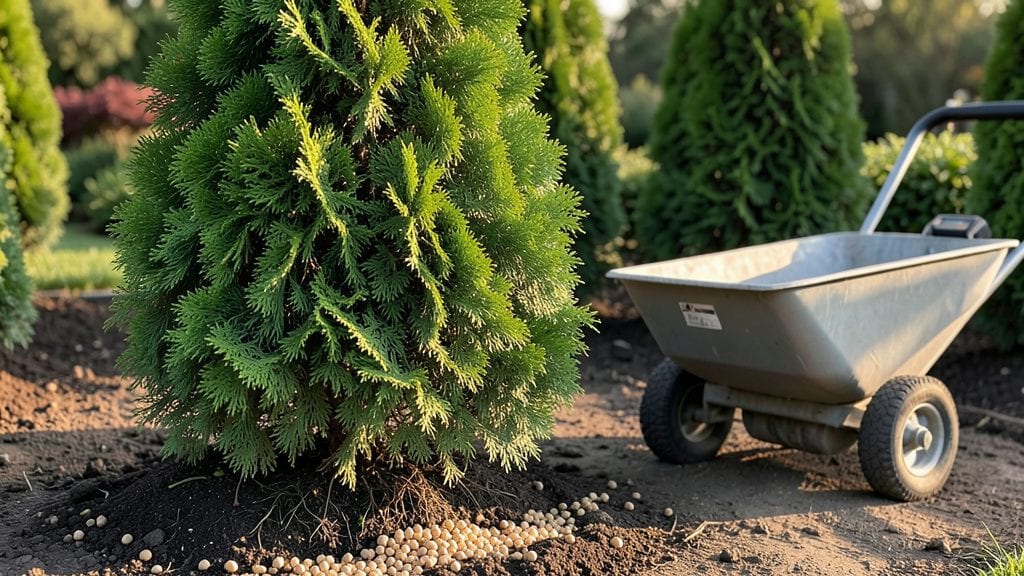
The right arborvitae plant food keeps your evergreens thriving year after year. I’ve learned that these trees don’t need much, but when they do, the difference between a lush hedge and a struggling one comes down to the right nutrients—and timing.
My Green Giant arborvitae went from sparse to full in just one growing season after switching fertilizers, and I’ll show you how to get the same results.
You’ll need a balanced, slow-release fertilizer (look for 10-10-10 or 12-12-12 ratios) that won’t burn roots, plus a few simple tools: gloves, a spreader, and a hose for watering. Organic options like composted manure or fish emulsion work too, but they require more frequent applications.
The key is feeding in early spring when new growth starts and again in late fall to prepare for winter.
What you’ll end up with is vibrant green foliage that stays dense and healthy all year, with fewer brown tips or sparse branches. Proper fertilization also helps arborvitae resist pests and disease, so you’ll spend less time fixing problems and more time enjoying your landscape.
The process is straightforward—just a few minutes of work twice a year makes all the difference.
This works for all arborvitae varieties, whether you’re growing them as hedges, privacy screens, or standalone trees. Even if you’ve struggled with yellowing needles or slow growth in the past, the right fertilizer routine can turn things around. Let’s get your evergreens looking their best!
📚 In This Guide
- What you need
- Instructions
- Tips and common mistakes
- Wrapping up and next steps
What you need
- ● Balanced slow-release fertilizer: Look for a 10-10-10 or 20-10-10 NPK ratio (e.g., Miracle-Gro Shake ‘n Feed or Espoma Plant-Tone). 1 lb per 100 sq ft of soil.
- ● Organic compost: Well-aged compost (e.g., Black Kow or homemade). 2–3 inches spread evenly over the root zone.
- ● Iron chelate: For yellowing foliage (chlorosis). 1 tsp per gallon of water (e.g., Southern Ag Liquid Iron).
- ● Mulch: Pine straw or wood chips (3–4 inches deep). Avoid fresh mulch—it can harm roots!
- ● Garden gloves (nitrile or leather for durability).
- ● Hand trowel or garden fork (for mixing soil/fertilizer).
- ● Watering can or hose with a gentle spray nozzle (avoid blasting roots!).
- ○ pH test kit (optional but helpful—arborvitae thrive in slightly acidic soil (pH 6.0–7.0)).
- ● Pruning shears (for trimming dead branches post-fertilizing).
- ● 💡 Test your soil first! Over-fertilizing can burn roots—especially in container-grown arborvitae.
- ● ✨ Water deeply before and after fertilizing to activate nutrients.
- ● 🌡️ Avoid fertilizing in extreme heat (spring/fall is ideal).
Step-by-Step guide to feeding arborvitae for lush, healthy growth
Here’s how to keep your evergreens thriving with the right nutrients at the right time.
Choose the Right Arborvitae Plant Food
Look for a balanced, slow-release fertilizer specifically formulated for evergreens. A 10-10-10 or 12-12-12 ratio works well, but avoid high-nitrogen fertilizers—too much can burn tender roots. I prefer organic options like fish emulsion or composted manure for a gentler, long-term boost. Check the label for micronutrients like iron and manganese, which arborvitae need for vibrant foliage.
If you’re unsure, test your soil first. A simple pH test kit (available at garden centers) will tell you if your soil is acidic enough—arborvitae thrive in soil with a pH of 6.0 to 7.0. If your soil is too alkaline, the plant won’t absorb nutrients efficiently, no matter how good the fertilizer is.
Apply Fertilizer at the Right Time
Timing is everything with arborvitae. Feed them once in early spring, just as new growth begins—you’ll see soft, bright green buds pushing through. Avoid fertilizing in late summer or fall, as this encourages tender new growth that won’t harden off before winter, leaving your plant vulnerable to frost damage.
Spread the fertilizer evenly around the root zone, keeping it 6 inches away from the trunk. Use about ½ cup per mature tree (or follow the label’s guidelines for younger plants). Water the area deeply afterward to help the nutrients penetrate the soil. You’ll know you’ve done it right when the soil feels moist 6 inches down—not soggy, just damp.
Water and Monitor for Signs of Health
After fertilizing, water your arborvitae once a week for the next month to encourage root uptake. Deep watering—1-2 inches per week—is better than frequent light watering. You’ll see the difference in 2-3 weeks: new growth will be darker green and fuller, and the branches will look less sparse.
Watch for signs of over- or under-fertilizing. Yellowing needles mean too much nitrogen, while brown, crispy tips signal drought stress or salt buildup from fertilizer. If you notice either, flush the soil with extra water to leach out excess salts and adjust your feeding schedule for next time.
Maintain Year-Round Care
Arborvitae don’t need frequent feeding, but they do benefit from annual mulching in late fall. Spread 2-3 inches of organic mulch (like shredded bark or pine needles) around the base, keeping it away from the trunk to prevent rot. This helps retain moisture and slowly releases nutrients as it breaks down.
Prune lightly in late winter or early spring to shape the tree and remove any dead or diseased branches. Avoid heavy pruning—arborvitae grow slowly, and over-pruning can stress the plant. With the right food and care, your arborvitae will stay dense, vibrant, and healthy for years.
Tips & tricks for perfect arborvitae plant food application
A few essential strategies will help you maximize the benefits of your arborvitae's nutrient needs while avoiding common pitfalls.
Soil Testing is Non-Negotiable: Before applying any fertilizer, invest in a simple pH test kit to check your soil's acidity. Arborvitae thrive in soil with a pH between 6.0 and 7.0, and adjusting this range can make all the difference. If your soil tests too alkaline, consider adding sulfur to lower the pH gradually over several months. This step ensures your plant can actually absorb the nutrients you're providing, rather than wasting expensive fertilizer.
Timing Matters More Than Quantity: The early spring feeding window in Step 2 is critical because it aligns with the tree's natural growth cycle. Look for those soft, bright green buds as your cue—this indicates the tree is ready to utilize nutrients. I've seen arborvitae show dramatic improvement when fed at this precise time, while trees fertilized at other times often exhibit stress symptoms like needle browning. Avoid the temptation to feed in late summer or fall, as new growth won't have time to harden off before winter.
Watering Technique Makes All the Difference: When you water after applying fertilizer in Step 2, aim for deep watering that reaches 6 inches down. This isn't just about hydration—it's about helping the nutrients penetrate where the roots can access them. I recommend using a soil probe or trowel to check moisture levels after watering. The soil should feel damp but not soggy at this depth. This technique prevents surface evaporation and ensures your arborvitae gets the full benefit of the fertilizer application.
Mulching Strategy for Year-Round Benefits: The annual mulching recommendation in Step 4 deserves special attention. Apply 2-3 inches of organic mulch like shredded bark or pine needles, but keep it 2-3 inches away from the trunk to prevent rot. This mulch layer acts as a slow-release nutrient source while retaining moisture. I've found that well-mulched arborvitae show better winter survival and require less supplemental watering during dry periods. Just remember to refresh the mulch layer annually as it breaks down.
Pro Tips for Arborvitae Plant Food
- A few essential strategies will help you maximize the benefits of your arborvitae's nutrient needs while avoiding common pitfalls.
- Soil Testing is Non-Negotiable: Before applying any fertilizer, invest in a simple pH test kit to check your soil's acidity.
- Timing Matters More Than Quantity: The early spring feeding window in Step 2 is critical because it aligns with the tree's natural growth cycle.
Frequently asked questions
Got questions about keeping your arborvitae thriving with the right plant food?
You’re not alone! Here are answers to the most common queries—so you can give your evergreens the care they deserve.
When is the best time to fertilize arborvitae?
Feed your arborvitae in early spring (March–April) and again in late summer (August–September). Avoid fertilizing in fall or winter, as new growth may not harden off before cold weather. Slow-release formulas are ideal for steady nutrient delivery.
What if my arborvitae turns brown after fertilizing?
Brown needles after fertilizing often signal over-fertilization or root burn. Flush the soil with water to dilute excess nutrients, then reduce feeding frequency. If damage persists, switch to a balanced, organic fertilizer (like fish emulsion) and monitor watering.
Can I use regular lawn fertilizer on arborvitae?
No—lawn fertilizers are too heavy in nitrogen and can burn arborvitae roots. Use a slow-release, evergreen-specific formula with a 20-10-10 or 16-4-8 NPK ratio. Look for labels mentioning "acid-loving plants" or "conifer fertilizers" for the best results.
How often should I fertilize young vs. mature arborvitae?
| Plant Age | Fertilizing Schedule |
|---|---|
| Young (1–3 years) | Every 4–6 weeks in growing season (spring–summer) with half-strength fertilizer. |
| Mature (4+ years) | Twice a year: early spring and late summer, using full-strength formula. |
What’s a natural alternative to chemical arborvitae plant food?
Try these organic options for a chemical-free boost:
- Compost or well-rotted manure (adds nutrients + improves soil structure).
- Fish emulsion or seaweed extract (rich in micronutrients like iron and zinc).
- Pine needle mulch (acidifies soil naturally and retains moisture).
- Coffee grounds (adds nitrogen but use sparingly—mix with soil first!).
Wrapping up and next steps
Choosing the right arborvitae plant food is the key to nurturing lush, vibrant evergreens that thrive year after year. Whether you opt for organic compost, balanced synthetic fertilizers, or slow-release options, consistency and proper application are what will make the difference.
Your arborvitae will reward you with healthy growth, rich color, and resilience—so get out there and give your greens the nutrition they deserve!
Ready to take the next step? Test your soil first to fine-tune your feeding plan, then explore our recommended arborvitae care guides for a full seasonal maintenance routine. Happy gardening! 🌿✨