Fertilization
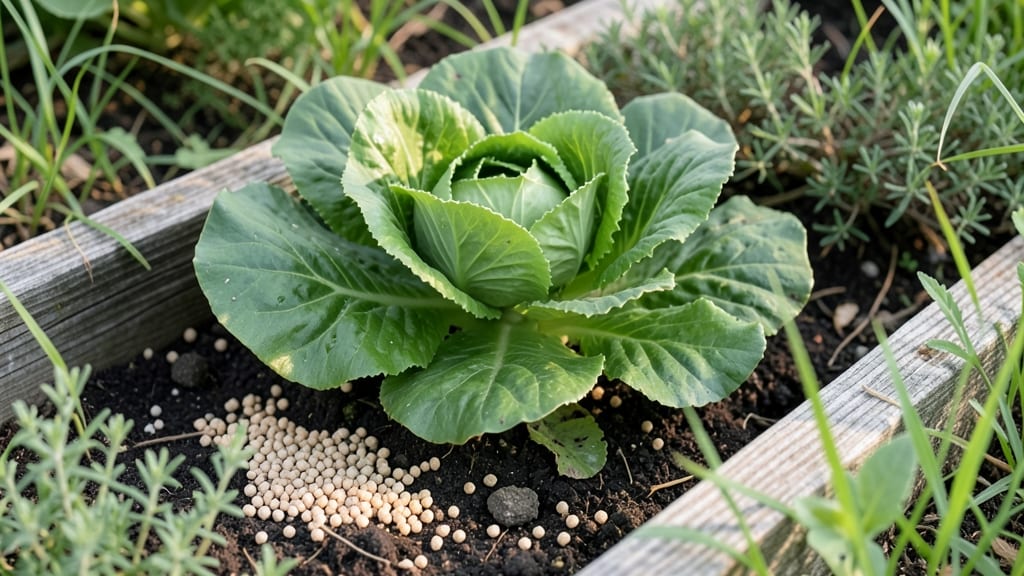
Fertilizing garden plants isn't just about throwing down bags of chemicals—it's about feeding the soil life that makes your plants thrive. 🌱 I learned the hard way that my tomatoes were starving for nitrogen while my roses craved phosphorus, and the difference between guessing and testing is what separates a decent garden from a showstopper.
The right mix keeps your soil alive with microbes and nutrients, so your plants grow stronger roots, bigger blooms, and more abundant harvests all season long.
You don't need a PhD in soil science to get this right—just a few key tools and a basic understanding of what your plants actually need.
Start with a simple soil test kit (they're cheaper than you think) to know your baseline, then stock up on balanced organic fertilizers like compost, worm castings, or a 10-10-10 blend for quick fixes.
The timing matters too: feed vegetables every 4-6 weeks, flowers at planting and midseason, and shrubs just once in early spring. Overdoing it burns roots faster than you can say "too much nitrogen."
What you'll end up with is plants that look shockingly lush and produce like crazy—tomatoes the size of your hand, roses that bloom nonstop, and herbs that stay fragrant all summer.
The secret isn't in the fancy labels but in matching the fertilizer to the plant's growth stage and your soil's current health. Once you see the difference, you'll never go back to guessing.
Works for containers, raised beds, or in-ground gardens—just adjust the amounts for smaller spaces. Let's get those roots fed right.
📚 In This Guide
- What you need
- Instructions
- Tips and common mistakes
- Wrapping up and next steps
What you need
- ● Fertilizer: Granular fertilizer (e.g., 10-10-10 or 5-10-5 NPK ratio) – 1–2 lbs per 100 sq ft
- ● Slow-release fertilizer (e.g., Osmocote) – Follow package instructions
- ● Liquid fertilizer (e.g., fish emulsion or seaweed extract) – 1–2 tbsp per gallon of water
- ● Organic options: Compost, worm castings, or bone meal – 1–2 inches mixed into soil
- ○ Soil Test Kit: To check pH and nutrient levels (optional but recommended)
- ● Watering Can or Hose: For applying liquid fertilizers
- ● Garden Gloves: To protect your hands from chemicals or rough soil
- ● Hand Trowel or Spade: For mixing fertilizer into soil or creating small holes
- ● Measuring Scoop or Cup: To ensure precise fertilizer amounts
- ○ Broadcast Spreader (optional): For even distribution of granular fertilizer
- ○ pH Adjusters (optional): Lime (to raise pH)
- ● Sulfur or peat moss (to lower pH)
- ○ Mulch (optional): Straw, wood chips, or leaves to retain moisture and nutrients
- ● Know your plants’ needs: Check labels or research specific nutrient requirements (e.g., nitrogen for leafy greens, phosphorus for blooms).
- ● Healthy soil: Loosen compacted soil and remove weeds before fertilizing.
- ● Timing: Fertilize in early spring (before blooming) or mid-summer (for a second boost). Avoid fertilizing in extreme heat or drought.
Instructions for fertilizing garden plants like a soil scientist
Here’s how I feed plants for maximum growth—without burning roots or wasting nutrients.
🌱 Step 1: Test Your Soil First
Before adding anything, grab a soil test kit to check pH and nutrient levels. Most garden centers sell them for under $20. I test every spring because soil changes yearly—rain, compost, and old fertilizer all alter what’s available. Aim for a pH between 6.0 and 7.0 for most vegetables and flowers; acid-loving plants like blueberries need 4.5-5.5.
If your soil is already rich in nitrogen (dark green color), hold off on heavy fertilizers. Overfeeding now leads to weak stems and disease. Instead, focus on phosphorus and potassium for root and flower development. A simple test saves money and prevents mistakes.
💧 Step 2: Choose the Right Fertilizer Type
Match your fertilizer to the plant’s growth stage. For new seedlings, use a low-nitrogen (5-10-10) starter fertilizer to encourage root development without overwhelming tender leaves. Mature plants need a balanced (10-10-10) or higher-phosphorus (10-20-10) formula for blooms and fruit. Slow-release granules work best for long-term feeding, while liquid fertilizers give an immediate boost.
I avoid synthetic fertilizers for organic gardens—they can disrupt soil microbes. Instead, I use composted manure (aged 6+ months) or fish emulsion for a nutrient-rich, soil-friendly feed. Always follow package rates; more isn’t better. Overfeeding causes leaf burn and nutrient runoff into waterways.
☀️ Step 3: Apply Fertilizer at the Right Time
Feed plants every 4-6 weeks during active growth (spring through summer). Avoid fertilizing in extreme heat (above 85°F) or drought conditions—plants can’t absorb nutrients when stressed. Water deeply 24 hours before applying fertilizer to help roots uptake what’s coming. This also prevents salt buildup in the soil, which can harm roots.
For vegetables, I side-dress with fertilizer mid-season when plants are 6-8 inches tall. Scratch a 1-inch trench near the base, add granules, and cover lightly with soil. For flowers and shrubs, spread granules evenly over the root zone and water in. Never apply directly to leaves—it causes chemical burns.
🌿 Step 4: Monitor and Adjust
Watch for signs of deficiency or excess. Yellow leaves often mean nitrogen deficiency, while brown leaf tips signal over-fertilization. If leaves curl or drop, flush the soil with 2-3 gallons of water to leach out excess salts. I keep a small notebook by the garden to track what I’ve applied and when—this helps me spot patterns over time.
Rotate fertilizer types seasonally. In early spring, I use a high-nitrogen (10-5-5) feed to kickstart growth. By late summer, I switch to a potassium-rich (5-5-10) formula to harden off plants for winter. Organic matter like mulch (2-3 inches) also feeds soil slowly, reducing the need for frequent fertilizing.
⏰ Step 5: Wind Down in Fall
Stop fertilizing 6-8 weeks before your first frost. Plants need time to absorb nutrients and prepare for dormancy. Instead, focus on adding compost (1-2 inches) and covering beds with mulch to protect roots and improve soil structure over winter. This builds a healthy foundation for next season’s growth.
I mark my calendar with the last fertilizing date each year—it’s easy to forget and overfeed in autumn. A well-fed garden in spring starts with smart fall prep. Think of it as a long-term investment, not a quick fix.
Tips & tricks for perfect plant fertilizing
These science-backed strategies will help you maximize growth while keeping your garden thriving without the guesswork.
Soil Testing Timing: The 24-hour window before fertilizing is crucial—this isn't just about hydration, it's about preparing your soil's microbial community. After watering deeply, let the soil settle for those full 24 hours. This gives beneficial microbes time to wake up and become active, making them ready to help your plants absorb nutrients more efficiently. Think of it as giving your soil's ecosystem a head start.
Heat Awareness: When temperatures climb above 85°F, your plants go into survival mode. They close their stomata (those tiny pores) to conserve water, which means they can't absorb nutrients from the soil—even if you're applying fertilizer. I've seen beautiful gardens ruined by fertilizing in heatwaves. If you must feed during hot weather, do it in the early morning or late evening when temps drop below 80°F.
Seasonal Rotation Strategy: That seasonal fertilizer rotation isn't just theory—it's about matching plant needs to their natural growth cycles. In early spring, when plants are breaking dormancy, they need that nitrogen push (10-5-5) to build leaves. By late summer, when they're preparing for winter, they crave potassium (5-5-10) for root strength. I keep a simple chart in my gardening journal to track these transitions year after year.
Visual Diagnosis: Those yellow leaves aren't just random—they're your plant's way of communicating. Bright yellow between veins usually means nitrogen deficiency, while yellowing with green veins signals phosphorus issues. Brown leaf tips? That's classic over-fertilization. I've learned to carry a small notebook to the garden to jot down these clues—it's like having a plant whisperer in your pocket. The key is acting quickly once you recognize the pattern.
Pro Tips for Fertilizing Garden Plants
- These science-backed strategies will help you maximize growth while keeping your garden thriving without the guesswork.
- Soil Testing Timing: The 24-hour window before fertilizing is crucial—this isn't just about hydration, it's about preparing your soil's microbial community.
- Heat Awareness: When temperatures climb above 85°F, your plants go into survival mode.
Frequently asked questions
Got questions about fertilizing your garden? You’re not alone!
Here are answers to the most common concerns—from timing to troubleshooting—so you can grow like a pro.
When is the best time to fertilize garden plants?
The ideal time depends on your plants! For most annuals and vegetables, fertilize early in the growing season (spring) and again mid-season (every 4–6 weeks). Perennials and shrubs benefit from a slow-release fertilizer in early spring or fall. Always check your plant’s specific needs—some, like tomatoes, are heavy feeders and may need more frequent boosts.
How do I know if my plants need fertilizer?
Watch for these signs: slow growth, yellowing leaves (especially older ones), or small, pale flowers. A simple soil test (available at garden centers) can reveal nutrient deficiencies. If your plants look healthy but stagnant, a light feeding with organic fertilizer can help. Over-fertilizing can harm roots, so less is often more!
Can I use coffee grounds or eggshells as fertilizer?
Coffee grounds add nitrogen (great for leafy greens) and improve soil texture, while crushed eggshells provide calcium (ideal for preventing blossom-end rot in tomatoes). Just use them sparingly—too much coffee grounds can acidify soil, and eggshells take months to break down. Mix them into compost or topsoil for best results.
What do I do if my plants burn after fertilizing?
Fertilizer burn happens when salts or nutrients overwhelm roots. If you spot brown leaf edges or crispy tips, flush the soil with water immediately and avoid fertilizing for 2–4 weeks. To prevent burns, always follow label instructions, water soil before applying fertilizer, and choose slow-release or organic options for sensitive plants.
Are synthetic fertilizers better than organic ones?
It depends! Synthetic fertilizers deliver fast, precise nutrients (great for quick fixes) but can harm soil long-term. Organic fertilizers (like compost or manure) improve soil health gradually and support beneficial microbes. For most gardeners, a balanced approach works best—use organic fertilizers for soil health and synthetics for nutrient spikes when needed.
How often should I fertilize container plants vs. in-ground plants?
| Container Plants | In-Ground Plants |
|---|---|
| Every 2–4 weeks (nutrients leach out faster). | Every 4–6 weeks (soil retains nutrients longer). |
| Use water-soluble fertilizers for convenience. | Opt for slow-release or organic to avoid runoff. |
Pro tip: Container plants dry out quicker, so always water before fertilizing to protect roots!
Wrapping up and next steps
Fertilizing your garden isn’t just about feeding plants—it’s about unlocking their full potential with a little soil science magic. 🌱 Whether you’re a seasoned green thumb or just starting, the right nutrients, timing, and techniques will reward you with vibrant blooms, bountiful harvests, and year-round lushness.
Now that you’ve got the secrets, it’s time to roll up your sleeves and watch your garden thrive!
Your next step? Pick one plant or area to experiment with—try a new fertilizer blend, adjust your schedule, or even DIY a compost tea. Small changes lead to big results, so start today and enjoy the journey of growing something extraordinary!