How To
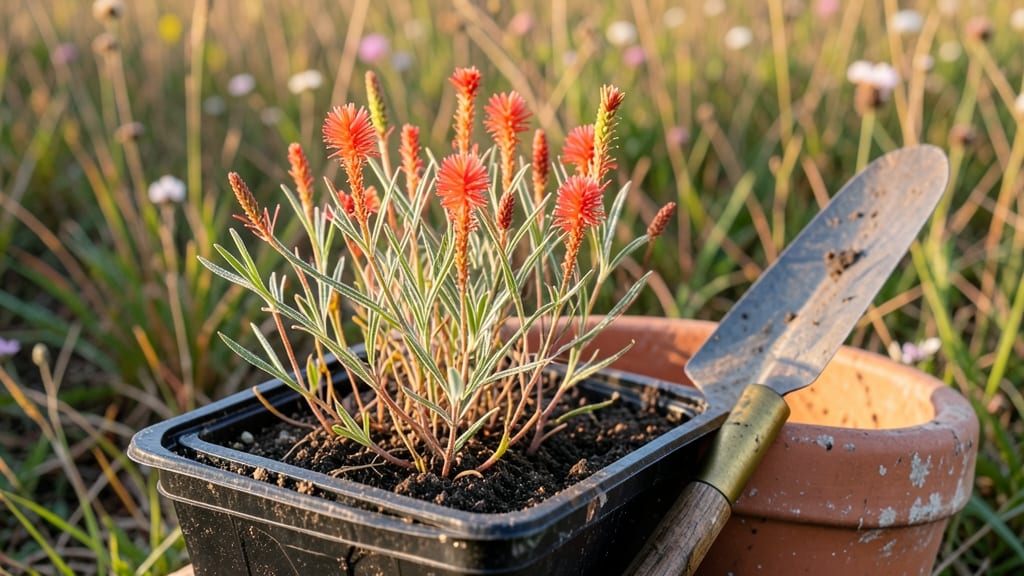
Planting Indian paintbrush transforms any sunny patch into a vibrant wildflower meadow. ✨ I’ve watched these striking red-orange blooms pop up effortlessly in my prairie garden, and the secret isn’t complicated—just mimic their native habitat.
The key is loose, well-draining soil and full sun, but don’t worry if you’re new to wildflower gardening. These plants are tougher than they look, and once established, they’ll spread like nature intended.
You’ll need just three things: a sunny spot with at least 6 hours of sunlight daily, a mix of native soil and coarse sand for drainage, and either seeds or young transplants.
Indian paintbrush thrives from seeds, but they’re tiny—think 1/8-inch—so scattering them lightly over prepared soil works best. For faster results, transplants are an option, though they’re harder to find. The real magic happens when you let them naturalize, turning bare ground into a colorful tapestry by next summer.
Expect the first blooms in 6-12 months if starting from seed, but don’t rush it—patience pays off. The plants will reward you with 3-6 inch spikes of tubular flowers that hummingbirds adore, and they’ll return year after year with minimal care.
The only trick is keeping them moist during the first growing season, then letting them fend for themselves. By fall, your meadow will feel like a piece of the American prairie right in your backyard.
Works best in USDA zones 3-9, but adaptable to rocky or sandy soils once established. Perfect for pollinator gardens, native landscapes, or even container edges. Let’s get those seeds in the ground!
📚 In This Guide
- What you need
- Instructions
- Tips and common mistakes
- Wrapping up and next steps
What you need
- ● Indian Paintbrush seeds: 1–2 oz (about 100–200 seeds) per 100 sq. ft. (Choose native varieties like Castilleja indivisa or Castilleja linariaefolia for best results.)
- ● Well-draining soil: Sandy loam or rocky soil (mimics natural prairie conditions). Avoid heavy clay.
- ● Sunlight: Full sun (6+ hours daily) in a dry, open area.
- ● Water source: Drip irrigation or a gentle hose (avoid overwatering—this plant thrives in drought!).
- ○ Optional companion plants: Grasses like Schizachyrium scoparium (Little Bluestem) or other native wildflowers (e.g., Lupinus or Ratibida) to create a balanced meadow.
- ● Garden rake: For loosening soil and creating shallow furrows (¼ inch deep).
- ● Gloves: To protect hands while handling seeds or rough soil.
- ○ Seed spreader (optional): For even distribution over large areas.
- ○ Mulch (optional): Straw or pine needles (1 inch thick) to retain moisture during germination.
- ● Label markers: To track planting dates and varieties.
- ● 🌡️ Timing: Plant in early spring or fall (avoid summer heat). Seeds need consistent moisture to germinate.
- ● 🎯 Soil Prep: Mix in compost or sand if your soil is too dense. Indian Paintbrush hates soggy roots!
- ● ✨ Patience: Germination can take 2–4 weeks. Thin seedlings to 6–12 inches apart once they sprout.
Step-by-Step guide to planting Indian paintbrush for stunning wildflower meadows
Here's how to coax these vibrant wildflowers into thriving meadows with minimal fuss.
🌱 Step 1: Prepare the Site for Optimal Growth Conditions
Indian paintbrush thrives in full sun with well-draining soil—this isn't a plant that tolerates soggy roots. Choose a site with at least 6 hours of direct sunlight daily. If your soil is heavy clay, mix in 2-3 inches of coarse sand or grit to improve drainage before planting.
Clear the area of weeds and grass, then loosen the top 6 inches of soil with a garden fork. The goal is to create a fluffy, aerated surface that roots can easily penetrate. I like to rake the area smooth afterward—this helps prevent erosion and gives seeds a clean, even surface to contact.
Here's the thing—Indian paintbrush often grows in disturbed areas, so don't overwork the soil. Just break up compaction without turning it into a tilled garden bed. You'll see the best results when the soil feels like a well-worn hiking trail—firm but not rock-hard.
🌿 Step 2: Plant Seeds at the Right Depth and Spacing
Sow seeds 1/8 inch deep—they're tiny, so I use a seed spreader or gently press them into the soil with my thumb. Planting too deep delays germination because the seedling must push through more soil to reach light. Space seeds 6-12 inches apart for a natural meadow look, or 3-4 inches apart if you want a denser display.
Lightly cover the seeds with a thin layer of soil or fine mulch. I like to use the 1/4 inch of compost I've pre-mixed with the topsoil—this adds nutrients without burying the seeds too deeply. Water gently with a fine mist until the soil feels uniformly moist but not saturated.
Don't worry if you can't see the seeds—they're that small. Just focus on keeping the soil consistently moist until germination. You'll see the first green shoots in 2-4 weeks, though some seeds may take longer, especially in cooler weather.
☀️ Step 3: Maintain Water and Light for First-Year Establishment
Keep the planting area consistently moist for the first 6-8 weeks—this is critical for young seedlings. Water deeply 2-3 times per week until the top 2 inches of soil feel damp. After the first year, Indian paintbrush becomes drought-tolerant once established, but seedlings need reliable moisture.
Once the plants reach 3-4 inches tall, reduce watering to once per week unless your area experiences extreme heat or drought. The key is to let the soil dry slightly between waterings—this encourages deeper root growth and prevents fungal issues.
Here's where it gets fun—watch for the distinctive paintbrush-like blooms in the second year. The flowers appear on the year-old growth, so patience pays off. If you're planting multiple varieties, space them 12-18 inches apart to create a vibrant, layered meadow effect.
Real talk: Indian paintbrush often self-seeds prolifically, so you might see new volunteers popping up in subsequent years. Embrace the wildflower magic—this is how these plants naturally spread in their native prairie habitats.
Tips & tricks for perfect Indian paintbrush planting
Creating a stunning wildflower meadow with Indian paintbrush is easier than you think—these game-changing tips will ensure your vibrant blooms thrive from the first planting. Let's dive into what nobody tells you about growing these striking wildflowers!
Soil Preparation Secret: The 6 hours of sunlight mentioned in Step 1 is non-negotiable—Indian paintbrush absolutely refuses to perform well in shade. But here's what I learned the hard way: if your soil is even slightly compacted, those tiny seeds will struggle to break through. After loosening the top 6 inches, I like to add a thin layer (1/4 inch) of coarse sand mixed with my compost. This creates the perfect balance of drainage and nutrients right where the roots need it most. Think of it like giving your seeds a head start in their race to the surface!
Seed Planting Precision: Those 1/8 inch deep seeds in Step 2 are microscopic—so small that even a gentle press with your thumb can bury them too deeply. Here's my trick: I mix the seeds with a little dry sand first, then sprinkle the mixture evenly over the prepared soil. This ensures even distribution without worrying about individual seed placement. After covering lightly, I use a spray bottle to mist until the soil feels like a damp sponge. The key is keeping that moisture consistent until germination—no soggy soil, just consistently damp!
Watering Wisdom: The critical 6-8 week watering window in Step 3 is where most people go wrong. I've seen beautiful meadows fail because gardeners either overwater (leading to rot) or underwater (causing seeds to dry out). My solution? Install a simple drip irrigation system on a timer for 10-15 minutes, 2-3 times per week. This delivers exactly the right amount of moisture without the guesswork. And here's the bonus: once your seedlings hit that 3-4 inch mark, you can reduce to weekly watering—nature takes over from there!
Patience Pays Off: That second-year bloom promise in Step 3 is real, but it requires trusting the process. I've seen gardeners dig up their plants too soon looking for results, only to miss the entire flowering cycle. Mark your calendar! The flowers emerge on last year's growth, so if you planted in spring, you'll see those iconic paintbrush shapes in late spring or early summer of the following year. This is where the magic happens—those vibrant red and orange blooms will transform your landscape into a prairie paradise.
Pro Tips for Planting Indian Paintbrush
- Creating a stunning wildflower meadow with Indian paintbrush is easier than you think—these game-changing tips will ensure your vibrant blooms thrive from the first planting.
- Soil Preparation Secret: The 6 hours of sunlight mentioned in Step 1 is non-negotiable—Indian paintbrush absolutely refuses to perform well in shade.
- Seed Planting Precision: Those 1/8 inch deep seeds in Step 2 are microscopic—so small that even a gentle press with your thumb can bury them too deeply.
Frequently asked questions
Got questions about planting Indian paintbrush? You’re not alone! Here are answers to the most common queries to help you grow a vibrant wildflower meadow with confidence.
When is the best time to plant Indian paintbrush?
Plant seeds in early spring (March–April) or late summer (August–September) for the best results. Avoid late fall planting—seeds may not establish before winter. If starting from transplants, spring is ideal.
How long does it take for Indian paintbrush to bloom?
With patience, you’ll see blooms in 1–2 years from seed. First-year plants focus on root growth, while second-year seedlings often produce stunning red-orange flowers by late spring or summer.
Can Indian paintbrush grow in shade?
While it thrives in full sun, Indian paintbrush tolerates partial shade (4–6 hours of sunlight daily). In deep shade, blooms may be sparse, but foliage stays lush. Pair it with shade-tolerant wildflowers like columbine for a mixed meadow.
Do I need to deadhead Indian paintbrush?
No deadheading is required! Let spent blooms stay—they provide winter interest and seed for pollinators. However, if you want to encourage more flowers, you can trim back faded stems in early summer.
What if my Indian paintbrush isn’t blooming?
Check these fixes:
- Ensure it gets at least 6 hours of sun daily.
- Verify soil is well-draining (amend with sand if clay-heavy).
- Be patient—first-year plants often skip blooming.
- Fertilizer isn’t needed (it thrives in poor soil).
Wrapping up and next steps
Planting Indian Paintbrush is your ticket to a vibrant, low-maintenance meadow that supports pollinators and adds wild beauty to your space! 🌸 With just a few simple steps—choosing the right seeds, preparing the soil, and nurturing your garden—you’ll create a thriving ecosystem that blooms year after year. Now’s the perfect time to roll up your sleeves and turn your yard into a living masterpiece!
Ready to dive in? Start small—pick a sunny patch, gather your supplies, and plant your first batch of Indian Paintbrush seeds this weekend. Before you know it, your meadow will be buzzing with bees, butterflies, and the joy of nature’s artistry! 🌿