Container Gardens
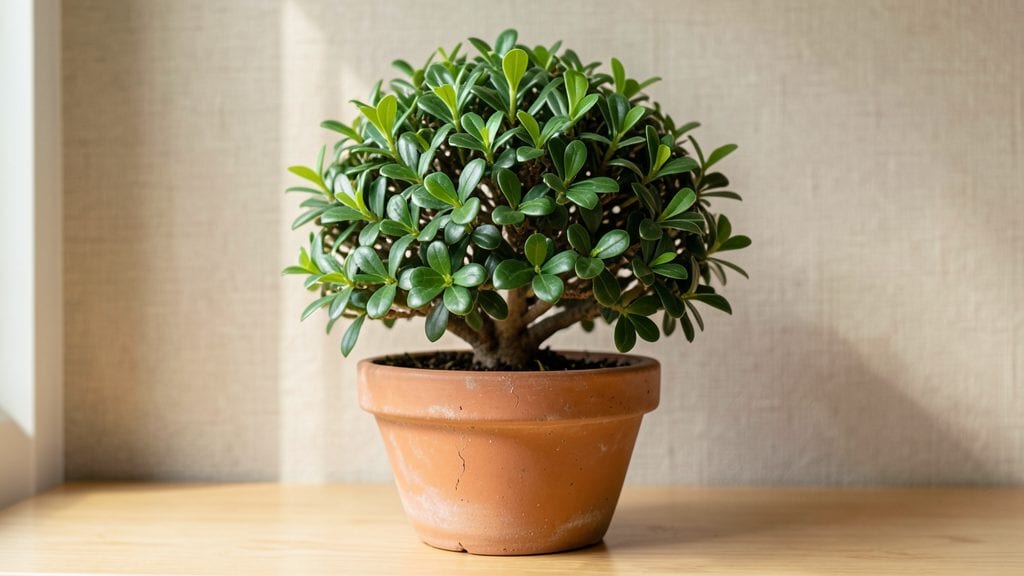
Growing boxwood indoors brings that polished, evergreen elegance into your home—without the fuss of high-maintenance plants. 🌿 I’ve kept mine thriving for years with just a few key adjustments, and the secret isn’t complicated: it’s about mimicking what boxwood naturally craves in a controlled environment.
The right light, water routine, and occasional trim keep those glossy leaves vibrant all winter long.
You’ll need a 5-10 gallon container with drainage, well-draining potting mix, and a spot near a bright window (south or west-facing is ideal). Water only when the top inch of soil feels dry—overwatering is the fastest way to kill these tough plants.
A light pruning every few months keeps them compact and bushy, and the results? A plant that looks like it belongs in a formal garden, not just your living room.
By summer’s end, your boxwood will be dense and lush, with no yellowing leaves or leggy growth if you stick to the routine. The best part? It stays green when other houseplants struggle, adding year-round structure to any space.
Once you get the hang of it, you’ll wonder why you ever bought anything else.
Works for apartments, offices, or sunrooms—just adjust light with grow bulbs if natural light is limited. Let’s get yours growing strong!
📚 In This Guide
- What you need
- Instructions
- Tips and common mistakes
- Wrapping up and next steps
What you need
- ● Boxwood plant: 1 healthy boxwood cutting (4–6 inches long) or
- ● 1 boxwood seedling (from a nursery)
- ● Container: 1 well-draining pot (10–12 inches in diameter for mature plants, 4–6 inches for seedlings)
- ○ Optional: Decorative cachepot (for aesthetic appeal)
- ● Potting mix: 1 bag (5–10 quarts) of well-draining, slightly acidic soil (pH 6.0–7.0)
- ● Mix: 60% peat moss or coco coir + 30% perlite/pumice + 10% sand
- ● Tools: 1 pair of clean pruning shears (for cuttings)
- ● 1 trowel or small shovel (for repotting)
- ● 1 spray bottle (for misting)
- ○ 1 moisture meter (optional but helpful)
- ● Rooting hormone (to boost cutting success)
- ● Slow-release fertilizer (for established plants)
- ● Mulch (orchid bark or pine needles for moisture retention)
- ● Grow lights (if natural light is limited)
- ● Humidity tray (to maintain 40–60% humidity for seedlings)
Step-by-Step instructions for cultivating boxwood indoors
Here's how to transform boxwood into a thriving, year-round indoor statement piece.
🌱 Step 1: Select and Acclimate Your Boxwood Plant
Choose a healthy boxwood with compact, glossy leaves and no visible pests. I always inspect the undersides of leaves and the soil surface for signs of spider mites or scale before bringing it inside. Boxwood thrives indoors when properly acclimated—start by placing it in a shaded outdoor spot for 3-5 days before moving it to your home.
This gradual transition prevents shock from temperature swings. Watch for wilting leaves or yellowing edges—they signal stress. Once indoors, position it near a bright window where it will receive 4-6 hours of indirect sunlight daily. East-facing windows provide ideal gentle morning light without harsh afternoon sun.
🪴 Step 2: Prepare the Right Container and Soil Mix
Boxwood prefers well-draining soil to prevent root rot. Use a 6-8 inch diameter pot with drainage holes—terra cotta is ideal because it breathes and helps regulate moisture. I repot my boxwood every 2-3 years using a mix of 50% potting soil, 30% perlite, and 20% compost to ensure aeration and nutrients.
Fill the pot to 1 inch below the rim with your prepared mix, then gently remove the boxwood from its nursery container. Loosen the root ball slightly if it appears compacted, then place it in the center of the new pot. The top of the root ball should sit ½ inch below the pot's rim—this allows for watering without overflow.
💧 Step 3: Establish a Consistent Watering Routine
Boxwood dislikes soggy soil but also can't tolerate drying out completely. Water when the top inch of soil feels dry to the touch, usually every 7-10 days in winter and 5-7 days in summer. I use room-temperature water and pour it slowly until it drains freely from the bottom—discard any excess in the saucer to prevent root rot.
Mist the leaves lightly once a week to maintain humidity, especially in dry indoor environments. You'll notice the leaves darken slightly after misting—that's normal and indicates proper moisture balance. Avoid wetting the foliage excessively, as this can promote fungal issues like powdery mildew.
☀️ Step 4: Maintain Ideal Light and Temperature Conditions
Boxwood grows best in 65-75°F temperatures and thrives under bright, indirect light. If you notice new growth stretching toward the window or leaves losing their glossy sheen, it's time to supplement with a grow light for 12-14 hours daily. I position mine 12-18 inches away to avoid leaf burn.
Rotate the plant a quarter turn weekly to ensure even growth. Boxwood responds beautifully to pruning—trim back leggy stems in early spring to encourage bushier, fuller growth. Always use clean, sharp pruners to make cuts just above a leaf node for the healthiest regrowth.
✂️ Step 5: Prune and Fertilize for Long-Term Health
Prune your boxwood lightly in late winter or early spring to shape it and remove any dead or damaged branches. I cut just above a set of leaves to encourage new growth from that point. For indoor plants, I fertilize every 6-8 weeks during the growing season (spring and summer) using a balanced, water-soluble fertilizer diluted to half-strength.
Reduce watering and fertilizing in fall and winter when growth naturally slows. You'll see a noticeable difference in leaf vigor after a few months of consistent care—healthier foliage, slower leaf drop, and a more compact shape. This is your reward for staying attentive to its needs.
Tips & tricks for perfect boxwood indoor plant care
Mastering boxwood care indoors means paying attention to subtle details that make all the difference between a struggling plant and a lush, vibrant centerpiece.
Acclimation is Key: That 3-5 day outdoor transition in Step 1 isn't just about gradual temperature adjustment—it's about letting the plant adjust to the light intensity indoors. I've seen boxwoods go into shock when moved directly inside, showing stress through yellowing leaves within days. Place it in a shaded outdoor spot where light conditions most closely resemble your indoor location. If you're moving it from a bright southern exposure to a north-facing window, extend the outdoor acclimation to 5-7 days to prevent leaf burn from sudden light changes.
Soil Mix Secrets: The 50-30-20 soil ratio in Step 2 works wonders because it balances moisture retention with aeration. For an extra boost, I add a handful of orchid bark to the mix—it improves drainage while adding organic matter that breaks down slowly. When repotting every 2-3 years, gently tease apart the root ball if you notice roots growing in tight circles around the perimeter. This encourages outward growth rather than root-bound stress. The ½ inch gap below the pot rim is crucial—it prevents water from pooling at the base where roots can't access oxygen.
Watering Wisdom: The top inch dry test in Step 3 is your best friend, but timing matters just as much as technique. In winter, when indoor air is dry from heating systems, check moisture every 5-7 days regardless of the calendar—boxwoods can dry out faster than you'd expect. For a visual cue, I press my finger about an inch deep: if the soil feels like a slightly damp sponge, it's ready for water. When misting leaves weekly, use a spray bottle with a fine mist setting to avoid creating droplets that can lead to fungal issues. The slight darkening after misting is actually a good sign—it means the leaves are absorbing moisture through their surfaces.
Light and Temperature Troubleshooting: That 65-75°F range in Step 4 is optimal, but every home has hot spots and cold corners. If your boxwood develops brown leaf tips despite proper watering, it's often a sign of low humidity or fluoride buildup from tap water. Place the pot on a tray filled with pebbles and water (keeping the pot rim above the water line) to increase humidity around the plant. For grow lights mentioned in Step 4, LED grow bulbs are more energy-efficient than traditional fluorescent tubes and produce less heat. Position them 12-18 inches away—any closer and you risk leaf burn from concentrated light.
Pro Tips for Boxwood Indoor Plant
- Mastering boxwood care indoors means paying attention to subtle details that make all the difference between a struggling plant and a lush, vibrant centerpiece.
- Acclimation is Key: That 3-5 day outdoor transition in Step 1 isn't just about gradual temperature adjustment—it's about letting the plant adjust to the light intensity indoors.
- Soil Mix Secrets: The 50-30-20 soil ratio in Step 2 works wonders because it balances moisture retention with aeration.
Frequently asked questions
Got questions about keeping your boxwood indoor plant thriving? Here are some of the most common ones—plus quick answers to help you grow with confidence!
How often should I water my boxwood indoors?
Water your boxwood when the top 1–2 inches of soil feel dry to the touch. Aim for moderate moisture—avoid soggy soil (which causes root rot) or letting it dry out completely. In winter, water 20–30% less since growth slows. Pro tip: Use a moisture meter for precision!
What’s the ideal temperature and humidity for indoor boxwoods?
Boxwoods love 60–75°F and thrive in moderate humidity (40–60%). If your home is dry (common with HVAC), place the pot on a pebble tray or use a humidifier nearby. Avoid drafts or sudden temperature swings—below 50°F can stress the plant.
How do I prune my boxwood to keep it shaped?
Prune after flowering (late spring/early summer) to encourage bushiness. Use clean, sharp shears to trim back 1/3 of the new growth at a 45° angle. For formal shapes, prune lightly every 4–6 weeks during the growing season. Never prune into old wood—it won’t regrow!
What pests should I watch for, and how do I treat them?
Common pests include spider mites, aphids, and scale. Check undersides of leaves weekly! Treat mild infestations with neem oil or insecticidal soap. For severe cases, isolate the plant and repeat treatment every 5–7 days. Prevent pests by wiping leaves with a damp cloth and avoiding over-fertilizing.
Can I grow boxwood indoors year-round, or does it need outdoor time?
Boxwoods can thrive indoors year-round if given bright, indirect light (east/west-facing windows are ideal). However, they’ll grow slower indoors due to limited space. If possible, move it outdoors in spring/summer for 4–6 hours of sunlight to boost health. Harden it off gradually to avoid shock!
What are some low-maintenance alternatives to boxwood for indoors?
If boxwood seems too finicky, try these easy-care indoor evergreens:
- Dwarf English Ivy – Thrives in low light, pet-friendly.
- Schefflera – Tolerates neglect, great for beginners.
- Dracaena – Air-purifying and drought-resistant.
- Parlor Palm – Loves humidity, perfect for bathrooms.
Wrapping up and next steps
Bringing a boxwood indoor plant into your home is a fantastic way to enjoy year-round greenery with minimal fuss! 🌿 With its low-maintenance care, adaptability, and striking appearance, it’s the perfect choice for both beginners and seasoned plant parents.
Whether you’re pruning for shape or simply keeping it thriving, this resilient plant will reward you with lush, vibrant foliage for seasons to come.
Ready to elevate your space? Start by selecting your favorite variety, gathering your supplies, and giving your boxwood the love it deserves. Happy planting! 🌱