Picking
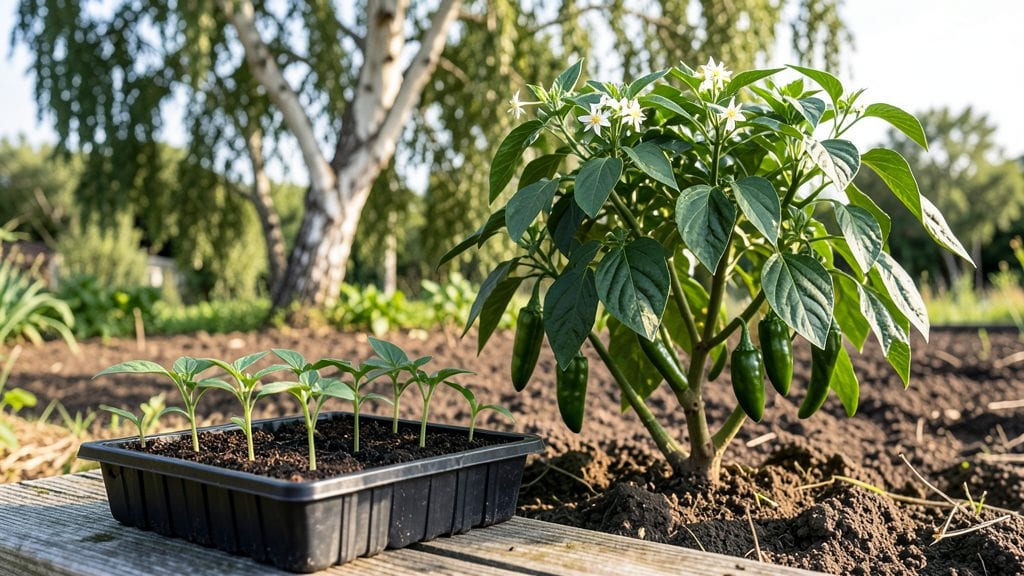
Tabasco peppers turn a sunny corner of your garden into a fiery harvest factory—90 days of waiting for those signature red pods is worth every minute. 🌱 I planted my first batch last spring and went from skeptical to obsessed after the first harvest, which I used to make my own homemade hot sauce.
The secret isn’t just the seeds; it’s the soil warmth, consistent moisture, and that perfect balance of sun and patience.
Start with seeds or seedlings, but if you’re buying plants, check for sturdy stems and no signs of yellowing—those are red flags. Your soil should drain well (Tabasco peppers hate soggy roots) and be amended with compost for that extra kick of nutrients.
Spacing matters too: give each plant 18-24 inches of room to stretch out, or they’ll crowd and produce fewer peppers.
Plant them 1/4 inch deep in well-warmed soil after your last frost date, and keep them in a spot where they’ll get full sun for at least 8 hours a day.
Watering is where most gardeners trip up—Tabasco peppers need 1-1.5 inches of water per week, but they’ll wilt faster than you think if the soil dries out.
Mulch helps keep moisture steady, and a light hand with fertilizer (too much nitrogen = leafy monsters, not peppers) keeps the focus on fruit.
By day 60, you’ll start seeing those first tiny peppers forming, and if you’re lucky, you might even get a few to ripen by late summer—though most gardeners save the best for next year’s harvest.
Here’s the thing about Tabasco peppers: they’re stubborn little plants, but once they take hold, they’ll reward you with hundreds of peppers if you nail the basics. Avoid overwatering, watch for pests like aphids (neem oil is your friend), and don’t rush—these aren’t tomatoes.
With the right care, you’ll be drying peppers by late summer, ready to bottle your own homemade Tabasco. Now, let’s get those seeds in the ground!
📚 In This Guide
- What you need
- Instructions
- Tips and common mistakes
- Wrapping up and next steps
What you need
- ● Tabasco pepper seeds – 10–20 seeds (or 3–5 plants if buying seedlings). Look for Capsicum frutescens varieties like "Tabasco" or "Aguacate."
- ● Well-draining potting mix – 5–10 gallons, enriched with compost (60% soil, 30% compost, 10% perlite).
- ● Containers or garden bed – Containers: 5–7 gallon pots (1–2 plants per container) with drainage holes.
- ● Garden bed: Full sun (6+ hours/day), loose, sandy loam soil (pH 6.0–7.0).
- ● Fertilizer – Balanced 10-10-10 or organic options like fish emulsion (apply every 4–6 weeks).
- ● Watering can or hose with gentle spray nozzle – Keep soil consistently moist (not soggy!).
- ● Trowel or small shovel – For transplanting seedlings.
- ● Pruning shears – To trim leggy stems or remove damaged leaves.
- ○ Spray bottle (optional) – For misting seedlings during germination.
- ○ Grow lights (optional) – If starting indoors before the last frost (LED or fluorescent, 12–16 hours/day).
- ● Warmth – Tabasco peppers thrive in 75–90°F (24–32°C). Wait until after the last frost or use a greenhouse.
- ● Patience – Germination takes 10–20 days; harvests arrive in 90+ days!
- ● Sunshine – No shortcuts here: 6+ hours of direct sunlight daily is non-negotiable.
Step-by-step instructions for planting Tabasco peppers
Here's my foolproof method for growing fiery Tabasco peppers from seed to harvest.
🌱 Step 1: Start Seeds Indoors 8-10 Weeks Before Last Frost
Fill 2-inch deep seedling trays with a sterile seed-starting mix (I use 1 packet of Tabasco pepper seeds for this method). Press the mix down lightly so it's firm but not packed—this helps roots establish quickly. Plant seeds 1/4 inch deep, spacing them 1 inch apart in each cell. Cover lightly with additional mix and mist gently until evenly moist.
Place the tray in a warm spot with a seedling heat mat set to 75-80°F. Tabasco seeds germinate best in warmth, and you'll see sprouts in 10-14 days. Keep the soil consistently moist but never soggy—damping-off disease will wipe out seedlings overnight if humidity stays too high.
☀️ Step 2: Provide Bright Light and Transplant After True Leaves Form
Once seedlings emerge, move them under grow lights or a south-facing window for 14-16 hours of light daily. Tabasco peppers need strong light to prevent leggy growth. I use a full-spectrum LED bulb positioned 2-3 inches above the plants and raise it as they grow. You'll know the light is right when seedlings have thick stems and dark green leaves spaced closely together.
After 4-6 weeks and when seedlings have 3-4 true leaves, transplant them into 4-inch pots filled with potting mix. Handle seedlings by their leaves to avoid damaging stems. Water deeply after transplanting to help roots establish in their new home.
🪴 Step 3: Harden Off and Plant Outdoors After All Frost Risk Passes
Two weeks before your last frost date, start hardening off seedlings by placing them outside in a sheltered spot for 1-2 hours the first day. Gradually increase their outdoor time over 10-14 days, ending with a full day in the sun. This toughens them up for the garden. Tabasco peppers thrive in full sun and warm soil temperatures above 65°F.
Plant seedlings 18-24 inches apart in a location with 6+ hours of direct sun daily. Dig a hole twice as wide as the root ball and mix in 1 tablespoon of balanced fertilizer (like 10-10-10) into the soil. Place the seedling in, firm the soil around it, and water deeply. Mulch with 1 inch of organic mulch to retain moisture and keep roots cool.
💧 Step 4: Water Deeply and Fertilize for Maximum Heat
Water Tabasco peppers at the base 1 inch per week, letting the soil dry slightly between waterings. You'll know it's time to water when the top inch of soil feels dry to the touch. Avoid wetting leaves to prevent disease. I water in the morning so foliage dries quickly—this keeps plants healthy and productive.
Feed plants every 4-6 weeks with 1 tablespoon of balanced fertilizer mixed into the soil or dissolved in water. Tabasco peppers are heavy feeders, and you'll see more peppers form when they get consistent nutrients. Stop fertilizing 4-6 weeks before harvest to let flavors concentrate.
✂️ Step 5: Prune and Harvest for Continuous Production
Prune plants by pinching off the first few flowers that appear. This encourages bushier growth and more peppers later in the season. Remove any suckers that form in the leaf axils—these drain energy from fruit production. You'll know when to harvest when peppers turn bright red and reach 2-3 inches long. Pick them regularly to encourage more production.
Harvest in the morning when peppers are crisp and flavors are strongest. Use clean scissors or pruners to snip stems, leaving a small portion attached to the plant. Store peppers in a cool, dark place for up to 2 weeks or process them into sauces, pickles, or hot peppers. With proper care, you'll get a continuous harvest until the first frost.
Tips & tricks for perfect Tabasco pepper planting
These little tricks will help you grow peppers that pack serious heat and flavor—without the common pitfalls that trip up even experienced gardeners.
The Heat Factor: Tabasco seeds need that 75-80°F warmth to germinate properly, but don't let the soil stay soggy! I use a heat mat set to 80°F and only mist until the mix feels like a damp sponge—not dripping wet. The 10-14 days wait for sprouts can feel long, but patience here prevents damping-off disease that wipes out seedlings overnight. Trust me on this—dry soil is better than too-wet soil for these heat lovers.
Lighting Secret: Those 14-16 hours of light daily are non-negotiable for preventing leggy seedlings. I've tried moving plants to sunny windowsills, but natural light fades fast in cloudy weather. If you don't have grow lights, position your plants within 2-3 inches of a full-spectrum LED bulb—closer than you think! Watch for thick stems and dark green leaves spaced closely together; that's your sign the light is perfect.
Transplanting Wisdom: When you transplant those 4-6 week old seedlings into 4-inch pots, handle them by their leaves—not the stems! I learned this the hard way after ruining three batches by gripping stems and snapping them. After transplanting, give them a deep watering to help roots establish in their new home. This step makes all the difference between weak plants and thriving peppers.
Soil Temperature Check: Tabasco peppers won't thrive in cold soil—plant them only when soil temperatures rise above 65°F. I test this by placing a thermometer in the ground in the morning; if it's consistently above 65°F, it's time to plant. The 18-24 inch spacing gives roots room to spread, and that 1 inch of organic mulch keeps moisture steady while preventing soil-borne diseases from splashing onto leaves.
Pro Tips for Planting Tabasco Peppers
- These little tricks will help you grow peppers that pack serious heat and flavor—without the common pitfalls that trip up even experienced gardeners.
- The Heat Factor: Tabasco seeds need that 75-80°F warmth to germinate properly, but don't let the soil stay soggy!
- Lighting Secret: Those 14-16 hours of light daily are non-negotiable for preventing leggy seedlings.
Frequently asked questions
Got questions about growing your own fiery Tabasco peppers? You’re not alone! Here are answers to the most common queries from gardeners just like you.
When is the best time to plant Tabasco peppers?
Start seeds indoors 8–10 weeks before your last frost date (around March in most zones). Transplant seedlings outdoors after soil warms to 60°F+—usually mid-to-late spring. Tabascos thrive in long, hot summers, so avoid early planting. For cooler climates, use black plastic mulch to retain heat!
How long does it take for Tabasco peppers to mature?
Expect a 90–120-day harvest from seed to ripe pepper. If you’re growing from transplants, maturity drops to 60–80 days. Patience pays off—peppers start small and green but turn bright red or yellow when fully ripe and packed with heat!
What if my Tabasco plants struggle in hot weather?
Tabascos love heat but can bolt (flower too early) if stressed. To prevent this:
- Keep soil consistently moist (not soggy).
- Use shade cloth (30–50%) during extreme heat (above 90°F).
- Prune lower leaves to improve airflow and reduce humidity-related diseases.
Can I grow Tabasco peppers in containers?
Tabascos are compact plants (2–3 feet tall) and thrive in 5-gallon pots or larger. Use a well-draining potting mix with added compost. Place containers in full sun (6+ hours/day) and fertilize every 2–3 weeks with a balanced liquid fertilizer. Just ensure pots have drainage holes!
Why aren’t my Tabasco peppers spicy?
Spice levels depend on ripeness, genetics, and care. For maximum heat:
- Harvest peppers fully ripe (red/yellow)—green peppers are milder.
- Avoid over-fertilizing with high-nitrogen (focus on phosphorus/potassium).
- Stress (like light drought) can boost capsaicin, but don’t overdo it!
Wrapping up and next steps
Growing your own Tabasco peppers is a rewarding adventure that brings bold flavors and fiery satisfaction to your kitchen! 🌶️ With the right soil, sunlight, and patience, you’ll enjoy a bountiful harvest in just 90 days.
Whether you’re a seasoned gardener or a beginner, these spicy gems are well worth the effort—so grab those seeds and get planting!
Ready to take the next step? Start small—try a few plants in pots or a dedicated garden bed—and experiment with growing conditions. Before you know it, you’ll be canning, drying, or cooking with your homegrown Tabasco peppers like a pro. Happy gardening! 🌱