Pruning
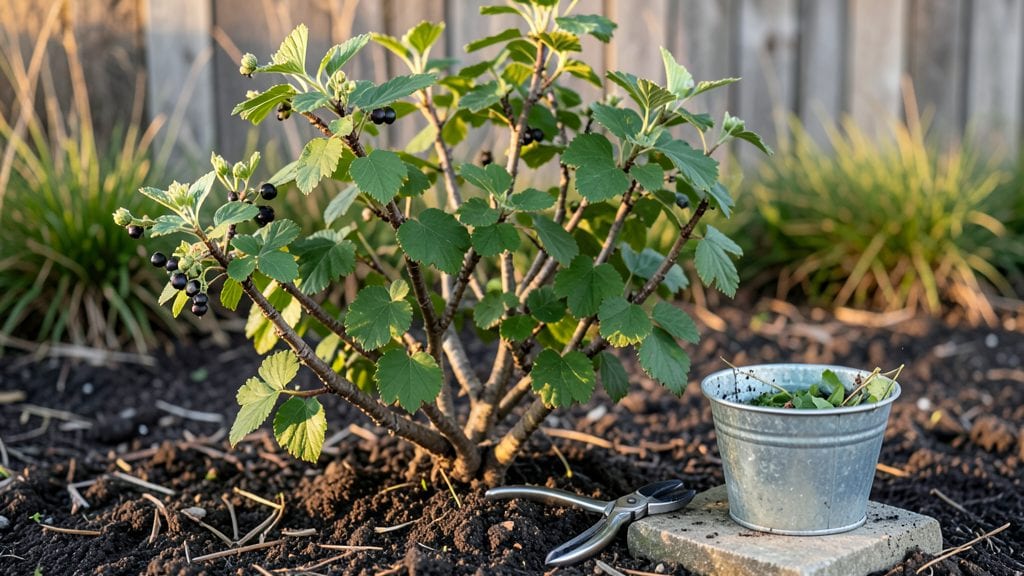
Pruning blackcurrant plants transforms a tangle of branches into a productive, disease-resistant shrub that bears fruit year after year.
I learned the hard way—my first attempt left the plant looking like a bird’s nest, but after mastering these three strategic cuts, my bushes now produce buckets of tart berries every summer.
The secret isn’t just when to cut, but how—angle matters just as much as timing, and I’ll show you the exact technique that keeps my plants thriving.
You’ll need sharp pruners, a clean cutting surface, and about 30 minutes on a calm day—no fancy equipment required. The real work happens in late winter before buds swell, but I also make light summer cuts to encourage new growth.
Most gardeners mess up by pruning too late or too aggressively, but with these simple rules, you’ll avoid common mistakes and keep your plants healthy for decades. Even better, the right cuts prevent mildew and improve airflow, so your bushes stay strong against pests.
By the end of this process, you’ll have a neatly shaped plant with fresh green canes ready to bear fruit. The first harvest after proper pruning is always sweeter—literally—and your neighbors will wonder how you got such plump, glossy berries.
The key is patience: blackcurrants reward careful pruning with bigger yields and longer lifespans. Let’s get those shears ready and turn your bushes into fruit machines.
This method works for all blackcurrant varieties, including the classic Ribes nigrum, and adapts easily to different climates. Whether you’re dealing with old, overgrown plants or starting fresh, these cuts will set you up for success.
Once you’ve mastered the basics, we’ll tackle summer maintenance and pest control to keep your harvests coming all season long.
📚 In This Guide
- What you need
- Instructions
- Tips and common mistakes
- Wrapping up and next steps
What you need
- ● Pruning shears: Bypass pruners (sharp, 6-8 inch blades) for clean cuts on small branches. Loppers (8-10 inch) for thicker stems (1-2 inch diameter).
- ● Pruning saw: Heavy-duty bow saw or pruning saw for stubborn, thick branches (2+ inches).
- ● Gloves: Garden gloves (cut-resistant, like mechanized or leather) to protect hands from thorns and sap.
- ● Disinfectant: Rubbing alcohol (70%+) or bleach solution (1:9 ratio) to sterilize tools between cuts (prevents disease spread).
- ● Rake or broom: For clearing fallen leaves/debris from the base (1-2 per session).
- ● Trash bags: Heavy-duty contractor bags (30+ gallon) for pruned branches (3-5 bags per plant, depending on size).
- ○ Twine or zip ties: Jute twine (1/4 inch) or plastic zip ties to secure supports for new growth (optional but helpful).
- ○ Pruning sealant: Tree wound paint (optional, for cuts > 1/2 inch on older wood to prevent disease).
- ● Timing: Prune on a dry, calm day (avoid rain for 24 hours before/after). Early morning or late afternoon is ideal.
- ● Weather check: Temperatures between 40°F–70°F (4°C–21°C) for minimal stress on the plant.
- ● Plant health: Wait until the plant is dormant (late winter) or just after harvest (summer) for best results.
Step-by-Step instructions for pruning blackcurrant plants
Blackcurrants reward precise pruning with bigger harvests and healthier bushes—here’s how to do it right.
Prune for Winter Dormancy in Late Fall
After harvest, remove all dead, diseased, or weak wood first. These stems are easy to spot—they’re brown, brittle, or covered in mold. Cut them back to the base with sharp pruners to prevent fungal spread to healthy growth. I always wear gloves for this step because blackcurrant sap can irritate skin.
Next, thin out crowded branches to improve airflow. Aim to keep only the strongest, most vigorous stems. You’ll notice some branches grow straight up while others angle outward—select the ones with the best structure. Remove any stems that cross or rub against each other, as these create wounds that invite pests. This cut keeps the plant’s energy focused on next year’s growth rather than maintaining weak limbs.
Shape and Renew Growth in Early Spring
When new shoots emerge in early spring, prune to shape the bush and encourage fruit production. Start by cutting back last year’s fruiting stems to about 6-8 inches from the ground. These stems are the ones that bore fruit last season—they’re thicker and often have small buds along their length. Shortening them prevents them from becoming too heavy with fruit and encourages new, vigorous growth from the base.
Next, trim any shoots that are growing inward or downward. These rarely produce quality fruit and can block sunlight from reaching the center of the bush. I like to step back and visualize the plant as an open vase shape—this ensures sunlight and air circulate freely. Avoid heavy pruning now; you’re just refining the structure, not removing large sections. The goal is to create a balanced framework for the summer’s growth.
Light Summer Maintenance After Harvest
Once you’ve harvested the fruit, perform a final light pruning to keep the plant tidy and productive. Remove any new shoots that grew from the base but aren’t part of the main structure. These are called “suckers” and compete with established branches for nutrients. Cut them off at the base to redirect energy to the existing framework.
Also, trim any stems that are overcrowded or rubbing together. You’ll see these as clusters of branches growing too close. Use clean pruners to make cuts just above a outward-facing bud. This encourages new growth in the right direction and prevents future damage. A quick pass with pruners now keeps the plant healthy and makes next year’s harvest easier to manage.
Sanitize Tools and Monitor Growth
After each pruning session, clean your pruners with rubbing alcohol to prevent the spread of disease. Blackcurrants are susceptible to fungal infections, so this simple step saves hours of trouble later. I also like to sharpen my pruners after use—they cut cleaner and reduce damage to the plant.
Throughout the growing season, keep an eye on the plant’s shape. If you notice branches growing too long or leggy, trim them back by about one-third to encourage bushier growth. This is especially important in the first few years after planting, when the plant is establishing its structure. Regular light pruning now means less heavy work later and a more productive bush overall.
Tips & tricks for pruning blackcurrant plants
Pruning blackcurrants might seem intimidating, but these key strategies will help you maintain a thriving bush with minimal effort.
Timing is Everything: Late fall is the perfect time to tackle the heavy pruning in Step 1. This timing allows the plant to heal before winter dormancy and prevents fungal spread during wet conditions. I've found that pruning after the first frost helps reduce disease pressure even further. Always work on a dry day to minimize the risk of infections.
Shape Matters: In Step 2, when shaping your bush, focus on creating an open vase shape. This isn't just about looks—it's about maximizing sunlight exposure and airflow to the center of the plant. I step back every few cuts to visualize how sunlight will penetrate. Remember, the goal is to keep the strongest, most vigorous stems that grow outward and upward.
Tool Maintenance: The pruners you use make a huge difference in Step 4. Always clean them with rubbing alcohol between cuts to prevent spreading disease. I keep a small bottle of 70% isopropyl alcohol in my gardening toolkit specifically for this purpose. Sharp tools also make cleaner cuts that heal faster, reducing the plant's stress. Don't forget to sharpen your blades regularly—they'll last longer and cut more effectively.
Seasonal Adjustments: In Step 3, when performing light summer maintenance, look for "suckers" growing from the base. These are easy to spot as they're thinner and often grow at odd angles. Removing these now prevents them from competing with your established framework. Throughout the growing season, I make it a habit to do a quick visual check every few weeks to catch any new growth that needs attention.
Pro Tips for Pruning Blackcurrant Plants
- Pruning blackcurrants might seem intimidating, but these key strategies will help you maintain a thriving bush with minimal effort.
- Timing is Everything: Late fall is the perfect time to tackle the heavy pruning in Step 1.
- Shape Matters: In Step 2, when shaping your bush, focus on creating an open vase shape.
Frequently asked questions
Got questions about pruning blackcurrant plants?
You’re not alone! Here are answers to the most common queries to help you keep your bushes thriving.
When is the best time to prune blackcurrants?
Prune blackcurrants in late winter or early spring (just before buds swell) for best results. This timing promotes healthy growth and prevents disease. Avoid pruning in fall—it can leave cuts vulnerable to winter damage or pests.
How much can I cut back my blackcurrant bushes?
Remove 1/3 of the oldest wood each year to maintain vigor. For established bushes, aim to cut back to a strong, outward-facing bud on each stem. Never remove more than 30% in a single pruning session to avoid stressing the plant.
What if I see dead or diseased branches?
Prune out any dead, diseased, or crossing branches immediately—year-round if needed. Sterilize your tools with rubbing alcohol between cuts to prevent spreading fungal issues like anthracnose. Bag and dispose of infected branches off-site.
Can I prune blackcurrants for better fruit production?
Yes! Focus on open-center pruning—removing crowded stems and thinning inner growth—to improve airflow and sunlight. This boosts fruit quality and reduces fungal risks. Younger bushes benefit from light pruning to encourage bushier growth.
What if I miss the ideal pruning window?
Don’t stress! Prune at any time, but avoid heavy cuts in summer (it can stress the plant). If you’re late, prioritize removing dead wood and thinning overgrowth. Just be gentle—blackcurrants are resilient but prefer gradual adjustments.
Wrapping up and next steps
Pruning your blackcurrant plants doesn’t have to be daunting—it’s all about timing, technique, and a little patience! 🌿 By mastering the three key cuts (summer thinning, winter shaping, and rejuvenation pruning), you’ll keep your bushes productive, healthy, and full of juicy berries for years to come.
Whether you’re a seasoned gardener or just starting out, every snip brings you closer to a thriving harvest.
Ready to take the next step? Grab your pruners, mark your calendar for those seasonal cuts, and watch your blackcurrants flourish! 🌟 For extra tips, check out our gardening resources or join a local gardening group—you’ve got this!