Pruning
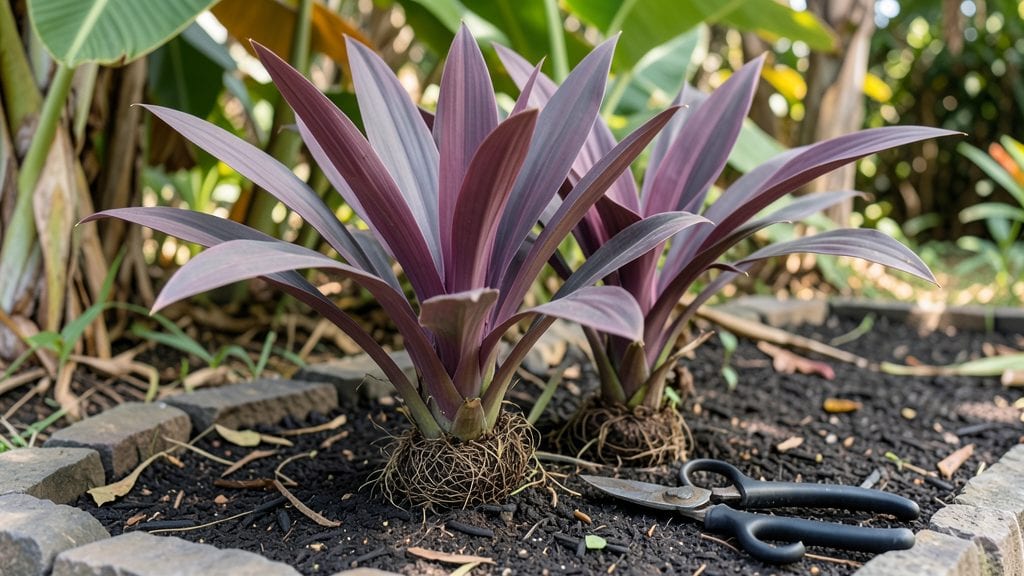
Pruning cordyline plants keeps them vibrant and full of life year-round. ✨ I’ve learned that a little precision goes a long way—these tropical beauties reward careful cuts with lush, colorful foliage that lasts.
The key is timing: a light trim in early spring jumpstarts growth, while summer pruning removes dead leaves before they spoil the show. Over time, you’ll notice thicker stems and brighter colors, proving that a sharp pair of shears is the secret to a showstopper plant.
You’ll need just three things: clean, sharp pruners, rubbing alcohol for sterilizing, and a bucket for clippings. I always sanitize my tools between cuts to prevent disease—trust me, your cordyline will thank you.
Work in the morning when the plant is hydrated, and avoid cutting more than one-third of the foliage at once. The goal is to shape, not strip, so focus on removing yellowed or damaged leaves first. This keeps the plant healthy while maintaining that striking, layered look.
After pruning, your cordyline will bounce back stronger than ever. Within weeks, you’ll see fresh growth at the stem tips, and the plant will fill out more densely. The best part? You can prune lightly throughout the year to control size or shape—no need to wait for a specific season.
Just keep an eye out for signs of stress, like wilting or brown edges, and adjust your approach. With each trim, you’re not just maintaining the plant; you’re sculpting a living work of art.
This method works for both indoor and outdoor cordylines, whether you’re dealing with a towering ‘Red Star’ or a compact ‘Baby Joe.’ The same principles apply—just scale the cuts to the plant’s size.
Start small, observe how your cordyline responds, and soon you’ll have a foolproof routine that keeps it thriving. The payoff? A plant that stays stunning, season after season, with minimal effort.
📚 In This Guide
- What you need
- Instructions
- Tips and common mistakes
- Wrapping up and next steps
What you need
- ● Sharp pruning shears or bypass pruners – Choose sterilized, bypass-style shears (4-6" blade) for clean cuts without crushing stems.
- ● Garden gloves – Heavy-duty, nitrile-coated gloves to protect against thorns and sap.
- ● Disinfectant (70% isopropyl alcohol or bleach solution) – 1 part bleach to 9 parts water to sterilize tools between cuts.
- ○ Pruning saw (optional but helpful for thick stems) – A curved-tooth saw (6-8" blade) for stems wider than 1 inch.
- ● Compost bin or bag – For collecting pruned foliage (use a sealed bag if diseased leaves are present).
- ● Hose or bucket of water – To rinse tools and clean sap off hands.
- ● Hand pruners with extendable handles – For tall Cordylines (reach up to 10+ feet!).
- ● Rubbing alcohol wipes – Quick cleanup for sticky sap on tools or skin.
- ● Plant food or fertilizer – Balanced 10-10-10 to nourish plants post-pruning.
- ● Ladder or step stool – If your Cordyline is over 6 feet tall.
- ● Permanent marker – To label cuttings for propagation.
Step-by-Step instructions for pruning cordyline plants
Here’s how to keep your cordylines vibrant and healthy while shaping them for year-round visual impact.
✂️ Step 1: Assess Growth and Identify Pruning Points
Start by examining your cordyline for signs of overgrowth, leggy stems, or dead leaves. I look for stems that have outgrown their space or leaves that are yellowed, browned, or damaged. These are your clear pruning targets. Healthy leaves should be firm, upright, and vibrant—anything less needs attention.
Use clean, sharp pruning shears to avoid tearing the stems. Make cuts at a 45-degree angle, about ½ inch above a leaf node or where new growth naturally occurs. This encourages fresh shoots to emerge from the right spot. Never cut into old, woody stems—focus on the newer, more flexible growth.
✂️ Step 2: Trim Leggy or Overgrown Stems
Leggy stems are a common issue with cordylines, especially in low-light conditions. I prune these back by ⅓ to ½ of their length, cutting just above a leaf node. This forces the plant to redirect energy into bushier, more compact growth. If a stem is completely bare or dead, remove it entirely at the base.
Watch for new side shoots emerging within 2-4 weeks after pruning—that’s your signal the plant is responding well. If you see no new growth after 6 weeks, consider adjusting light exposure or fertilizing to support recovery.
✂️ Step 3: Shape for Balance and Aesthetics
Cordylines thrive when pruned for shape, whether you prefer a rounded form or a more structured look. Step back and visualize the plant’s final shape before making cuts. I like to remove stray stems that disrupt the symmetry, cutting them back to a balanced length.
For a fuller appearance, prune the outer stems slightly shorter than the inner ones. This creates depth and prevents a flat, one-dimensional look. Avoid cutting into the thick, woody base—this can damage the plant’s health and slow down recovery.
💧 Step 4: Post-Pruning Care for Faster Recovery
After pruning, water your cordyline deeply to help it recover. I give it a thorough soak until water runs out the drainage holes, then let the soil dry slightly before watering again. This prevents root stress while encouraging new growth.
Hold off on fertilizing for 2-3 weeks to let the plant focus on healing. Once new shoots appear, resume feeding with a balanced fertilizer every 4-6 weeks during the growing season. Keep the plant in bright, indirect light—direct sun can stress freshly pruned stems.
⏰ Step 5: Schedule Regular Maintenance Trims
Cordylines benefit from light pruning every 3-4 months to maintain shape and remove dead foliage. I also do a deeper trim in early spring to encourage fresh growth before the active growing season. This keeps the plant looking tidy and prevents overcrowding.
If you’re growing cordylines for their striking foliage, prune lightly in fall to preserve color. Avoid heavy cuts during dormancy, as this can stress the plant. With consistent care, your cordylines will stay lush, colorful, and full of energy year-round.
Tips & tricks for pruning cordyline plants
Perfecting your cordyline pruning takes practice, but these tricks will help you achieve professional-looking results while keeping your plants healthy.
The Angle Matters: In Step 1, when you make those 45-degree cuts about ½ inch above a leaf node, you're not just following instructions—you're giving your plant the best chance to heal properly. The angled cut prevents water from pooling on the stem, which can lead to rot. I've found that using a sharp, clean pruning shear makes all the difference—dull blades crush the stem instead of cutting cleanly.
Leggy Stems Need Special Attention: The ⅓ to ½ length reduction in Step 2 works wonders for leggy stems, but here's what nobody tells you: focus on the top third of the plant first. This creates an instant fuller look while encouraging new growth lower down. I've seen dramatic transformations in just 4-6 weeks when I prioritize the upper stems—it's like giving your cordyline a makeover from the top down.
Shape with Purpose: When shaping in Step 3, think of your cordyline like a sculpture. Step back and visualize the final form before making any cuts. I like to use a small mirror to check the backside of the plant—I've caught more than one stray stem that would have ruined the symmetry if left unnoticed. The key is to create visual balance by cutting outer stems slightly shorter than inner ones, which adds that dimensional look we all admire.
Recovery is Everything: That 2-3 week fertilizer break in Step 4 is crucial for recovery, but don't forget about light conditions. After pruning, move your plant to bright, indirect light—this helps prevent sunburn on freshly exposed stems. I've learned the hard way that direct sunlight can scorch new growth, so I always keep my pruned cordylines near an east-facing window or under sheer curtains during their recovery period.
Pro Tips for Pruning Cordyline Plants
- Perfecting your cordyline pruning takes practice, but these tricks will help you achieve professional-looking results while keeping your plants healthy.
- The Angle Matters: In Step 1, when you make those 45-degree cuts about ½ inch above a leaf node, you're not just following instructions—you're giving your plant the best chance to heal properly.
- Leggy Stems Need Special Attention: The ⅓ to ½ length reduction in Step 2 works wonders for leggy stems, but here's what nobody tells you: focus on the top third of the plant first.
Frequently asked questions
about pruning Cordyline plants can help you avoid common mistakes and keep your plants thriving. Here are answers to the most common queries:When is the best time of year to prune Cordyline plants?
The ideal time to prune Cordyline is in early spring, just as new growth begins. This timing encourages fresh, vibrant foliage and prevents stress during colder months. Light pruning can also be done in late summer to shape the plant, but avoid heavy cuts during winter or extreme heat.
How much can I trim off my Cordyline without harming it?
You can safely remove up to one-third of the plant’s height in a single pruning session. For mature plants, focus on removing dead or yellowing leaves first, then shape the remaining growth. Avoid over-pruning—this can stress the plant and reduce its ability to produce new leaves.
What should I do with the cuttings after pruning?
Use the cuttings for propagation! Dip the stems in rooting hormone and plant them in well-draining soil. Keep the soil moist and place the cuttings in bright, indirect light. In 4-6 weeks, you should see new root growth. This is a great way to expand your Cordyline collection for free!
Why are my Cordyline leaves turning brown after pruning?
Brown leaves after pruning can indicate over-pruning, underwatering, or shock. If the plant is otherwise healthy, the brown edges will eventually fade as new growth emerges. To prevent this, water deeply after pruning and avoid cutting into woody stems. If browning persists, check for pests or fungal issues.
Can I prune Cordyline in winter?
Pruning in winter is not recommended unless absolutely necessary (e.g., removing dead or diseased branches). Cold temperatures and reduced growth slow recovery. If you must prune, do so on a mild day and avoid heavy cuts. Wait until spring for major shaping to ensure the best results.
Wrapping up and next steps
Pruning your cordyline plants isn’t just about keeping them tidy—it’s your secret to year-round vibrancy and healthier growth! With the right tools, timing, and techniques, you’ll unlock lush foliage and even encourage stunning blooms.
Whether you’re trimming for shape, rejuvenation, or pest control, every snip brings your plants one step closer to their best.
Ready to see the difference? Grab those shears and give your cordylines the care they deserve—your garden (and future pruning projects) will thank you! 🌿✂️