Shrubs
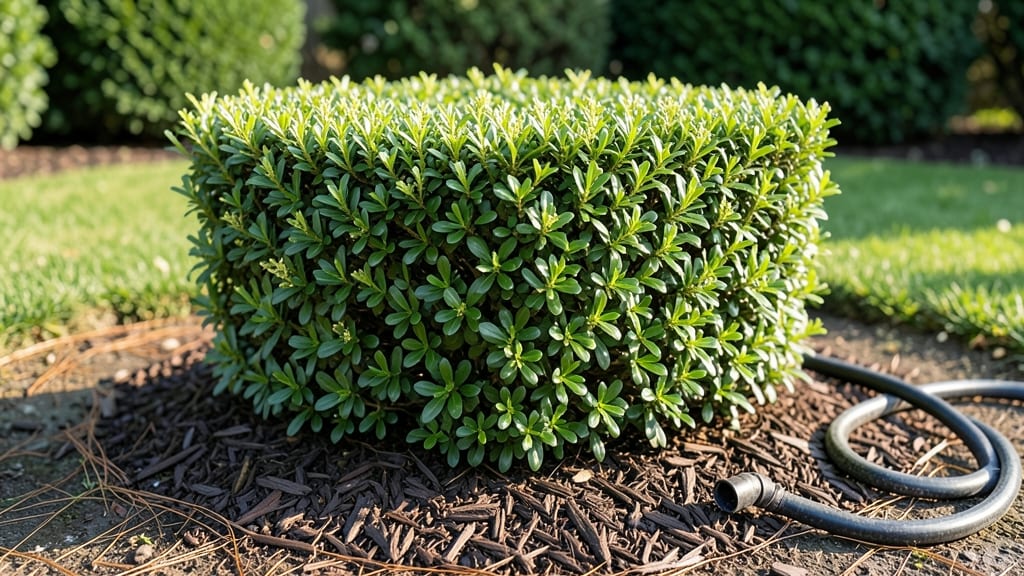
Boxwood foundation planting creates that impeccably manicured look homeowners dream of—structured, polished, and effortlessly elegant. ✨ I’ve seen how a single row of boxwoods can transform a plain yard into a welcoming statement, framing your home with clean lines and year-round greenery.
The secret lies in spacing them just right—too tight, and they’ll fight for space; too far apart, and the effect feels sparse. My first attempt was uneven, but after measuring each plant’s mature width, I finally got that military precision that makes all the difference.
Start with 2- to 3-foot spacing for standard boxwoods, adjusting for dwarf varieties or bold architectural shapes. Pair them with low-growing perennials like creeping thyme or ornamental grasses to soften the edges while keeping maintenance simple.
The key is layering: taller plants behind, mid-height in the middle, and ground covers in front. This creates depth without overwhelming the boxwoods’ star role. I’ve even seen homeowners mix in evergreen shrubs like junipers for texture contrast—just avoid anything that outgrows the boxwoods.
What you’ll end up with is a crisp, high-impact border that stays lush through winter and blooms subtly in spring. The dark green foliage contrasts beautifully with brick, siding, or even modern stucco, while the neatly trimmed shapes add a touch of classic sophistication.
My neighbors used to joke that my yard looked like a museum—now they ask for my spacing secrets. The best part? Once established, boxwoods need minimal fuss: a light trim twice a year and occasional mulch to keep weeds at bay.
For homes with steep slopes or curved driveways, stagger the plants instead of lining them up straight—it follows the natural flow of the landscape while keeping that structured look.
And if you’re working with limited space, try tiered planters filled with boxwoods and trailing ivy for a vertical foundation effect. The possibilities are endless, but the foundation? Always starts with proper spacing and a sharp pair of shears.
📚 In This Guide
- What you need
- Instructions
- Tips and common mistakes
- Wrapping up and next steps
What you need
- ● Boxwood plants: 12–24 plants (depending on spacing—aim for 3–4 feet apart for mature size). Choose disease-resistant varieties like Buxus sempervirens or Buxus microphylla.
- ● Topsoil or garden soil: 2–3 cubic yards (enough to fill planting holes and amending existing soil).
- ● Organic compost or aged manure: 1–2 bags (to enrich soil and improve drainage).
- ● Slow-release fertilizer: 10–20 lbs (e.g., 10-10-10 or a balanced shrub fertilizer).
- ● Mulch: 2–3 bags (2–4 inches of shredded bark or pine straw to retain moisture and suppress weeds).
- ○ Optional: Ground cover plants (e.g., Ajuga or Vinca) for underplanting.
- ● Decorative edging (e.g., metal or stone) to define borders.
- ● Shovel or spade: 1 (for digging planting holes).
- ● Hoe or garden fork: 1 (to loosen soil and remove weeds).
- ● Measuring tape: 1 (to ensure even spacing).
- ● Wheelbarrow or bucket: 1 (for mixing soil and compost).
- ● Gloves and knee pads: 1 pair each (for comfort and protection).
- ○ Optional: String and stakes (to mark planting lines).
- ● Hose with spray nozzle (for watering).
- ● Clear the planting area of debris, weeds, and grass (use a glyphosate-free herbicide if needed).
- ● Test soil pH (ideal range: 6.0–7.0; amend with lime or sulfur if necessary).
- ● Check local frost dates to plant in spring or early fall (avoid extreme heat or cold).
- ● Ensure proper drainage (boxwoods hate soggy roots!).
Step-by-Step instructions for boxwood foundation planting
Here's how to create clean, structured borders that elevate any home's curb appeal.
🪴 Step 1: Prepare the Planting Site and Soil
Start by marking your foundation border with landscape spray paint, using 4-foot spacing between plants for mature size. Boxwoods thrive in well-drained soil with a pH between 6.0 and 7.5. If your soil is heavy clay, amend it with 2-3 inches of compost mixed into the top 12 inches of soil.
Dig holes twice as wide as the root ball but only as deep as the container—boxwoods hate being planted too deep. This prevents root suffocation and encourages strong establishment. I always loosen the roots gently if they're circling the container before placing them in the hole.
🌱 Step 2: Plant Boxwoods at the Correct Depth and Spacing
Remove the plant from its container and place it in the hole so the top of the root ball sits 1 inch above ground level. This ensures proper drainage and prevents crown rot. Backfill with the amended soil, tamping gently every 2 inches to eliminate air pockets.
Water deeply immediately after planting to settle the soil and eliminate air gaps. You'll see the soil settle slightly—this confirms good root contact. For 4 plants, use about 5 gallons of water total, applied slowly at the base to avoid runoff.
☀️ Step 3: Provide Initial Watering and Mulching
Apply 2-3 inches of mulch around each plant, keeping it 3 inches away from the stem to prevent moisture buildup. I use shredded hardwood mulch because it breaks down slowly and improves soil structure over time. Water again after mulching to help settle everything in place.
Boxwoods need consistent moisture during establishment, so water 2-3 times per week for the first 6 weeks unless rainfall provides 1 inch per week. You'll know they're getting enough water when the soil feels moist but not soggy 2 inches down.
✂️ Step 4: Prune and Shape for Long-Term Structure
Wait until spring of the following year before pruning, as new plants need time to establish roots. Use clean, sharp pruners to shape the plants by cutting back any overly long or leggy growth. I aim for a rounded, compact form that complements the home's architectural lines.
Prune just after flowering to maintain density and encourage bushier growth. Avoid heavy pruning—never remove more than 25% of the plant's foliage in one season. You'll see new growth emerge within 4-6 weeks, signaling successful pruning.
🌿 Step 5: Maintain Through the First Growing Season
Fertilize lightly in early spring with a balanced 10-10-10 fertilizer, applying ½ pound per 100 square feet. Water deeply after fertilizing to help nutrients reach the roots. Boxwoods are low-maintenance but appreciate a monthly check for pests like boxwood mites or leafminers.
Monitor soil moisture during dry spells, watering when the top 1-2 inches feel dry. By fall of the first year, your plants should show dense, vibrant foliage and minimal signs of stress. This confirms they're well on their way to becoming a stunning, long-lasting foundation border.
Tips & tricks for perfect boxwood foundation planting
Between us, the devil is in the details when planting boxwoods—those small adjustments make all the difference between a border that fades into the background and one that becomes the star of your landscape.
The Spacing Secret: That 4-foot spacing between plants might seem generous, but it's critical for mature size. Boxwoods grow slowly but steadily, and crowding them leads to competition for nutrients and air circulation. I've seen too many poorly spaced borders where plants struggle to reach their full potential. Measure carefully—use stakes and string lines for a perfectly straight border before you even start digging.
Root Ball Rescue: If you notice roots circling tightly in the container (a common issue with nursery plants), don't just shove them into the hole! Gently tease them apart with your fingers or a fork. This prevents "pot-bound" roots from strangling themselves once planted. Think of it like untangling headphones—patience pays off. The goal is to encourage outward root growth rather than letting them stay in that compacted circle.
Mulch Placement Matters: That 2-3 inches of mulch should stay 3 inches away from the stem—this isn't just arbitrary spacing. Mulch piled against the stem creates a moist environment that invites fungal diseases like crown rot. I've seen beautiful boxwoods ruined by this simple mistake. Use a rake to create a clean circle around each plant before applying mulch, and always water the soil, not the foliage, to maintain that 3-inch buffer.
Pruning Precision: When shaping your boxwoods in Step 4, aim to cut just outside the leaf bud at a 45-degree angle. This encourages new growth in the right direction while maintaining that clean, structured look. And remember—those 4-6 weeks until new growth appears are your reward for patience. I can't tell you how many times I've seen people over-prune in frustration, only to watch their plants take years to recover. Less is more with boxwoods!
Pro Tips for Boxwood Foundation Planting
- Between us, the devil is in the details when planting boxwoods—those small adjustments make all the difference betwee...
- The Spacing Secret: That 4-foot spacing between plants might seem generous, but it's critical for mature size. Boxwoo...
- Root Ball Rescue: If you notice roots circling tightly in the container (a common issue with nursery plants), don't j...
Frequently asked questions
Got questions about creating a polished boxwood foundation planting?
Here are answers to the most common ones—so you can design with confidence!
What’s the best spacing for boxwoods along a foundation?
Plant boxwoods 3 to 4 feet apart for mature size (6–8 ft wide). Closer spacing (2–3 ft) works for smaller varieties like 'Green Velvet' but may require more pruning. Always check the specific cultivar’s mature width to avoid overcrowding.
When is the ideal time to plant boxwoods near a house?
Plant in early spring or fall (4–6 weeks before frost) for best root establishment. Avoid extreme heat or cold—boxwoods struggle in summer drought or winter freeze. Mulch well after planting to retain moisture and protect roots.
Can I use alternatives to boxwood for a foundation border?
Yes! Try holly (thorny, evergreen), juniper (drought-tolerant), or inkberry (low-maintenance). For color, dwarf lilacs or ornamental grasses add texture. Just ensure alternatives match your climate zone and maintenance preferences.
How do I prevent boxwoods from damaging my foundation?
Keep plants at least 12–18 inches away from siding to avoid moisture buildup. Improve drainage with a French drain or gravel layer if your yard holds water. Avoid overwatering—boxwoods hate soggy roots!
How often should I prune boxwoods for a clean foundation look?
Lightly shape boxwoods once or twice a year—spring for form and late summer for cleanup. Use sharp shears to avoid tearing. Never cut into old wood (brown centers)—this kills the plant. Aim for a rounded, tapered shape for natural elegance.
Wrapping up and next steps
Creating a boxwood foundation planting is your chance to blend structure and elegance into your landscape—transforming plain walls into a polished, inviting border that stands the test of time. 🌿 With the right spacing, soil prep, and maintenance, your boxwoods will thrive for years, offering year-round beauty and curb appeal.
Now that you’re armed with the know-how, roll up your sleeves and start planting—your future curb appeal is just a shovel’s depth away!
Next step:
- Mark your planting zones and dig in!
- Need extra inspiration? Browse boxwood variety guides for the perfect fit.
- Tag us in your before-and-after pics—we’d love to see your progress! 📸