Vegetables
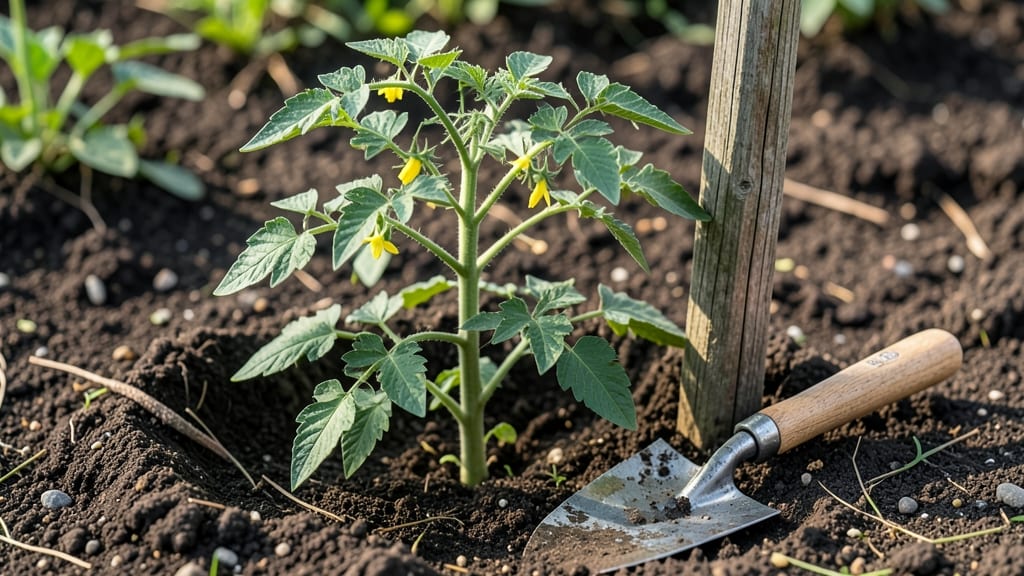
Planting tomatoes outdoors transforms your garden into a sun-drenched fruit factory—60 days from transplant to ripe, juicy tomatoes if you time it right. 🌱 I learned the hard way that rushing seedlings into cold soil or picking the wrong variety can turn your hopes into sad, leggy plants.
The secret isn’t just about when you plant; it’s about matching your tomatoes to your climate, prepping the soil like a pro, and giving them the space they crave.
Start with the right variety—determinate types for bushy plants that ripen all at once, indeterminate for vining giants that produce all season. A 5-gallon pot works for containers, but in-ground plants need 18-24 inches of space between them.
Warm soil (at least 60°F) and nighttime temps above 50°F are non-negotiable—waiting a week or two after your last frost saves your plants from shock. I’ve seen seedlings recover from transplant shock in 10 days with proper care, but cold soil? That’s a one-way ticket to failure.
Once planted, keep soil consistently moist (not soggy) and mulch to lock in warmth. You’ll spot the first blossoms in 3-4 weeks, and those tiny green fruits will swell into sun-ripened tomatoes faster than you think.
The key is patience—60 days from transplant to harvest is realistic if you avoid common pitfalls like overwatering or crowding. Imagine pulling a vine-ripe tomato straight from the vine, its scent filling the air as you slice it for sandwiches.
This works for backyard plots, raised beds, or even balcony containers—just adjust spacing and support. Urban gardeners can use cage systems or trellises to save space. The biggest mistake? Skipping the soil prep or ignoring the weather forecast. Let’s get those tomatoes growing strong from day one.
📚 In This Guide
- What you need
- Instructions
- Tips and common mistakes
- Wrapping up and next steps
What you need
- ● Tomato seeds or seedlings: Choose disease-resistant varieties like Celebrity or Cherry Roma. Start with 5–10 seeds or 3–5 seedlings per plant (thin to 1–2 strong plants per spot).
- ● Well-draining potting mix: 5–10 gallons (sterilized, organic blend with compost). Avoid garden soil if it’s heavy or clay-based.
- ● Containers or garden bed: Containers: 5-gallon pots or larger (minimum 12" deep) with drainage holes. Use 1 pot per plant.
- ● Garden bed: 6" deep, 18" wide rows (space plants 18–24" apart for determinate varieties; 24–36" apart for indeterminate).
- ○ Fertilizer: Balanced 10-10-10 or tomato-specific fertilizer (follow package rates). Optional: Compost (aged) or worm castings for slow-release nutrients.
- ● Hand trowel or transplanting spade (for digging holes or containers).
- ● Watering can or hose with gentle nozzle (avoid blasting seedlings!).
- ○ Gloves (optional but handy for messy soil or thorny plants).
- ● Stakes or cages: 1–2 per plant (6–7 ft tall for indeterminate varieties; 4–5 ft for determinate). Use bamboo stakes, metal cages, or tomato towers.
- ● Mulch: 2–3 inches of straw, grass clippings, or shredded leaves to retain moisture.
- ● Sunlight: 6–8+ hours of direct sun daily (tomatoes are sun-worshippers!).
- ● Warm soil: Wait until after the last frost (soil temp should be at least 60°F). Use a soil thermometer if unsure!
- ● Water source: Consistent access to water (tomatoes need 1–2 inches per week).
- ● Patience: Tomatoes take 60–90 days to fruit—plan ahead for your first harvest! 🍅
- ● Pruning shears (for trimming suckers or dead leaves).
- ● Epsom salt (1 tbsp per plant monthly for magnesium boost).
- ● Row covers or shade cloth (to protect seedlings from pests or heatwaves).
- ● pH test kit (ideal soil pH: 6.0–6.8).
- ● Trellis or string system (for vertical growth in small spaces).
Step-by-step instructions for planting tomatoes outdoors
Here's the foolproof method I've used for decades to get tomatoes thriving in the garden.
🪴 Step 1: Prepare the Planting Site
Choose a location with full sun exposure—at least 6-8 hours of direct sunlight daily. Tomatoes need warmth to set fruit, so avoid shady spots. I always test the soil a week before planting by digging a 6-inch deep hole and checking for moisture retention and drainage.
If your soil drains poorly, mix in 2-3 inches of compost and a handful of coarse sand to improve aeration. The ideal soil should feel like a damp sponge—not soggy, not powdery. Work the amendments into the top 12 inches of soil and let it settle for a few days before planting.
☀️ Step 2: Harden Off Seedlings
Two weeks before your last frost date, move seedlings outdoors for 2-3 hours daily, gradually increasing their time outside. Start in a sheltered spot and avoid direct sun the first few days. You'll know they're ready when they tolerate a full day outside without wilting.
I always check for pale or yellowing leaves—this signals stress. If you see it, move them back inside for a day or two before trying again. Hardened-off plants adjust to outdoor conditions and grow stronger roots once transplanted.
🌱 Step 3: Plant Deeply for Strong Stems
Dig a hole wide enough to accommodate the root ball without crowding. Tomatoes love depth—bury ⅔ of the stem below soil level. This encourages stronger root growth along the buried portion. Gently loosen the roots if they're circling in the pot before placing the plant in the hole.
Fill the hole with soil, pressing lightly to remove air pockets. Water deeply to settle the soil and eliminate gaps. The top of the root ball should sit 1 inch below the soil surface—this prevents water from pooling around the stem and causing rot.
💧 Step 4: Water and Mulch
Water immediately after planting to help roots establish. Use 1-2 gallons of water per plant to ensure the soil is thoroughly moist. Avoid overhead watering—it spreads disease. Instead, water at the base using a soaker hose or drip irrigation.
Spread 2-3 inches of mulch around each plant, keeping it 2 inches away from the stem to prevent rot. Mulch conserves moisture, regulates soil temperature, and suppresses weeds. I use straw or shredded leaves because they break down slowly and improve soil structure over time.
✂️ Step 5: Support and Prune for Productivity
Install a stake or cage at planting time to support the plant as it grows. Tomatoes grow heavy with fruit, and proper support prevents sprawling and disease. Tie the main stem loosely to the stake with soft plant ties every 12 inches of growth.
Once the plant reaches 18 inches tall, begin pruning suckers—those small shoots that grow in the leaf axils. Remove them by pinching them off with your fingers. Pruning improves airflow and directs energy to fruit production, not excessive foliage.
Tips & tricks for perfect outdoor tomato planting
Here's what nobody tells you about transforming your garden into a tomato powerhouse—details that separate good harvests from spectacular ones.
Sunlight Strategy: That 6-8 hours of direct sunlight isn't just a suggestion—it's non-negotiable for fruit set. I've seen tomatoes in partial shade produce tiny, bitter fruit. If your garden has afternoon shade, consider a temporary shade cloth during peak summer heat to prevent sunscald on the fruit. The key is consistent warmth—tomatoes need temperatures above 55°F to set fruit properly.
Soil Science: When testing your soil in that 6-inch deep hole, pay attention to the smell—healthy soil has an earthy aroma, while compacted or waterlogged soil smells stale. For heavy clay soils, I recommend mixing in 1 part compost to 2 parts soil by volume, plus a handful of perlite for extra aeration. The goal is that damp sponge texture—if water pools on top, you need more sand.
Harden-Off Hack: Those 2-3 hours daily should start in the morning when temperatures are cooler. I place seedlings in a sheltered spot like under a patio cover or against a fence, gradually moving them to sunnier locations. Watch for leaves that curl or look like they've been frostbitten—this means they're not ready yet. Pro tip: Use small plant clips to secure seedlings to stakes during hardening to prevent wind damage.
Planting Depth: Burying ⅔ of the stem isn't just about root growth—it's about creating a stronger plant from the ground up. The buried portion will develop new roots, making your tomato more resilient. When loosening circling roots, I use my fingers to gently separate them rather than pulling—think of it like untangling headphones, not yanking apart knots. The 1 inch below soil surface for the root ball is crucial to prevent crown rot.
Pro Tips for Planting Tomatoes Outdoors
- Here's what nobody tells you about transforming your garden into a tomato powerhouse—details that separate good harve...
- Sunlight Strategy: That 6-8 hours of direct sunlight isn't just a suggestion—it's non-negotiable for fruit set. I've ...
- Soil Science: When testing your soil in that 6-inch deep hole, pay attention to the smell—healthy soil has an earthy ...
Frequently asked questions
Got questions about planting tomatoes outdoors? You’re not alone—growing juicy, homegrown tomatoes is a rewarding (but sometimes tricky!) process. Below, we’ve answered the most common questions to help you avoid pitfalls and maximize your harvest.
When is the best time to plant tomatoes outdoors?
Plant tomatoes after the last frost date when soil temperatures are consistently above 50°F (10°C). Most gardeners aim for late spring to early summer (April–June, depending on your climate). Use black plastic mulch or row covers if early planting is risky—it warms the soil faster!
How long does it take for outdoor tomatoes to grow and bear fruit?
From seed to harvest, expect 60–85 days for cherry tomatoes and 70–100 days for beefsteak varieties. Start with transplants (not seeds) to shave off 2–4 weeks. Pro tip: Stake or cage plants early (when 6–8 inches tall) to support vines and speed up fruiting.
What if my outdoor tomatoes struggle in hot weather?
Heat stress (above 90°F/32°C) can cause blossom drop or sunscald. Solutions:
- Provide afternoon shade with shade cloth (30–50%).
- Mulch heavily to keep roots cool.
- Water deeply early in the morning to reduce evaporation.
- Choose heat-tolerant varieties like ‘Solar Fire’ or ‘Heatmaster.’
How do I prevent pests and diseases in outdoor tomato plants?
Common threats include aphids, hornworms, and fungal diseases like blight. Preventative steps:
- Rotate crops annually to break disease cycles.
- Use neem oil or insecticidal soap for pests.
- Prune lower leaves to improve airflow and reduce humidity.
- Remove diseased foliage immediately and sterilize tools.
Bonus: Companion plants like basil or marigolds deter pests naturally!
Can I grow tomatoes in containers outdoors?
Use 5-gallon pots or larger (bigger = better for stability and yield). Ensure containers have drainage holes and fill with well-draining potting mix. Dwarf varieties like ‘Tiny Tim’ or ‘Patio Princess’ thrive in containers. Move pots to follow the sun’s arc for optimal growth.
Why aren’t my outdoor tomatoes ripening?
Ripening issues often stem from lack of sunlight, water stress, or nutrient deficiencies. Check:
- Sunlight: Tomatoes need 6–8+ hours of direct sun daily.
- Water: Inconsistent watering causes blossom end rot or cracked fruit.
- Nutrients: Feed with balanced fertilizer (10-10-10) every 3–4 weeks.
- Harvest early: Pick green tomatoes and ripen indoors with a banana in a paper bag!
Wrapping up and next steps
Planting tomatoes outdoors is a rewarding journey that leads to sun-kissed, homegrown goodness—and you’ve got all the tools to make it happen! 🌱 From choosing the right varieties to nurturing strong seedlings and protecting your plants, every step brings you closer to a bountiful harvest.
Whether you’re a first-time gardener or a seasoned green thumb, the key is patience, observation, and a little love.
Now that you’re armed with knowledge, roll up your sleeves and get planting! Start by marking your calendar for transplanting day, then enjoy the process of watching your tomatoes grow—one leaf, one vine, and one delicious fruit at a time. Happy gardening! 🌞