Propagation
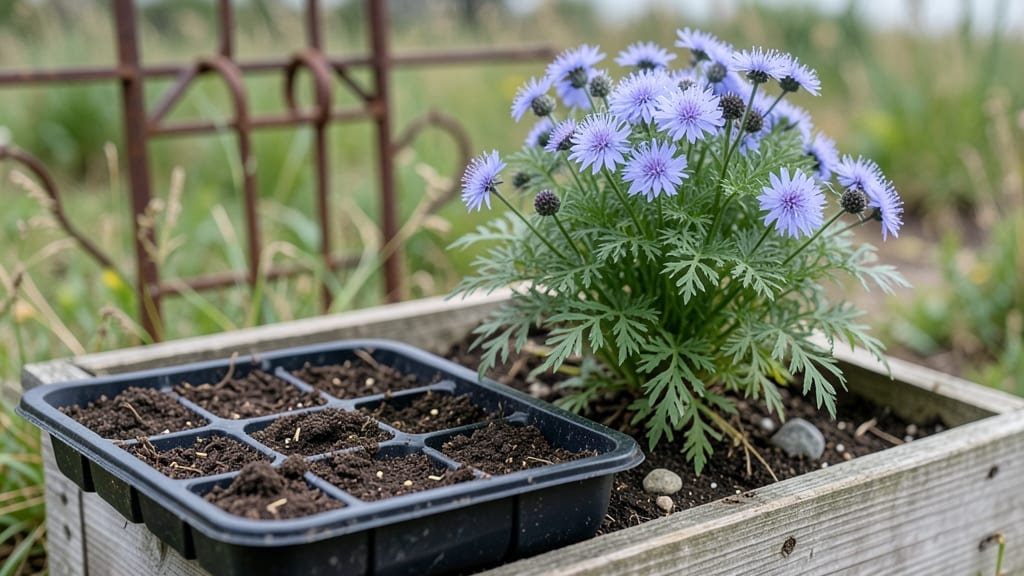
Planting nigella seeds transforms any garden corner into a delicate lacework of blooms with almost no effort. 🌿 I’ve grown them in everything from sunny borders to shady containers, and they always deliver those signature paper-thin flowers in shades of blue, white, and pink.
The secret lies in their love of well-drained soil and patience—these seeds don’t rush, but once they do, they reward you with blooms from spring through fall.
You’ll need just three things: a sunny spot (at least 6 hours of light), loose soil (even sandy or rocky works), and a light hand with the trowel. Scatter seeds ¼ inch deep, 6–12 inches apart, and forget about fussing over them.
Nigella thrives on neglect, so water lightly until sprouts appear—usually within 2–4 weeks—and then let nature take over. The key is not to overwater; these plants hate soggy roots.
What you’ll end up with is a self-seeding spectacle that multiplies every year. The first blooms arrive in 8–10 weeks, and the more you grow, the more they spread, creating airy clusters that hummingbirds adore.
Even if you forget to deadhead, the seeds will scatter and pop up where they please—proof that minimal care still yields maximal beauty.
Works in containers, borders, or meadow-style gardens, and they’re tough enough to handle drought once established. Here’s how to get started without the guesswork—no green thumb required.
📚 In This Guide
- What you need
- Instructions
- Tips and common mistakes
- Wrapping up and next steps
What you need
- ● Nigella seeds: Choose Nigella damascena (Love-in-a-Mist) or Nigella sativa (Black Cumin). Buy 1–2 packets (5–10g each) for a small garden or 5–10g per square foot for larger areas.
- ● Well-draining potting mix: 1–2 bags (10–20L) of seed-starting mix or a blend of 50% peat/coir + 50% perlite/sand for optimal drainage.
- ● Containers or garden bed: For indoors/seedlings: 4–6 small pots (3–4 inches deep) with drainage holes or a seed tray with individual cells.
- ● For outdoor planting: A sunny garden bed (6+ hours of light) with loose, well-drained soil or raised beds (if your soil is heavy clay).
- ● Watering can or spray bottle: A fine-mist spray to avoid disturbing seeds during germination.
- ○ Fertilizer (optional but helpful): Balanced liquid fertilizer (e.g., 10-10-10) OR
- ● Compost tea (for organic gardening). Use ½ the recommended dose to avoid burning seedlings.
- ● Grow lights: If planting indoors before the last frost, a full-spectrum LED grow light (12–16 hours/day) speeds up growth.
- ● Plant labels: Mark varieties (e.g., ‘Persian Jewels’) to track colors and blooming times.
- ● Mulch: Straw or shredded leaves to retain moisture and suppress weeds in outdoor beds.
- ● Trellis or stakes (for tall varieties): Some nigella varieties (like ‘Miss Jekyll’) grow up to 24 inches—add support if needed.
- ● Dibber or pencil: For precise seed placement in garden beds.
Step-by-Step instructions for planting nigella seeds
Here’s how to grow these delicate, self-seeding beauties with almost no effort.
🌱 Step 1: Choose the Right Location and Prepare Soil
Nigella thrives in full sun—at least 6 hours daily—but tolerates partial shade in hotter climates. The soil should be well-draining but not sandy; mix in 1-2 inches of compost into the top 6 inches of soil to improve fertility without compacting. I avoid heavy clay because it causes root rot, and nigella hates soggy feet.
Loosen the soil to a depth of 4-6 inches with a garden fork or tiller. If your soil is dense, work in 1 part perlite to every 3 parts soil—this keeps moisture balanced while preventing waterlogging. The goal is light, airy soil that mimics nigella’s natural Mediterranean habitat.
🌱 Step 2: Sow Seeds Directly in the Garden
Nigella seeds are tiny but hardy—no need for indoor starting. Scatter them ¼ inch deep in early spring, 2-3 weeks before your last frost, or in late summer for fall blooms. I space mine 12-18 inches apart in clusters of 3-5 seeds for a natural, cottage-garden look. Press them lightly into the soil; they don’t need covering.
Keep the soil consistently moist (not soggy) until germination, which takes 2-4 weeks. Water gently with a fine spray nozzle—a heavy stream can wash seeds away. Once sprouts appear, reduce watering to once weekly unless your climate is extremely dry. Overwatering is the fastest way to kill these drought-tolerant charmers.
☀️ Step 3: Provide Minimal Care for Year-Round Blooms
Nigella is one of the most low-maintenance annuals—no fertilizing, no pruning, and no fuss. The key is letting the plants go to seed after flowering. When blooms fade, leave the seed pods on the stems; they’ll self-sow for next year’s display. I snip only the spent flowers if I want to collect seeds for sharing.
Watch for powdery mildew in humid summers—this shows as white dust on leaves. If you see it, space plants 6 inches farther apart to improve airflow. Deadhead only if you’re harvesting seeds; otherwise, enjoy the whimsical seed pods that sway in the breeze.
⏰ Step 4: Collect Seeds for Next Season (Optional)
When seed pods turn brown and papery (usually 6-8 weeks after flowering), snip them off with clean scissors. Lay them on a paper towel in a dry, shaded spot for 1-2 weeks to fully dry. Gently rub the pods between your fingers to release the seeds—store them in a paper envelope in a cool, dark place until spring.
Nigella seeds stay viable for 3-4 years, so you’ll never need to buy more. Here’s the thing—these seeds are not for cooking (they’re toxic if ingested), but their ornamental value is unbeatable. Plant a few extra each year, and you’ll have a self-sustaining display for decades.
Tips & tricks for perfect nigella seeds planting
Here's what I learned after growing nigella for years—these small details make all the difference between a patchy display and a lush, self-seeding garden.
Soil Preparation Secret: In Step 1, don't just add compost—think about texture. I like to sift in a handful of coarse sand along with the perlite (1 part perlite to 3 parts soil) to create that perfect Mediterranean-like drainage. This mimics their natural habitat and prevents the soil from becoming compacted over time. The goal is soil that feels like a dry sponge—not too dense, not too loose.
Timing Tip for Germination: The 2-4 week germination window in Step 2 can feel like forever, but there's a trick: if your soil stays consistently moist (not soggy) and temperatures are above 60°F, germination happens faster. I've found that covering the area with a lightweight row cover speeds things up by about a week without smothering the delicate seedlings. Just remove it once sprouts appear!
Powdery Mildew Prevention: In Step 3, when you spot that white dust on leaves, don't just space plants farther apart—also consider morning watering. Wet leaves in the evening create perfect conditions for powdery mildew to thrive. Watering in the morning gives leaves time to dry completely, and I've found that adding a thin layer of mulch around plants helps keep humidity at bay while retaining moisture.
Seed Collection Hack: For Step 4, here's a pro move: instead of waiting for pods to turn completely brown, watch for when they start to split open naturally. This usually happens about 6-8 weeks after flowering, but I've learned to harvest them just as they're starting to crack—this prevents the seeds from scattering all over your garden. Store them in envelopes with a few silica gel packets to keep them extra dry.
Pro Tips for Nigella Seeds Planting
- Here's what I learned after growing nigella for years—these small details make all the difference between a patchy di...
- Soil Preparation Secret: In Step 1, don't just add compost—think about texture. I like to sift in a handful of coarse...
- Timing Tip for Germination: The 2-4 week germination window in Step 2 can feel like forever, but there's a trick: if ...
Frequently asked questions
Got questions about growing nigella seeds? You’re not alone! Here are answers to the most common queries—from timing to troubleshooting—to help you cultivate those delicate, lace-like blooms with confidence.
When is the best time to plant nigella seeds?
Nigella seeds thrive in cool weather, so plant them early spring (as soon as soil is workable) or late summer/early fall for a second flush of blooms. They’re frost-tolerant, so don’t rush—wait until nighttime temps stay above 40°F (4°C). For year-round blooms, succession plant every 3–4 weeks!
Do nigella seeds need full sun, or can they grow in partial shade?
While nigella prefers full sun (6+ hours daily) for the most vibrant blooms, they’re surprisingly adaptable. In partial shade (4–6 hours of sun), expect slightly smaller flowers but still plenty of production. Just avoid deep shade—this self-seeding annual needs light to germinate and grow vigorously.
Why aren’t my nigella seeds germinating? Troubleshooting tips!
If your seeds aren’t sprouting, check these common issues:
- Too deep: Plant seeds just below the soil surface (max ¼ inch deep)—they need light to germinate!
- Overwatering: Keep soil moist but not soggy; nigella hates "wet feet."
- Cold soil: Wait until soil temps hit 50°F (10°C)+ for consistent germination.
- Old seeds: Nigella seeds lose viability after 2–3 years—start fresh!
Can I grow nigella in containers, or is it better for garden beds?
Nigella loves containers—just use pots at least 6 inches deep with drainage holes. Mix in sandy loam for better aeration, and place them in sunny spots. Containers are perfect for balconies or patios, and you can even grow them as edible garnishes (more on that below!).
Are nigella seeds edible? How can I use them in cooking?
Yes! While the flowers and seeds are edible, they’re best used sparingly—they have a slightly bitter, nutty flavor (like a cross between onion and sesame). Try:
- Sprinkling toasted seeds on salads or soups for crunch.
- Using fresh flowers as a garnish for cocktails or desserts.
- Adding dried seeds to homemade bread or granola for a unique twist.
Wrapping up and next steps
Growing nigella seeds is a rewarding journey that brings fragrant blooms and delicate foliage to your garden with almost no fuss! Whether you’re a seasoned gardener or a beginner, these easy-to-grow seeds thrive in diverse conditions, offering year-round beauty with minimal effort. 🌸
Now that you’re armed with the right tips—from soil prep to harvesting—why not take the next step? Grab your seeds, find a sunny spot, and let nature do the rest. Happy planting, and enjoy the charming results your garden will soon display!