Watering
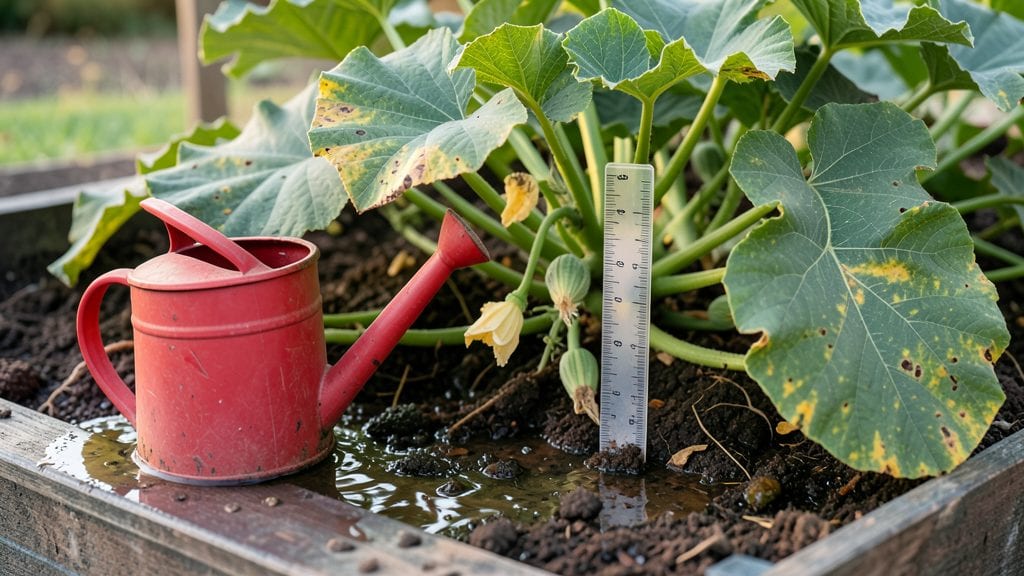
Overwatered squash plants turn your garden into a swamp—yellowing leaves, mushy stems, and fruit that never ripens. 🌱 I’ve watched my own vines collapse from too much love (yes, water is love, but not this much), and I’m here to tell you how to bring them back.
The fix starts with understanding why your soil is drowning the roots, then giving the plants room to breathe again.
The biggest red flags are soggy soil that smells like wet socks and leaves that wilt despite having water. Squash roots need air almost as much as they need moisture, so the first step is cutting back watering to once every 3–4 days (unless it’s scorching hot).
Mix in compost or perlite to break up heavy soil—this helps water drain faster and keeps roots from sitting in puddles.
Within 5–7 days, you’ll see new signs of life: firmer stems, perky leaves, and maybe even a few baby squash forming. The key is consistency—check soil moisture by sticking your finger 1–2 inches deep before watering again.
If it’s damp, wait. If it’s dry, give it a slow drink at the base of the plant, not overhead.
This works for both bush and vining squash, whether you’re growing zucchini, butternut, or pumpkins. The same fixes apply to cucumbers and melons, too. Once you’ve got the watering rhythm down, your plants will reward you with bold, disease-free harvests all season long.
The Hidden Triggers Behind Wet Squash Roots
When your squash plants look more like soggy sponges than thriving vines, the culprit is often watering gone wrong. But why does this happen? Overwatering isn’t just about pouring too much H2O—it’s a chain reaction of environmental and plant-specific factors that create the perfect storm for root stress.
Let’s break down the root causes (pun intended) behind why your squash plants might be drowning in their own downpour.
Squash plants thrive in well-draining soil, but if your garden beds or containers lack proper drainage, water pools around the roots instead of seeping away. Here’s why this matters:
- Compacted Soil: Heavy clay or tightly packed soil acts like a sponge, trapping water and cutting off oxygen. Roots suffocate because they can’t breathe—literally. Think of it like trying to breathe through a wet towel.
- Improper Container Drainage: Pots without drainage holes or those lined with plastic (which blocks airflow) turn into water traps. Even "self-watering" containers can over-saturate if not monitored.
- Low-Lying Planting Areas: Squash planted in depressions or near slopes collects runoff, creating localized puddles. This is especially true after heavy rain or frequent watering.
Science Note: Roots need aeration—oxygen levels drop below 10% in waterlogged soil, triggering anaerobic bacteria that produce toxic compounds like ethanol (yes, like in beer) and hydrogen sulfide, which poison the plant.
You might think squash plants—being heavy drinkers—need constant hydration, but their roots are actually sensitive to excess moisture. Here’s how overwatering sneaks up on you:
- Ignoring Soil Moisture Tests: Sticking your finger 1–2 inches into the soil is the gold standard. If it’s damp, hold off! Water only when the top layer feels dry to the touch.
- Watering on a Schedule: Squash plants need consistent moisture, but that doesn’t mean daily drenching. Overhead sprinklers or automatic timers can lead to chronic sogginess, especially in humid climates.
- Using the Wrong Water Volume: A deep, infrequent watering (1–2 inches per week) encourages strong root growth. Light, frequent showers keep the surface wet but starve roots deeper down.
Pro Tip: 💡 Use a moisture meter or the "squeeze test"—grab a handful of soil; if water drips out, you’ve overdone it.
Not all gardens are created equal, and your local climate can either save or sabotage your squash. Here’s how weather factors in:
| Factor | How It Causes Overwatering | Solution |
|---|---|---|
| High Humidity | Air already saturated with moisture means soil stays damp longer, tricking you into thinking it needs more water. | Reduce watering by 30–50% and mulch to prevent evaporation. |
| Frequent Rainfall | Heavy rains can deliver 2+ inches of water in a day, overwhelming even well-draining soil. | Use raingardens or elevated beds to divert excess water. |
| Cool Temperatures | Squash roots grow slower in <60°F soil, making them more susceptible to rot if watered normally. | Cut back on watering in spring/fall and focus on mulching. |
Science Note: Squash plants are Cucurbitaceae—they’re adapted to drought-tolerant conditions in their native regions. Overwatering mimics a tropical monsoon, which their roots aren’t evolutionarily equipped to handle.
Not all soil is equal, and squash roots are picky about their environment. Here’s how your garden’s makeup might be contributing to the problem:
- High Organic Matter Without Structure: Soil packed with compost or peat holds water like a sponge but lacks the sand/gravel ratio needed for drainage. Aim for a loamy texture (40% sand, 40% silt, 20% clay).
- Freshly Amended Beds: Newly tilled or heavily fertilized soil can become water-repellent due to disrupted soil microbes. Wait 4–6 weeks after amending before planting.
- Shallow Root Systems: If your squash plants are young or stressed (from pests/disease), their roots haven’t developed deep enough to handle excess water.
Action Step: 🔥 Conduct a jar test to check drainage: Fill a jar with your garden soil and water it. If water sits at the top after 2 hours, amend with perlite or coarse sand.
Fixing Overwatered Squash Plants
Now that you know the signs and causes of overwatered squash, it’s time to take action! The good news is that with the right steps, your plants can bounce back—and you can still enjoy a bountiful harvest.
Below, we’ll break down practical fixes for each common cause, along with prevention tips to keep your squash thriving.
If your squash plants are sitting in soggy soil, the first step is to stop watering immediately and let the roots dry out. Overwatering creates an oxygen-deprived environment, which can lead to root rot and fungal diseases.
🔥 Step 1: Assess the Soil
- Gently press your finger 1-2 inches deep into the soil. If it feels damp or sticky, it’s still too wet.
- If the soil smells musty or rotten, root rot may already be setting in.
👨🍳 Step 2: Improve Drainage
- Loosen compacted soil around the base of the plant with a fork or trowel to help excess water escape.
- If your garden bed has poor drainage, consider raising the plant slightly by adding a mound of soil or using containers with drainage holes.
🥘 Step 3: Water Only When Needed
- Wait until the top 1-2 inches of soil are dry before watering again.
- Water deeply but less frequently—aim for 1-1.5 inches per week, adjusting for rain.
- Water at the base (not the leaves) to prevent fungal issues.
✨ Prevention Tip:
Use a moisture meter or the finger test to monitor soil moisture. If you’re unsure, underwater slightly—squash plants are more forgiving of drought than overwatering.
If your squash is in heavy clay soil or small containers without drainage, water can pool around the roots, suffocating them.
🔥 Step 1: Amend the Soil
- Mix in compost or well-rotted manure to improve drainage and aeration.
- For clay-heavy soil, add sand or perlite to create better airflow.
🍳 Step 2: Repot if Using Containers
- If your squash is in a small or poorly draining pot, transplant it to a larger container (at least 12 inches deep) with drainage holes.
- Use a lightweight potting mix designed for vegetables.
🎯 Prevention Tip:
Before planting, test your soil’s drainage by digging a hole, filling it with water, and timing how long it takes to drain. If it takes more than 30 minutes, amend the soil.
If your area has frequent heavy rains or an overzealous irrigation system, your squash may be drowning before you even notice.
🔥 Step 1: Adjust Watering Schedule
- Pause watering during heavy rain periods.
- Use a rain gauge to track weekly rainfall and adjust accordingly.
👨🍳 Step 2: Install Drainage Solutions
- French drains or swales (shallow trenches) can redirect excess water away from plant beds.
- For containers, elevate them on a stand or use self-watering pots with overflow holes.
🥘 Step 3: Use Mulch to Regulate Moisture
- Apply 2-3 inches of straw, wood chips, or shredded leaves around the base (but not touching the stem) to:
- Reduce evaporation
- Keep soil temperature stable
- Prevent water from pooling
💡 Pro Tip:
If you’re using drip irrigation, check for leaks or misaligned emitters that could be overwatering specific areas.
If your squash plants show yellowing leaves, wilting, or mushy stems, they may need emergency care.
🔥 Step 1: Trim Affected Leaves
- Use sterilized pruners to remove yellow or blackened leaves to prevent further spread of disease.
- Do not compost diseased plant material—discard it in the trash instead.
🍳 Step 2: Apply Fungicide (If Needed)
- If you suspect powdery mildew or bacterial rot, spray with a copper-based fungicide or neem oil solution (1 tsp per quart of water).
- Reapply every 7-10 days until the issue clears.
🥘 Step 3: Boost Plant Health
- Fertilize lightly with a balanced, water-soluble fertilizer (like 10-10-10) to help recovery.
- Avoid nitrogen-heavy fertilizers, which can encourage more leaf growth at the expense of root health.
✨ Prevention Tip:
Rotate crops—don’t plant squash in the same spot year after year to prevent soil-borne diseases from building up.
Reviving overwatered squash takes time, but with the right adjustments, your plants can recover. Monitor closely, adjust watering habits, and keep an eye out for improvement—healthy green leaves and strong vines will return!
Would you like a quick checklist for monitoring progress? Let us know in the comments! 🌱💧
Frequently asked questions
Why do my squash leaves turn yellow when I water them regularly?
Yellowing leaves often signal overwatering, but they can also mean nutrient deficiencies or fungal issues. Check the soil first—if it’s soggy and smells musty, you’re drowning the roots. Squash plants prefer dry topsoil between waterings. Try the finger test: stick your finger 1-2 inches deep—if it’s damp, wait before watering again.
Can I save my squash plants if the stems feel mushy?
Mushy stems are a red flag for root rot, but you can still try to revive them. Stop watering immediately and improve drainage by loosening compacted soil or repotting in fresh, well-draining mix. Prune any blackened leaves and apply a copper fungicide if you see signs of disease. Recovery takes 5-10 days of dry conditions.
How do I know if my squash plants need more water or less?
Use the finger test: press your finger 1-2 inches deep into the soil. If it feels dry, water deeply at the base. If it’s still damp, wait. Squash plants are drought-tolerant—underwatering is less risky than overwatering. Also check for wilting leaves (underwatered) vs. yellowing, mushy stems (overwatered).
Will mulch help prevent overwatering in my squash patch?
Yes! Mulch regulates moisture by reducing evaporation and preventing water from pooling around stems. Use 2-3 inches of straw or wood chips, keeping it 2 inches away from the plant base to avoid rot. It also keeps soil temperature stable and suppresses weeds—just avoid thick layers that trap too much moisture.
Can I use the same fix for overwatered cucumbers or melons?
Cucumbers, melons, and squash are all in the Cucurbitaceae family and share similar watering needs. The same rules apply: well-draining soil, infrequent deep watering, and proper drainage. Just adjust for size—larger plants like pumpkins need more water, while bush varieties like zucchini prefer consistent moisture without soggy soil.