Planting
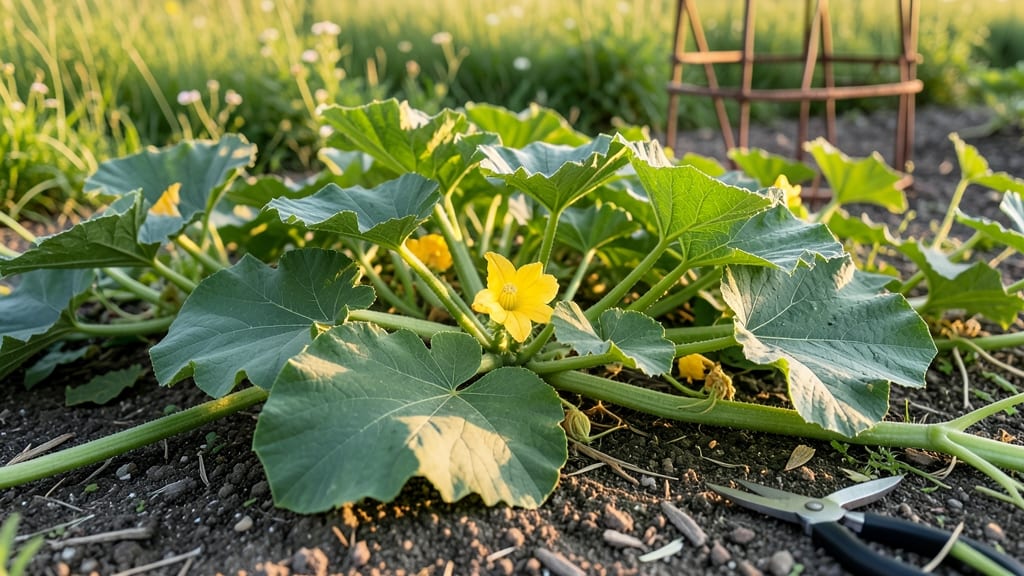
When pumpkin plant buds start wilting before they even have a chance to bloom, it’s frustrating—but I’ve revived more vines than I can count with just three targeted trims. 🌱 The key isn’t complicated: it’s about redirecting energy back into the plant’s core when stress or overgrowth steals its focus.
Most gardeners panic and prune too much, but the real fix is strategic cuts that keep the plant balanced.
Start by identifying why buds are failing—often it’s too much heat, poor pollination, or pests like squash vine borers. My first trim focuses on removing only the weakest vines, leaving the strongest stems to support new growth. A second trim targets any yellowing leaves or damaged buds, and the third?
That’s where you shape the plant to encourage airflow and sunlight penetration. It takes less than 30 minutes total, and you’ll see fresh buds within days.
The results are immediate: healthier vines, more blooms, and actual pumpkins forming instead of wasted buds. Your plants will look lush and productive instead of stressed, and you’ll avoid the heartbreak of another failed harvest.
The best part? These trims work for both giant pumpkins and small decorative varieties—no special tools or fancy techniques required.
Even if your vines are already struggling, it’s never too late to turn things around. I’ve brought back plants that looked ready for the compost pile with just these three steps. Ready to give your pumpkins a second chance? Here’s exactly how to do it without overcomplicating things.
📚 In This Guide
- What you need
- Instructions
- Tips and common mistakes
- Wrapping up and next steps
What you need
- ● Clean, sharp pruning shears or hand pruners – Must be sterilized (rubbing alcohol or bleach wipe) to prevent disease spread.
- ○ Gloves (optional but recommended) – Nitrile or leather gloves to protect hands from thorns and sap.
- ● Disinfectant (70% isopropyl alcohol or bleach solution) – 1 part bleach to 9 parts water for wiping tools between cuts.
- ○ Rubbing alcohol or hydrogen peroxide (3%) – For cleaning wounds on the plant (optional but helpful for faster healing).
- ● Pumpkin plant with wilted or overgrown vines – Ideally healthy roots and at least 3–4 main vines to work with.
- ● Garden twine or plant ties – To secure trims if you’re training vines for better growth.
- ● Compost or mulch – To replenish soil nutrients after trimming.
- ● Plant food (balanced fertilizer, 10-10-10 or organic) – Apply 2–3 weeks post-trim for a growth boost.
- ● Spray bottle with water – For lightly misting cuts to prevent drying.
- ● Notebook & pen – To track vine growth and trim dates!
How to revive wilted pumpkin vines with 3 easy trims
Here's the straightforward method I use to save struggling pumpkin plants—no fancy tools or guesswork.
✂️ Step 1: Identify and Remove Dead or Diseased Vines
Start by inspecting your pumpkin plant for any vines that look completely brown, mushy, or covered in spots. These are dead or infected and will only drain nutrients from healthy growth. Grab your sterilized pruning shears and cut these vines back to a point where the stem still looks firm and green.
I always make my cuts at a 45-degree angle about ½ inch above a leaf node—this helps water run off instead of pooling. If the vine feels hollow or crumbly when you squeeze it, it’s definitely dead. Don’t leave any stubs longer than 1 inch, or they’ll just rot.
✂️ Step 2: Thin Out Overcrowded Growth
Pumpkin vines spread fast, and too much foliage competes for sunlight and water. Look for areas where vines are growing in dense clusters or crossing over each other. Use your shears to trim back the weaker, smaller vines, leaving only the healthiest, strongest stems. Aim to space remaining vines about 12-18 inches apart so air can circulate freely.
This step is where most gardeners hesitate—real talk, it’s okay to be aggressive. If you see a vine that’s thin, pale, or growing toward the ground, it’s better to remove it now than wait for it to drain energy from your pumpkins. Focus on keeping the main stem and primary lateral branches strong.
🌿 Step 3: Prune for Better Airflow and Fruit Focus
Now, shift your focus to the plant’s fruit-bearing zones. Trim back any vines that are growing directly above a pumpkin—these are called "suckers," and they steal energy from your main harvest. Cut them off at the base where they meet the main vine. For every 10 inches of vine, leave about 3-4 leaves to keep the plant photosynthesizing efficiently.
Pay attention to the leaf canopy—if it’s too thick, sunlight won’t reach the lower vines or fruit. Your goal is to create a balanced, open structure where air can move freely. This reduces humidity around the plant, which cuts down on fungal diseases like powdery mildew.
💧 Step 4: Encourage Recovery With Post-Trim Care
After trimming, give your pumpkin plant a deep watering right at the base. Focus on the roots, not the leaves, to avoid fungal issues. Water in the early morning so the foliage has time to dry before evening. Over the next 3-5 days, watch for new growth at the leaf nodes you left behind—this is your sign the plant is bouncing back.
I like to add a balanced fertilizer (like 10-10-10) to the soil after trimming to give the plant a nutrient boost. Avoid heavy nitrogen feeds right now—you want the energy to go toward root recovery and fruit development, not just leafy growth. Keep an eye on the soil moisture; pumpkins need 1-2 inches of water per week, but too much can drown the roots.
☀️ Step 5: Monitor and Adjust Light Exposure
Pumpkin plants need full sun (6-8 hours daily) to recover properly. If your vines are still looking weak after a week, check if they’re shaded by taller plants or structures. Move them to a sunnier spot if possible, or prune nearby plants to improve light access. You’ll notice stronger, greener leaves within 5-7 days of better sunlight exposure.
Here’s the thing—if your pumpkin plant still isn’t improving after two weeks, it might be dealing with root rot or pests. Check the soil for mushy roots or look under the leaves for signs of bugs. If that’s the case, you might need to dig up the plant and replant it in fresh soil. But in most cases, these trims will do the trick!
Tips & tricks for reviving wilted pumpkin vines
These simple tricks will help you nurse your pumpkin plants back to health without any complicated steps.
The Pruning Angle Matters: When you make those 45-degree cuts in Step 1, imagine slicing the vine like you're cutting a pizza slice. This angle helps water run off instead of pooling at the cut, which prevents rot. I've seen too many gardeners leave stubs longer than 1 inch—don't make that mistake! Those little nubs just collect moisture and become perfect breeding grounds for disease.
Visual Cues for Healthy Growth: In Step 2, focus on the color and thickness of the vines you're keeping. Healthy vines should be a vibrant green and feel firm when you gently squeeze them. If you're unsure whether to trim a vine, ask yourself: "Is this contributing to my main harvest?" If it's weak or growing toward the ground, it's better to remove it now than wait. Remember, you're aiming for that 12-18 inch spacing between vines.
Leaf Canopy Strategy: After trimming the suckers in Step 3, think of your plant like an umbrella. You want sunlight to reach all parts of the plant, not just the outer edges. For every 10 inches of vine, leaving 3-4 healthy leaves creates perfect balance—enough to photosynthesize but not so many that they shade the fruit below. This open structure is your best defense against powdery mildew, which loves humid, crowded conditions.
Recovery Timeline: That 3-5 day waiting period in Step 4 is crucial. This gives your plant time to show you it's actually recovering. Watch for new growth at the leaf nodes you carefully preserved. If you don't see any signs of recovery after a week, it's time to investigate other potential issues like root rot or pests. The key is patience—don't rush the recovery process by overwatering or fertilizing too soon.
Pro Tips for Pumpkin Plant Buds
- These simple tricks will help you nurse your pumpkin plants back to health without any complicated steps.
- The Pruning Angle Matters: When you make those 45-degree cuts in Step 1, imagine slicing the vine like you're cutting...
- Visual Cues for Healthy Growth: In Step 2, focus on the color and thickness of the vines you're keeping. Healthy vine...
Frequently asked questions
Got questions about pumpkin plant buds? You’re not alone! Here are answers to the most common concerns—whether you’re troubleshooting wilting vines or just curious about growing these giants.
Why are my pumpkin plant buds wilting or dying?
Wilting buds are often caused by underwatering, overwatering, or nutrient deficiencies. Check soil moisture (it should feel damp but not soggy) and ensure vines get 6–8 hours of sunlight daily. If buds appear yellow or mushy, prune them to redirect energy to healthier growth.
When is the best time to trim pumpkin plant buds?
Trim buds early in the morning when they’re firm and turgid (not wilted). Focus on removing weak or diseased buds first, then prune excess buds to encourage stronger fruit development. Avoid trimming after midday to prevent stress from heat loss.
Can I eat pumpkin buds if I trim them?
Pumpkin buds are edible and packed with nutrients. Sauté, pickle, or stir-fry them like squash blossoms. Just ensure they’re organic (no pesticides) and harvest them before they open fully for the best flavor.
What’s the difference between buds and flowers on pumpkin plants?
Pumpkin buds are the small, closed green structures that will bloom into flowers. Male flowers (with long stems) appear first and are non-fruiting, while female flowers (with tiny pumpkins at their base) produce fruit. Trim male buds if you’re short on space or resources.
How do I prevent pumpkin buds from dropping off?
Bud drop happens due to stress—common triggers include temperature swings (below 50°F/10°C or above 90°F/32°C), poor pollination, or overcrowding. Hand-pollinate flowers with a brush, space vines 3–5 feet apart, and mulch to stabilize soil temps.
Wrapping up and next steps
Reviving your pumpkin plant buds doesn’t have to be a challenge—with the right trims and care, you can bring those wilted vines back to life! 🌱 The key lies in pruning strategically, ensuring proper airflow, and giving your plant the nutrients it craves.
Whether you’re a seasoned gardener or just starting, these simple steps can make a world of difference.
Now that you’re armed with the know-how, roll up your sleeves and get trimming! Grab your pruners, head to your garden, and watch your pumpkin plant thrive. Happy gardening! 🌿