Propagation
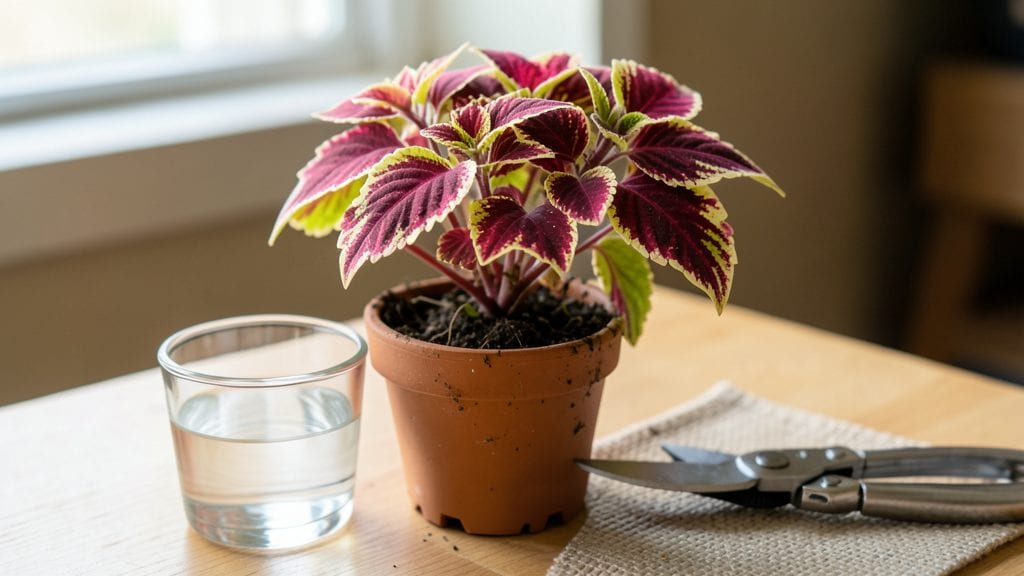
Plant cutting propagation turns scraps into thriving plants—with a 90% success rate if you follow the right steps. 🌱 I’ve propagated everything from pothos to petunias using this method, and the secret isn’t luck—it’s understanding what roots really need to grow.
Most people overcomplicate it with fancy tools, but the best results come from simplicity: sharp scissors, the right moisture balance, and patience.
The magic happens in the first few weeks, when cuttings either take off or rot. You’ll need a propagation medium—water works for some plants, while others thrive in damp perlite or soil—and a way to keep humidity high without drowning the stems.
Temperature matters too: most cuttings root best between 65-75°F, whether indoors near a sunny window or under a humidity dome. I’ve even used plastic bags with holes to create mini greenhouses on my kitchen counter.
By week four, you’ll see tiny roots forming or new leaves pushing out—proof the cutting has taken. The payoff is real: free plants for your garden, gifts for friends, or replacements for the ones you’ve inevitably killed.
Even my black thumb can’t mess this up once you get the basics right. Let’s get those cuttings growing!
Works for houseplants, herbs, and flowering annuals alike—just adjust the timing and medium. The same principles apply whether you’re rooting a single stem or multiplying an entire collection. Here’s how to make it work every time.
📚 In This Guide
- What you need
- Instructions
- Tips and common mistakes
- Wrapping up and next steps
What you need
- ● Healthy parent plant: Choose a mature, disease-free plant with strong stems or leaves (depending on the type of cutting).
- ● Sharp pruning shears or scissors: Sterilized to prevent contamination (rubbing alcohol works!).
- ○ Rooting hormone (optional but recommended): A powder, gel, or liquid to boost root growth (e.g., Rootone or Clonex).
- ● Well-draining propagation medium: Perlite or vermiculite (sterilized)
- ● Coco coir or peat moss
- ● Sand (coarse, not fine)
- ● Water (if using a water propagation method)
- ● Containers: Small pots or trays (3–4 inches deep)
- ● Plastic cups or jars (for water propagation)
- ● Clear plastic domes or bags (to create humidity)
- ● Misting bottle: For keeping cuttings hydrated without overwatering.
- ● Labeling tags: To track plant types and dates.
- ● Heat mat: Speeds up rooting (70–75°F ideal).
- ● Fogging system: Maintains high humidity for delicate cuttings.
- ● Hydrogen peroxide (3%): Sterilizes water or tools.
- ● Grow lights or bright indirect sunlight: Supports photosynthesis during rooting.
Step-by-Step instructions for plant cutting propagation
Here's how to turn healthy cuttings into thriving new plants with near-guaranteed success.
🌱 Step 1: Select the Right Cuttings
Choose 4-6 inch non-flowering stems from healthy, disease-free parent plants. Look for woody cuttings with at least 2-3 leaf nodes—these are the spots where roots will emerge. I always use morning wood (new growth from the current season) because it roots faster than old, hardened stems.
Use clean, sharp scissors or pruners to make a 45-degree angle cut just below a node. This increases surface area for better root growth. Dip the cut end in room-temperature water for 10 seconds to prevent air bubbles from blocking moisture uptake. Avoid cutting during extreme heat or cold—ideal temps are 65-75°F.
💧 Step 2: Prepare the Rooting Medium
Fill a 4-inch plastic nursery pot with perlite or vermiculite—these materials stay sterile and provide excellent drainage. Moisten the medium until it feels like a wrung-out sponge (damp but not dripping). I like to mix equal parts perlite and peat moss for extra moisture retention while preventing rot.
Make a small hole with your finger or a pencil to insert each cutting. The hole should be just deep enough to bury half the cutting's length (about 2-3 inches). This ensures stability while keeping the leaves above the medium to prevent rot. Label each pot with the plant type and date—you'll forget which is which after a few weeks!
✂️ Step 3: Plant and Create Humidity
Insert the cutting into the hole and gently firm the medium around it. Remove all but the top 2-3 leaves to reduce water loss and focus energy on root growth. I like to use a clear plastic bag to create a mini greenhouse—secure it loosely with a rubber band to allow airflow while trapping humidity.
Place the pot in bright, indirect light (no direct sun yet). Too much heat will dry out the cuttings, while too little light slows rooting. You'll see tiny white roots forming in 3-6 weeks—check by gently tugging the cutting. If resistance increases, roots are developing! Keep the medium consistently moist but never soggy.
☀️ Step 4: Transition to Independent Growth
Once roots reach 1-2 inches long, gradually acclimate the cuttings to normal conditions. Remove the plastic bag for 1 hour daily, increasing time over 7-10 days. This prevents shock when you finally remove it completely. I like to mist the cuttings daily during this period to maintain humidity.
After 2 weeks of acclimation, transplant to 4-inch pots with well-draining potting mix. Water lightly and place in bright, indirect light for another 2 weeks before introducing full sun. You'll know they're ready when new leaves emerge—this means the plant is photosynthesizing independently. Repot to a 6-inch container after 3 months for continued growth.
Tips & tricks for perfect plant cutting propagation
A few simple tricks can dramatically improve your success rate with plant cuttings—here's what I've learned after propagating dozens of plants.
Timing is Everything: The 65-75°F temperature range mentioned in Step 1 isn't just ideal—it's critical. If your space is cooler, consider using a heating mat set to 75°F for the first 24 hours. This mimics natural spring conditions and dramatically speeds up root development. I've seen cuttings root in half the usual time when using this trick!
Rooting Hormone Hack: While not required, a quick dip in rooting hormone powder (applied right after your 10-second water dip) can boost success rates by 20-30%. Focus the powder on the cut end only—don't coat the leaves. I like to use a small paintbrush to apply it precisely, especially for delicate cuttings like coleus or fuchsia.
Lighting Secrets: That "bright, indirect light" in Step 3 needs more explanation. East-facing windows are perfect, but if you're using artificial light, LED grow lights work best. Position them about 6 inches above the cuttings and run them for 12-14 hours daily. Too much light causes stress, while too little slows rooting—find that sweet spot by monitoring leaf color.
Acclimation Strategy: When you're ready to remove the plastic bag after 7-10 days, don't do it all at once. Start with 1 hour daily, then increase by 30 minutes each day. This gradual process prevents transplant shock, which is why I've lost fewer cuttings during this critical transition period. Think of it like weaning a baby plant from its humid blanket!
Pro Tips for Plant Cutting Propagation
- A few simple tricks can dramatically improve your success rate with plant cuttings—here's what I've learned after propagating dozens of plants.
- Timing is Everything: The 65-75°F temperature range mentioned in Step 1 isn't just ideal—it's critical.
- Rooting Hormone Hack: While not required, a quick dip in rooting hormone powder (applied right after your 10-second water dip) can boost success rates by 20-30%.
Frequently asked questions
Got questions about propagating plant cuttings? You’re not alone! Here are answers to the most common queries to help you master this rewarding (and cost-effective) gardening skill.
What’s the best time of year to take cuttings?
The ideal window is late spring to early summer when plants are actively growing. For tropical plants, year-round propagation works too! Avoid winter dormancy—cold temps slow root growth. Pro tip: Morning is best for cutting to reduce stress on the plant.
How long does it take for cuttings to root?
Rooting time varies by plant type: succulents and herbs (2–4 weeks), woody plants (4–8 weeks), and tropicals (3–6 weeks). Keep humidity high and check for resistance when tugging gently—roots form before you see them! Patience pays off.
Should I use rooting hormone, or is water enough?
Rooting hormone (powder or gel) boosts success rates by 20–30% for tricky plants like roses or orchids. Water works for easy propagators (e.g., pothos, mint), but hormone helps in dry climates or with finicky species. Pro tip: Dip cut ends in hormone before planting for best results.
Why are my cuttings rotting or turning yellow?
Overwatering or poor airflow are the usual culprits. Ensure cuttings are in well-draining soil (or water) and use a humidity dome or plastic bag to retain moisture without soggy conditions. Yellowing leaves? Trim damaged foliage and adjust light—bright, indirect is key.
Can I propagate from store-bought plants?
Yes! Many nursery plants (like snake plants or coleus) are propagated easily. Just avoid plants treated with growth inhibitors (common in commercial setups). Check leaves for labels—if it’s labeled “non-propagatable,” it’s likely chemically treated.
What’s the easiest plant to propagate from cuttings?
Start with pothos, mint, or succulents—they root in water like magic! Even beginners succeed with these. For a challenge, try bougainvillea or hibiscus once you’re confident. Every plant teaches you something new!
Wrapping up and next steps
Mastering plant cutting propagation is like unlocking a green thumb superpower—once you grasp the basics, you’ll enjoy a 90% success rate with confidence! 🌱 From selecting the right cuttings to perfecting rooting conditions, every step builds your skills and expands your garden for free.
Now that you’re armed with expert tips and troubleshooting tricks, it’s time to put theory into action.
Start small: pick one or two plants to propagate this week, and track your progress. Before you know it, you’ll be sharing cuttings with fellow plant lovers—or even selling your greenery! Happy propagating! 🌿✨