Orchid Care
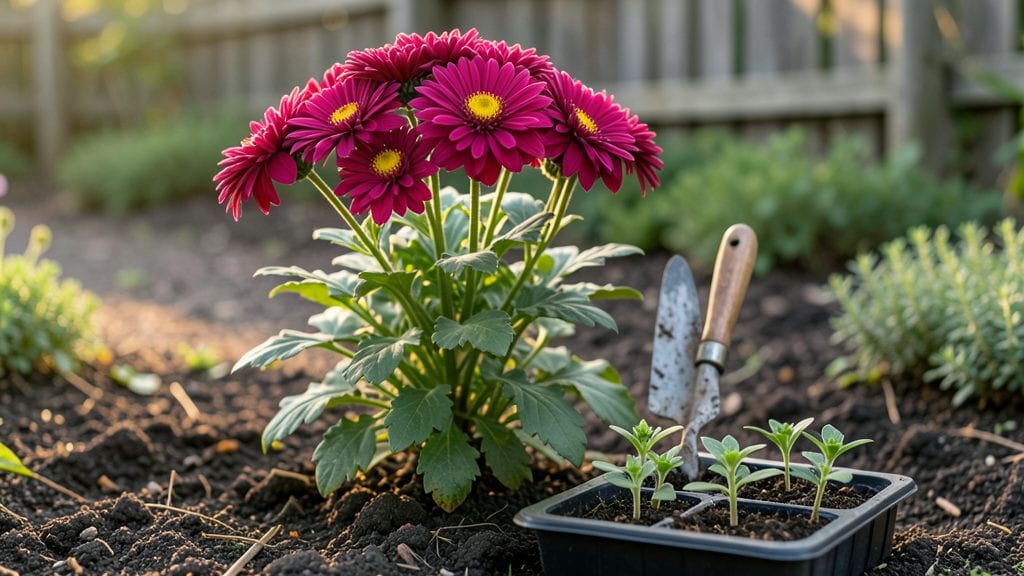
Planting chrysanthemums outdoors transforms your garden into a late-season explosion of color when most flowers have called it quits. 🌻 I’ve planted them every fall for years, and the secret to their bold, long-lasting blooms isn’t just timing—it’s giving them the right start.
The best time to plant depends on your climate, but most gardeners wait until late summer or early fall, when soil is still warm but nights cool down. This gives roots time to establish before winter, so they burst into flower next year.
You’ll need a spot with at least 6 hours of sunlight and well-draining soil—chrysanthemums hate soggy roots. Amend heavy clay with compost or sand, and space plants 18-24 inches apart for good airflow.
If you’re using container-grown plants, dig a hole twice as wide as the root ball to encourage spreading. Water deeply after planting, then keep soil moist (but not soggy) for the first two weeks—this is when roots are most vulnerable.
What you’ll end up with is a garden that stays vibrant well into October, with flowers in every shade from white to deep purple. The key is consistency: once established, chrysanthemums are low-maintenance, but they reward regular deadheading (snipping spent blooms) and a light fertilizer in early spring.
Even in small spaces, they deliver months of color when most gardens have gone quiet.
Works just as well in garden beds or large containers—just use pots with drainage holes and well-draining potting mix. Here’s how to make it happen without the guesswork.
📚 In This Guide
- What you need
- Instructions
- Tips and common mistakes
- Wrapping up and next steps
What you need
- ● Chrysanthemum plants: 3–5 healthy nursery-grown plants (choose varieties suited to your climate, like ‘Bonanza’ or ‘Daisy’ types).
- ● Potting soil or garden soil: 1–2 bags of well-draining potting mix (or amend garden soil with compost for fertility).
- ● Organic fertilizer: A balanced 10-10-10 NPK or slow-release granular fertilizer (½ cup per plant).
- ● Mulch: 2–3 inches of straw, wood chips, or shredded leaves to retain moisture and regulate soil temp.
- ● Garden trowel or shovel: For digging holes (6–8 inches deep).
- ● Gloves: A pair of gardening gloves to protect your hands.
- ● Watering can or hose: With a gentle spray nozzle for even watering.
- ○ Pruning shears (optional): To trim dead foliage or shape plants after planting.
- ○ Plant tags (optional): To label varieties and track care needs.
- ● Sunlight: A spot with full sun (6+ hours/day) or partial shade (4–6 hours) (varies by variety).
- ● Weather timing: Plant after the last frost date in spring or early summer (or late summer for fall blooms).
- ● Soil pH: Slightly acidic to neutral (6.0–7.0) (test with a soil kit if unsure).
- ● Drainage check: Ensure your planting area isn’t soggy—chrysanthemums hate waterlogged roots!
Step-by-Step instructions for planting chrysanthemums outdoors
Here’s how I plant chrysanthemums for vibrant, long-lasting blooms that thrive from early summer to frost.
🪴 Step 1: Choose the Right Location and Prepare the Soil
Chrysanthemums thrive in full sun—at least 6 hours daily—so pick a spot with minimal shade. I avoid low-lying areas where cold air settles, as these plants are frost-sensitive once established. Test the soil first: dig a 6-inch deep hole and check drainage. If water pools after 30 minutes, amend with 2-3 inches of coarse sand or perlite to improve aeration.
Loosen the soil to a depth of 12 inches with a garden fork, breaking up any compacted layers. Chrysanthemums prefer slightly acidic to neutral soil (pH 6.0-7.0). If your soil is heavy clay, mix in 2-3 inches of compost to improve structure and fertility. The goal is well-draining, nutrient-rich soil that holds moisture without becoming waterlogged.
🌱 Step 2: Plant at the Correct Depth and Spacing
Dig holes twice as wide as the root ball and 1 inch deeper than the container’s base. Gently remove the plant from its pot and tease the roots outward if they’re circling. Place the chrysanthemum in the hole so the top of the root ball sits ½ inch below soil level. This ensures stability and prevents stem rot from sitting too low.
Space plants 18-24 inches apart for dwarf varieties and 24-36 inches apart for standard types. Crowding leads to poor airflow, which invites fungal diseases like powdery mildew. I like to plant in a slight mound if my soil drains poorly—this lifts roots above potential waterlogging. Backfill the hole with soil, pressing lightly to eliminate air pockets, but avoid compacting the mix.
💧 Step 3: Water Deeply and Mulch for Retention
Water each newly planted chrysanthemum with 1 gallon of water to settle the soil and encourage root contact. I use a watering wand to direct moisture evenly around the base, avoiding the leaves. After watering, let the soil surface dry slightly before applying a 2-3 inch layer of mulch. Organic options like shredded bark or straw work best—they suppress weeds, retain moisture, and gradually enrich the soil as they decompose.
Keep the mulch 2 inches away from the plant stem to prevent rot. Mulching also moderates soil temperature, protecting roots during heatwaves and early frosts. Water deeply every 2-3 days until the plants are established, checking that the top 2 inches of soil feel dry before watering again. Overwatering is the fastest way to smother chrysanthemum roots.
☀️ Step 4: Fertilize and Monitor for Healthy Growth
Wait 4-6 weeks after planting before applying fertilizer to let roots recover. I use a balanced, slow-release fertilizer (10-10-10) at half strength, spreading granules evenly around the base and watering them in. Chrysanthemums are heavy feeders, so I repeat this every 4-6 weeks during the growing season. Avoid high-nitrogen fertilizers—they promote leafy growth at the expense of blooms.
Watch for signs of stress: yellowing leaves often mean overwatering or nutrient deficiency, while brown edges signal underwatering or salt buildup from fertilizer. Pinch back the tips of new growth when plants are 6-8 inches tall to encourage bushier, more floriferous plants. This step is crucial—skipping it leads to leggy stems and fewer blooms.
⏰ Step 5: Time Pruning for Season-Long Blooms
Deadhead spent blooms regularly to prolong flowering. I use clean, sharp pruners to cut back to the nearest set of leaves or bud. This redirects the plant’s energy into new growth and blooms instead of seed production. For fall-blooming varieties, I also cut back stems by ⅓ their height in early summer. This encourages a second flush of flowers and keeps plants compact.
In late summer, reduce watering slightly to harden off plants for fall. Chrysanthemums are surprisingly cold-hardy once established, but young plants may need winter protection. I mound extra soil or mulch around the base in Zone 5 or colder to insulate roots. With proper care, these plants will reward you with bold, long-lasting color well into autumn.
Tips & tricks for perfectly planted chrysanthemums
These garden-tested strategies will help you avoid common pitfalls and maximize your chrysanthemums' potential for vibrant, long-lasting blooms.
Soil Test First: Before amending your soil in Step 1, grab a simple soil test kit from your local garden center. Chrysanthemums thrive in pH 6.0-7.0 soil, and knowing your exact pH prevents guesswork. If your soil tests too acidic, add 2-3 inches of lime to the bottom of each planting hole—this creates an ideal root zone immediately. I've seen plants struggle for years in untested soil before realizing a simple pH adjustment was all they needed.
Root Ball Prep: In Step 2, when removing chrysanthemums from their containers, gently squeeze the root ball to loosen any circling roots. This prevents girdling as the plant grows. Pro tip: If you're planting multiple varieties, keep track of each type by wrapping a colored tag around the stem before planting—this makes future pruning and care much easier, especially when deadheading in Step 5.
Watering Wisdom: The 1 gallon of water in Step 3 should be applied slowly to prevent runoff. I use a watering wand because it gives me precise control over where the water goes—directing it to the root zone while avoiding the leaves prevents fungal diseases. After watering, I always check for standing water in the hole. If it pools, I add another handful of perlite to improve drainage before backfilling.
Fertilizer Timing: The 4-6 week waiting period before fertilizing in Step 4 gives roots time to establish without competing with the plant's energy needs. I've found that using a 10-10-10 fertilizer at half strength gives just enough nutrients without overwhelming young plants. For a natural boost, you can substitute a compost tea (brewed from well-aged compost) every 3-4 weeks instead of chemical fertilizer—it's gentler on the plants and improves soil structure over time.
Pro Tips for Planting Chrysanthemums Outdoors
- These garden-tested strategies will help you avoid common pitfalls and maximize your chrysanthemums' potential for vibrant, long-lasting blooms.
- Soil Test First: Before amending your soil in Step 1, grab a simple soil test kit from your local garden center.
- Root Ball Prep: In Step 2, when removing chrysanthemums from their containers, gently squeeze the root ball to loosen any circling roots.
Frequently asked questions
Got questions about planting chrysanthemums outdoors? You’re not alone! Here are some of the most common concerns—and their answers—to help you grow vibrant blooms with confidence.
When is the best time to plant chrysanthemums outdoors?
For most climates, plant chrysanthemums in early spring (after the last frost) or early fall (6–8 weeks before the first frost). This gives roots time to establish before extreme heat or cold. In warmer zones, fall planting is ideal for winter blooms!
Can I plant chrysanthemums in winter?
Not directly! Chrysanthemums hate frost and cold soil. If you must plant in winter, use a greenhouse or cold frame to protect them. Otherwise, wait until spring or fall. Pro tip: Start seeds indoors 8–10 weeks before your last frost for early blooms!
How do I keep pests like aphids or slugs from eating my chrysanthemums?
Pests love chrysanthemums! Prevent them with:
- Neem oil spray (weekly preventive treatment)
- Diatomaceous earth (sprinkle around the base for slugs)
- Row covers (lightweight fabric to block pests early)
- Companion planting (try marigolds—they repel many pests!)
What if my chrysanthemums don’t bloom? How do I fix it?
Non-blooming chrysanthemums usually need one of these fixes:
- Too much nitrogen (use a low-nitrogen, high-phosphorus fertilizer like 5-10-10).
- Overcrowding (space plants 12–24 inches apart for airflow).
- Not enough sunlight (they need 6+ hours of direct sun daily).
- Pinch back growth in early summer to encourage blooming.
Are there chrysanthemum varieties that thrive in hot climates?
For heat-tolerant varieties, try:
- ‘Dwarf Bonanza’ (compact, thrives in zones 5–9)
- ‘Mammoth’ series (hardy and drought-resistant)
- ‘Sea Pink’ (heat-loving with pink blooms)
Plant in late summer or early fall to avoid peak heat stress. Mulch heavily to retain moisture!
Wrapping up and next steps
Planting chrysanthemums outdoors is a rewarding way to add vibrant color and texture to your garden—just remember to time it right for seasonal success! Whether you’re a beginner or a seasoned gardener, these hardy blooms thrive with the right soil, sunlight, and care.
Now that you’re equipped with the best practices, grab your gloves and get ready to transform your outdoor space into a stunning autumn display.
Your next step? Mark your calendar for planting season (spring or early fall) and watch your garden burst with beauty! 🌼