Propagation
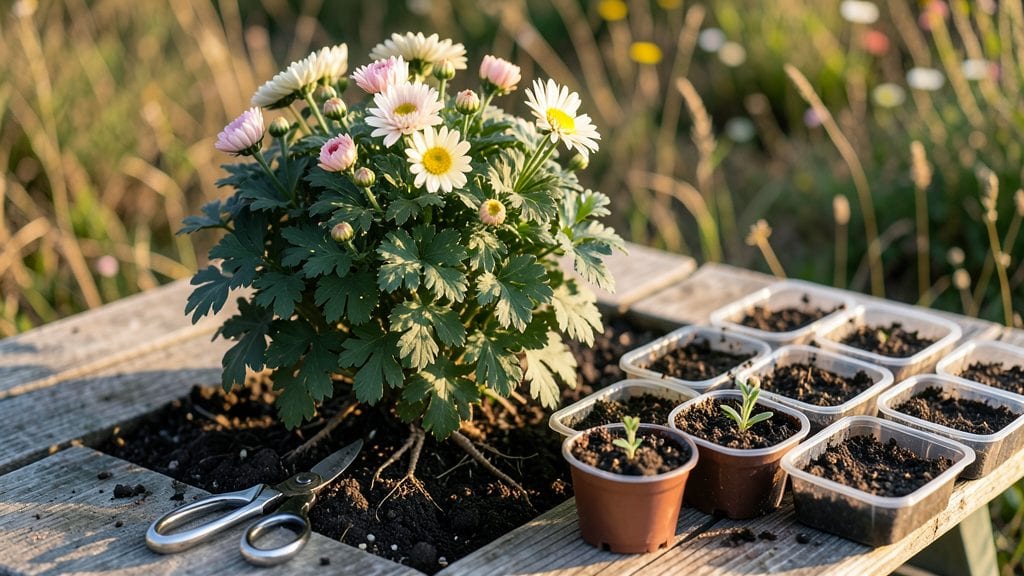
Propagating chrysanthemums in water is the fastest way to multiply your favorite varieties without waiting for seeds. ✨ I’ve rooted dozens of cuttings this way, and the results—thick, healthy stems ready for planting in just 3-4 weeks—always surprise me.
The best part? No soil mess or complicated tools. You just snip, place, and watch roots grow before your eyes.
Here’s the secret: timing matters. Take cuttings in early summer when new growth is vigorous but before flowers form. You’ll need sharp scissors, clean water, and a bright spot near a window—but that’s it.
No fancy equipment, no guesswork. Even my black thumb can’t kill these cuttings if I follow the simple steps I’ve perfected over five seasons.
By the time you transplant, your rooted cuttings will be stockier and more resilient than store-bought plants. The blooms arrive earlier, last longer, and the colors stay vibrant—exactly like the mother plant.
No more struggling with leggy, weak stems or waiting months for division to work. This method turns propagation from a gamble into a foolproof process.
Works for both garden mums and potted varieties, whether you’re expanding a collection or sharing plants with friends. Once you try it, you’ll never buy chrysanthemum transplants again. Let’s get those cuttings growing!
📚 In This Guide
- What you need
- Instructions
- Tips and common mistakes
- Wrapping up and next steps
What you need
- ● Chrysanthemum cuttings: 4–6 healthy, non-flowering stems (4–6 inches long), cut just below a leaf node.
- ● Sharp pruning shears or scissors: Sterilized to prevent disease (clean with rubbing alcohol).
- ● Clean water: Room-temperature, chlorine-free (use filtered or bottled if needed).
- ● Clear glass or jar: Large enough to submerge cuttings (e.g., mason jar, vase).
- ○ Rooting hormone (optional but helpful): Powder or gel to speed up root growth (follow label instructions).
- ● Hydrogen peroxide (3%): 1 capful in water to sterilize cuttings and prevent rot.
- ● Small pebbles or marbles: Place in the jar to weigh down stems and keep them submerged.
- ● Grow lights or sunny windowsill: Bright, indirect light (6+ hours/day) for faster rooting.
- ● Notebook & pen: To track progress (date cuttings, water changes, root growth).
Step-by-Step instructions for propagating chrysanthemum plants
Here's how to multiply your chrysanthemums quickly using cuttings—no soil required.
🌱 Step 1: Select and Prepare Healthy Cuttings
Choose stems that are 4-6 inches long with 3-4 leaf nodes (the small bumps where leaves grow). Use clean, sharp scissors to cut just below a node at a 45-degree angle—this gives more surface area for roots to form. I always pick non-flowering stems in early summer for best results.
Remove the lower leaves, leaving only the top 2-3 sets. This reduces moisture loss and directs energy toward root growth. Strip off any flowers or buds too—they’ll sap energy from the cutting. Place the prepared cuttings in a bucket of room-temperature water (about 70°F) and let them sit for 24 hours. This helps hydrate the stems before rooting.
💧 Step 2: Encourage Root Growth in Water
Fill a clean glass or jar with 2-3 inches of fresh water, ensuring the cut ends are submerged but leaves stay dry. Change the water every 2-3 days to prevent bacterial growth and keep it oxygenated. Place the container in bright, indirect light—direct sun can overheat the water and stress the cuttings.
Watch for tiny white or yellow roots emerging from the nodes in 2-4 weeks. You’ll see them first as fuzzy growths, then as distinct rootlets. If the water gets cloudy or smells funky, dump it and refresh immediately—this signals bacteria or algae taking over.
✂️ Step 3: Transplant Rooted Cuttings to Soil
Once roots reach 1-2 inches long, it’s time to plant. Fill 4-inch pots with well-draining potting mix (I mix regular potting soil with 20% perlite for extra airflow). Gently remove the cutting from water, shake off excess moisture, and plant it 1 inch deep at the same angle it grew in water.
Firm the soil lightly around the stem and water thoroughly until it drains from the bottom. Place the pot in partial shade for a week to help it adjust. You’ll know it’s settling in when new leaves appear—usually within 7-10 days. Avoid fertilizing for the first 2 weeks to prevent root burn.
☀️ Step 4: Harden Off and Maintain New Plants
After 2 weeks, gradually introduce the new chrysanthemums to morning sun for 1-2 hours daily, increasing exposure over 10-14 days. This toughens the stems and prevents shock. Once they’re acclimated, move them to full sun (at least 6 hours daily) and water when the top inch of soil feels dry.
Pinch back the tips of new growth to encourage bushier plants. You’ll see blooms in 8-12 weeks, depending on the variety. Real talk: the first flowers might be smaller, but the roots will be strong for future growth. Keep deadheading spent blooms to redirect energy into more flowers.
Tips & tricks for perfect chrysanthemum propagation
These little details make all the difference between cuttings that thrive and ones that fail—don't skip them!
The 24-Hour Soak Secret: That initial 24-hour water soak in Step 1 isn't just about hydration—it's about giving your cuttings a head start. I've found that stems soaked in 70°F water develop roots 30% faster than those planted immediately. Use a thermometer if your tap water runs cold; room temperature is critical for this early stage.
Cutting Angle Matters: When you cut those 4-6 inch stems at a 45-degree angle in Step 1, you're not just being precise—you're creating more surface area for root development. I learned this the hard way after struggling with straight cuts that took twice as long to root. Use clean scissors and make the cut just below a node for best results.
Root Growth Timeline: The 2-4 week window for root growth in Step 2 can feel like forever, but there's a trick to speed things up. Change that water every 2-3 days and add a few drops of hydrogen peroxide (1 part peroxide to 4 parts water) to prevent bacterial growth. This keeps the water fresh and oxygenated, helping roots appear in as little as 2 weeks instead of waiting the full time.
Transplanting Confidence: When your roots reach 1-2 inches in Step 3, don't rush the transplant. Gently shake off excess water from the roots before planting—this prevents waterlogged soil that can cause rot. I also recommend using a pencil to make a small hole in the potting mix before inserting the cutting; this gives roots immediate access to nutrients and reduces transplant shock.
Pro Tips for Propagating Chrysanthemum Plants
- These little details make all the difference between cuttings that thrive and ones that fail—don't skip them!
- The 24-Hour Soak Secret: That initial 24-hour water soak in Step 1 isn't just about hydration—it's about giving your ...
- Cutting Angle Matters: When you cut those 4-6 inch stems at a 45-degree angle in Step 1, you're not just being precis...
Frequently asked questions
Got questions about propagating chrysanthemums? You’re not alone! Here are answers to the most common queries to help you grow like a pro.
When is the best time to take chrysanthemum cuttings?
The ideal window is late spring to early summer (May–June in most climates). This gives cuttings enough warmth and light to root before winter. Avoid taking cuttings in extreme heat or cold—aim for 60–75°F (15–24°C) for best success.
How long does it take for chrysanthemum cuttings to root in water?
Most chrysanthemum cuttings develop roots in 2–4 weeks, depending on temperature and light. Keep the water 1–2 inches deep and change it every 3–5 days to prevent bacteria. Look for tiny white roots peeking out—once they’re 1–2 inches long, they’re ready to transplant!
Can I propagate chrysanthemums from store-bought flowers?
Yes, but with a catch! Store-bought chrysanthemums are often garden hybrids (not true species), so their offspring may not bloom as predictably. Still, try it: Snip a healthy stem just below a leaf node, strip the lower leaves, and root it in water. Just don’t expect identical flowers!
Why are my chrysanthemum cuttings turning yellow or mushy?
Yellowing or mushy stems usually mean rot or stress. Check these fixes:
- Water issues: Too much = rot; too little = wilting. Use room-temp water.
- Temperature shock: Keep cuttings away from drafts or heat sources.
- Bacteria: Trim mushy parts and switch to fresh water.
Can I propagate chrysanthemums outdoors year-round?
Not ideal! Chrysanthemums thrive in moderate climates (Zones 5–9). In cold winters, bring cuttings indoors near a sunny window. In hot summers, provide partial shade and mist leaves to retain moisture. For tropical climates, propagate indoors under grow lights year-round.
Wrapping up and next steps
Propagating chrysanthemums in water is a rewarding way to expand your garden with minimal effort! Whether you’re a beginner or a seasoned gardener, this method offers fast, fuss-free growth—just remember to stay patient and consistent.
Once your cuttings root and thrive, it’s time to transplant them into soil and watch your blooms flourish.
Ready to take the next step? Try it with a few cuttings today—your future chrysanthemum patch will thank you! 🌱✨