Picking
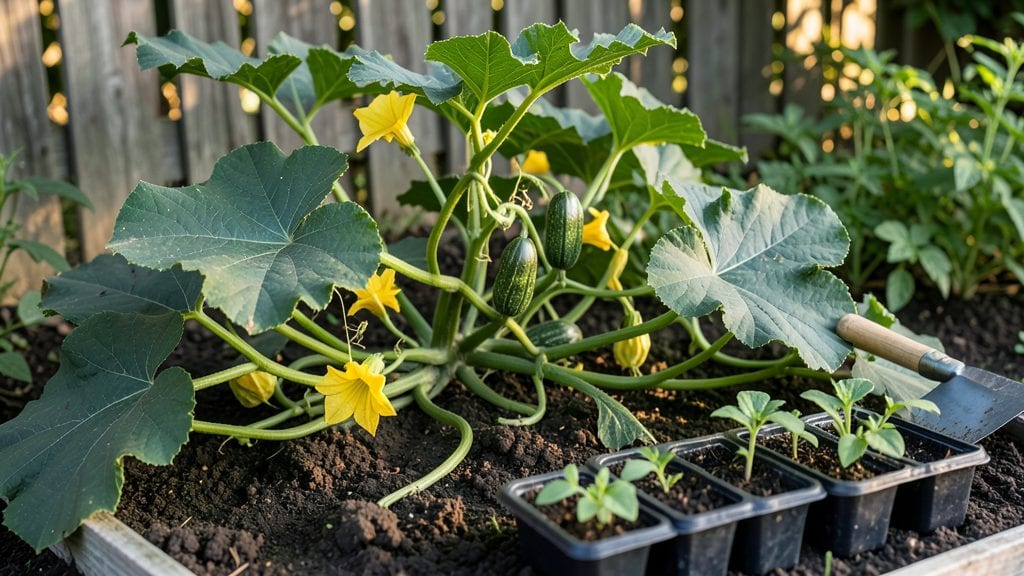
Planting Hubbard squash isn’t just about dropping seeds in the dirt—it’s about creating the perfect conditions for those massive, ribbed fruits to thrive. 🌱 I’ve learned that the difference between a handful of squash and a bountiful pile comes down to soil prep, spacing, and a few warm-season secrets most gardeners miss.
The first step? Rich, well-draining soil with plenty of compost worked in—Hubbard squash are heavy feeders and won’t tolerate poor nutrition.
Start seeds indoors 4-6 weeks before your last frost, or sow directly when soil reaches 70°F—they won’t germinate in cool conditions. Plant seeds 1 inch deep, spacing them 3-4 feet apart in all directions, since these vines spread wide and need room to breathe.
If you’re short on space, try a hill system with 3-4 seeds per mound, thinning to the strongest plant once they’re 6 inches tall.
What you’ll end up with is a thriving patch of squash vines producing 5-10 pound fruits by late summer, if you keep the soil consistently moist (not soggy) and mulch heavily to retain moisture.
The key is patience—Hubbard squash mature slowly, but the payoff is worth it when you’re staring at a harvest that looks like it belongs in a farmers’ market. Early care is simple: just watch for slugs and thin seedlings as needed.
Works best in zones 3-10 with full sun (6+ hours daily), but if you’re in a hot climate, provide afternoon shade to prevent sunscald on young plants. The biggest mistake?
Crowding them—too many vines competing leads to stunted growth and fewer fruits. With the right setup, you’ll have squash so big they’ll make your neighbors do a double take.
📚 In This Guide
- What you need
- Instructions
- Tips and common mistakes
- Wrapping up and next steps
What you need
- ● Hubbard squash seeds – Buy heirloom or hybrid varieties (e.g., 'Blue Hubbard,' 'Gold Rush'). Aim for 2–3 seeds per hill (thin to 1–2 plants later).
- ● Well-draining soil – Test for pH 6.0–6.8. Amend with compost or aged manure (1–2 inches mixed into top 6–12 inches of soil).
- ○ Fertilizer – Use a balanced 10-10-10 or 5-10-10 at planting (follow label rates). Optional: Add potassium-rich fertilizer (like banana peels or greensand) mid-season.
- ● Mulch – Straw or shredded leaves (2–3 inches) to retain moisture and suppress weeds.
- ● Watering can or hose – With a fine spray nozzle for gentle watering (avoid wetting leaves to prevent disease).
- ○ Garden twine or stakes – For optional support if vines sprawl (though Hubbard squash is typically bushy).
- ● Gloves & pruners – For handling vines and harvesting.
- ● Sunlight – Full sun (6–8+ hours daily). Partial shade may reduce yields.
- ● Spacious plot – Hubbard squash needs 3–4 feet of diameter per plant (or 5–6 feet apart in rows).
- ● Warm soil – Wait until soil temps reach 60°F+ (use a soil thermometer if unsure).
- ● Crop rotation – Avoid planting in the same spot as other squash, pumpkins, or cucumbers for 3+ years to prevent disease.
Step-by-step guide for planting Hubbard squash
Here’s how I plant Hubbard squash every season—it’s all about warm soil, proper spacing, and patience.
🌱 Step 1: Prepare the Soil and Planting Site
Hubbard squash thrives in rich, well-draining soil with a pH between 6.0 and 7.0. Work in 2-3 inches of compost into the top 6-8 inches of soil to improve fertility and drainage. I avoid fresh manure—it can burn tender roots. Choose a location with full sun (6-8 hours daily) and shelter from strong winds, which can damage the large vines.
Test the soil moisture before planting. Stick your finger 1 inch deep—if it feels dry, water the area thoroughly 24 hours before planting. Hubbard squash roots need consistent moisture but hate soggy soil. I also add a handful of wood ash to raise pH slightly if my soil tends to be acidic.
☀️ Step 2: Time Planting for Warm Soil
Wait until the soil temperature reaches at least 65°F before planting—Hubbard squash seeds won’t germinate in cold soil. I check soil temp with a thermometer in the morning for accuracy. Plant seeds 1 inch deep and 4-6 inches apart in rows spaced 3-4 feet apart. This gives vines room to sprawl without crowding.
If frost threatens, cover seedlings with floating row covers until nighttime temperatures stay above 50°F. I’ve found that planting too early in cool soil leads to slow germination and weak seedlings. For 4 plants, you’ll need about 12-16 square feet of garden space—don’t skimp on room.
💧 Step 3: Water and Mulch for Consistent Growth
Water the soil deeply right after planting to settle it around the seeds. Keep the soil evenly moist (not soggy) until germination, which takes 7-14 days depending on soil warmth. Once seedlings emerge, water at the base to avoid wetting leaves, which can cause disease. I use a soaker hose for even moisture without disturbing the soil.
Apply 2-3 inches of straw mulch around plants once they’re 2 inches tall. Mulch retains moisture, suppresses weeds, and keeps soil temps stable. Replenish mulch as it breaks down—Hubbard squash vines grow 6-10 feet long, and consistent moisture is key to preventing blossom-end rot.
🌿 Step 4: Thin and Train Vines for Maximum Yield
When seedlings reach 3-4 inches tall, thin to the strongest plant per hill (every 3-4 feet along the row). Remove weaker seedlings at the base to avoid disturbing roots. I leave 1-2 plants per hill—overcrowding reduces fruit size and increases disease risk. Prune any suckers (side shoots) that form in the leaf axils to direct energy to fruit production.
Train vines along a trellis or fence if space is limited, but leave 2-3 feet of vine length on the ground for early fruit development. Hubbard squash fruits grow heavy—support them with straw or mesh slings to prevent rot. Harvest when the rind turns hard and dull-colored, usually 80-100 days after planting.
Tips & tricks for perfect Hubbard squash planting
These proven strategies will help you avoid common pitfalls and maximize your harvest—no guesswork required.
Soil Temperature Secret: That 65°F soil temperature is non-negotiable for germination. I use a soil thermometer in the morning shade for accuracy—morning temps can be misleadingly cooler. If you're planting in early spring, consider using a cold frame to warm the soil faster. The difference between 65°F and 50°F soil can mean the difference between strong seedlings and weak, leggy plants that struggle to establish.
Moisture Management: The 24 hours before planting is crucial for soil prep. Water deeply but let excess drain completely—Hubbard squash roots need oxygen too. I test moisture by squeezing a handful of soil: if it crumbles easily, it's ready. Too much water creates anaerobic conditions that stunt root growth. Once planted, maintain 1 inch of water per week, delivered at the base to prevent fungal diseases.
Thinning Strategy: When thinning to 1-2 plants per hill at 3-4 inches tall, do it on a cloudy day or late afternoon to reduce stress on the remaining plants. I use clean, sharp scissors to snip seedlings at soil level rather than pulling—this prevents disturbing roots of the plants you're keeping. The extra space gives vines room to develop those 6-10 foot runners without competing for nutrients.
Mulch Upgrade: While straw works well, I've found black plastic mulch (optional) speeds up soil warming and suppresses weeds more aggressively. If using straw, refresh it every 4-6 weeks as it breaks down. The mulch layer should always be 2-3 inches thick—this prevents soil temperature fluctuations that can stress the plants, especially during those 80-100 day growth periods.
Pro Tips for Planting Hubbard Squash
- These proven strategies will help you avoid common pitfalls and maximize your harvest—no guesswork required.
- Soil Temperature Secret: That 65°F soil temperature is non-negotiable for germination.
- Moisture Management: The 24 hours before planting is crucial for soil prep.
Frequently asked questions
Got questions about growing your own Hubbard squash? You’re not alone! Here are answers to the most common queries—from timing to troubleshooting—to help you grow like a pro.
When is the best time to plant Hubbard squash?
Hubbard squash thrives in warm soil, so wait until after the last frost when temperatures consistently stay above 60°F (15°C). For most regions, this means planting in late spring to early summer. Start seeds indoors 2–3 weeks earlier if your growing season is short.
How much space do Hubbard squash plants need?
These squash are space-hoggers! Give each plant 3–4 feet of diameter (or 6–8 feet in rows) to sprawl comfortably. They’ll spread widely, so avoid crowding—this helps prevent disease and ensures healthy fruit. Pro tip: Use trellises if space is tight, though they’re heavy and may need support.
Why aren’t my Hubbard squash flowers turning into fruit?
Poor pollination is the #1 culprit. Hand-pollinate by transferring pollen with a paintbrush between male (long stems) and female (tiny squash at the base) flowers. Other issues? Check for pests (squash bugs, beetles), nutrient deficiencies (especially nitrogen), or extreme heat, which can stunt growth.
Can I substitute butternut squash for Hubbard in recipes?
While Hubbard has a nutty, sweet flavor and dense texture, butternut is a great swap for roasting, soups, or baking. For pies or purees, Hubbard’s richer taste shines—butternut works in a pinch. Just adjust cooking times: Hubbard stays firmer longer.
How do I know when Hubbard squash is fully ripe?
Look for a hard rind (can’t pierce with a nail) and a dull, matte finish. The stem should dry up and separate easily from the fruit. Color deepens to tan or beige, and the squash feels heavy for its size. Harvest before frost—ripe Hubbard keeps for months in a cool, dry place!
Still stumped? Drop your Hubbard squash woes in the comments—we’ve got answers!
Wrapping up and next steps
Growing Hubbard squash is a rewarding journey that blends patience with delicious results!
With the right spacing, soil prep, and a few careful techniques, you’ll soon be harvesting those iconic, ribbed beauties. 🌱 Whether you’re a seasoned gardener or a curious beginner, these proven tips will set you up for success—and maybe even inspire you to experiment with new varieties.
Ready to take the next step? Mark your calendar for planting season, prep your garden beds, and get ready to savor the sweet taste of homegrown victory! 🎉