Container Gardens
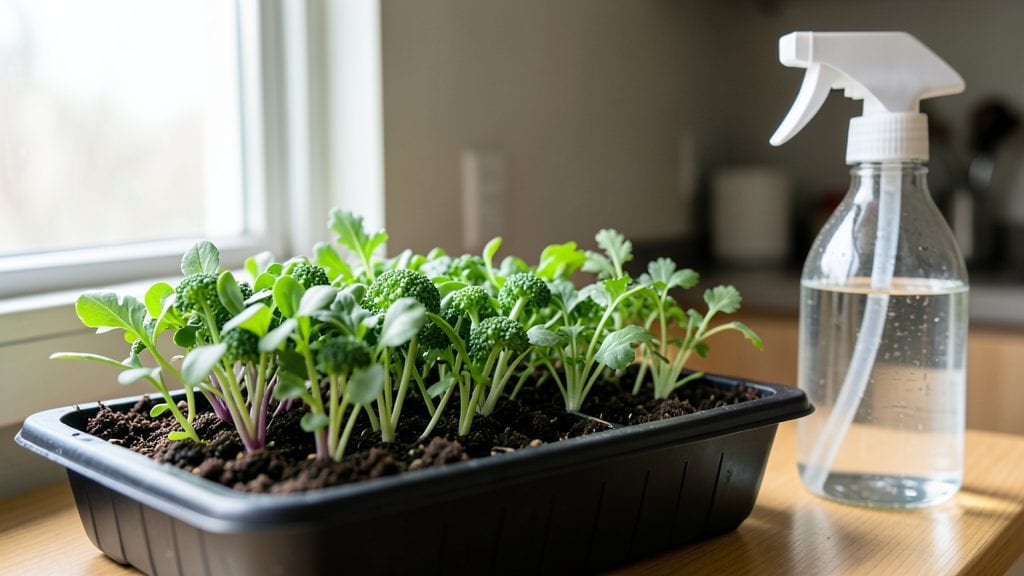
Planting microgreens indoors gives you a fast harvest in just 7 days—no sunlight required. ✨ I’ve grown them in my kitchen for years, and the secret is keeping it simple: the right seeds, a shallow container, and a little patience.
Most people overthink it, but you only need a few basic supplies and a consistent routine.
You’ll need microgreen seeds (broccoli, radish, or sunflower work best), a shallow tray or container, potting soil, and a spray bottle for watering. No fancy equipment—just what you already have at home.
The whole process takes less than 30 minutes to set up, and you can grow them year-round, regardless of your climate.
By day 7, you’ll have vibrant, nutrient-packed greens ready to snip and use. They’re perfect for salads, sandwiches, or garnishes, and the flavor is more intense than store-bought sprouts. The best part? You can grow them in small spaces, like a windowsill or countertop, without needing a full garden.
Even if you’ve never grown anything before, microgreens are foolproof—just avoid overwatering and keep them in a warm spot. Once you master this, you’ll never buy greens again. Let’s get those seeds sprouting!
📚 In This Guide
- What you need
- Instructions
- Tips and common mistakes
- Wrapping up and next steps
What you need
- ● Seeds: Choose organic, high-quality microgreen seeds (e.g., broccoli, radish, sunflower, or pea shoots). Start with 1–2 tbsp per tray (about 1 oz).
- ○ Growing Tray: A shallow, drainage-friendly container (10" x 20" works well). Optional: Stackable trays for space-saving.
- ● Growing Medium: Organic Potting Soil: Lightweight, seed-starting mix (1–2 inches deep).
- ○ Coconut Coir or Hydroponic Mats: For soil-free growing (optional but easy to clean).
- ● Watering Can or Spray Bottle: Fine mist for gentle hydration.
- ● Grow Lights: Full-spectrum LED (12–16 inches above plants, 12–16 hours/day). Budget pick: Clip-on LED bulbs.
- ● Fine-Mesh Screen or Paper Towels: To cover seeds while germinating (prevents drying).
- ● Scissors or Knife: For harvesting.
- ● Spray Bottle with Water: For humidity control (mist 1–2x daily).
- ○ pH Test Kit (Optional): Ensures soil pH is 6.0–7.0 for optimal growth.
- ○ Humidity Dome (Optional): Speeds up germination in dry climates.
Step-by-step instructions for planting microgreens indoors
Here's the quickest way to grow nutrient-packed microgreens in just 7 days—no sunlight required!
🌱 Step 1: Prepare Containers and Soak Seeds
Use the 4 shallow trays (about 10x20 inches) lined with the 2 rolls of paper towels or 4 layers of dampened paper towels. Soak the 1 pound of mixed microgreen seeds in a bowl of lukewarm water for 6-8 hours—this softens the seed coat and kickstarts germination. I like to use a mesh strainer to drain excess water while keeping seeds contained.
Spread the soaked seeds evenly across the paper towels, spacing them about ½ inch apart to prevent overcrowding. Press down lightly so they make contact with the towels but don’t bury them—they need air to germinate. Cover the tray with the plastic wrap and place it in a warm, dark spot (like a pantry or under the sink). This mimics the cozy conditions seeds love.
💧 Step 2: Mist and Maintain Moisture for 3 Days
Check the seeds after 24 hours—you’ll see tiny white sprouts peeking through! Mist the towels lightly with room-temperature water every 12 hours to keep them damp but not soggy. Too much water drowns the seeds; too little slows growth. I use a spray bottle for precision, aiming for a fine mist that doesn’t dislodge the seeds.
After 72 hours, the sprouts should be about ½ inch tall with cotyledons (those first tiny leaves) unfurling. This is your signal to move them to light—even if it’s just a grow light or a bright kitchen counter. The goal is to prevent leggy, weak stems by giving them light as soon as they’re ready.
☀️ Step 3: Introduce Light and Harvest in 7 Days
Place the trays under the grow light (or near a south-facing window) for 12-16 hours of light daily. The LED grow light should be 4-6 inches above the trays—close enough to encourage bushy growth but not so near it overheats the leaves. Rotate the trays quarter-turn daily so the greens grow evenly toward the light.
After 4 more days (total 7 days), your microgreens will be ready! They should have 2-3 true leaves and a vibrant color. Harvest by snipping just above the soil line with clean scissors, leaving the roots behind for a second (smaller) harvest. Rinse gently under cool water to remove any paper towel residue, then pat dry with a clean kitchen towel before storing.
🌿 Step 4: Store and Enjoy Your Fast Harvest
Place the harvested microgreens in a sealed container lined with a paper towel to absorb excess moisture. Store them in the fridge for up to 5 days—they’ll stay crisp and flavorful if kept dry. I like to portion them into small bags for easy grab-and-go salads or sandwiches. The second harvest (if you left roots) will be ready in another 3-4 days, though it’ll be smaller.
Here’s the thing—microgreens are incredibly fast, but they’re also sensitive to overhandling. Avoid packing them too tightly in storage, or they’ll wilt within 24 hours. And if you see any yellowing or mold, toss it immediately—those are signs of overwatering or poor airflow during growth.
Tips & tricks for perfect indoor microgreen growth
These game-changing tricks will help you maximize your 7-day harvest and avoid common pitfalls that turn microgreens into sad, leggy disappointments.
Seed Spacing Secret: When spreading your 1 pound of mixed microgreen seeds across the paper towels, resist the urge to pack them tightly. That ½ inch spacing isn't just about aesthetics—it's about airflow. Crowded seeds create a humid microclimate that breeds mold. Trust me, you'll thank yourself when you're harvesting vibrant greens instead of tossing a moldy batch after 3 days.
Temperature Matters: That warm, dark spot for the initial 72 hours should ideally be between 70-75°F. If your kitchen runs cooler, place the trays on top of your fridge or near a warm appliance. The goal is to mimic springtime conditions where seeds naturally germinate. Too cold? Growth slows dramatically. Too hot? You risk overheating the seeds before they even sprout.
Light Transition Strategy: The moment you move your sprouts to light after 72 hours, position the LED grow light at the 4-6 inch mark—closer than you might think. This proximity triggers bushier growth rather than those sad, stretched-out stems. After 24 hours of light exposure, gradually increase the height to 6-8 inches to prevent burning while maintaining vigor. Rotate those trays daily to avoid lopsided growth.
Harvest Timing Hack: Your microgreens are ready when they hit 2-3 true leaves—not when you feel like harvesting! The 7-day window is precise because that's when their nutrient density peaks. Waiting longer makes them bitter, and harvesting too early means wasted potential. Pro tip: Harvest in the morning when they're at their crispest, and always use clean scissors to avoid crushing delicate stems.
Pro Tips for Planting Microgreens Indoors
- These game-changing tricks will help you maximize your 7-day harvest and avoid common pitfalls that turn microgreens into sad, leggy disappointments.
- Seed Spacing Secret: When spreading your 1 pound of mixed microgreen seeds across the paper towels, resist the urge to pack them tightly.
- Temperature Matters: That warm, dark spot for the initial 72 hours should ideally be between 70-75°F.
Frequently asked questions
Got questions about growing microgreens indoors? You’re not alone!
Here are answers to the most common concerns—from timing to troubleshooting—so you can crush your harvest like a pro.
How long do microgreens take to grow indoors?
Most microgreens are ready in 7–14 days! Fast growers like radish or broccoli sprout in about a week, while slower varieties (e.g., sunflower) may take 2 weeks. Harvest when the first true leaves appear—no sunlight needed! Just keep them moist and under a grow light.
Can I grow microgreens without a grow light?
Technically yes, but results will be weak. Place your tray near a sunny window (south-facing is best) for 4–6 hours daily. If natural light is limited, supplement with a cheap LED bulb (10–15 watts per tray). Without light, seedlings stretch (a.k.a. "leggy") and may not thrive.
Why are my microgreens turning yellow or moldy?
Yellowing? Likely overwatering or poor drainage. Mold (fuzzy spots)? Your tray is too damp—water only the soil, not the leaves, and use a spray bottle. For extra airflow, prop up the lid slightly or use a fan on low. Discard affected batches and sanitize trays with vinegar.
What’s the best way to harvest and store microgreens?
Snip stems 1/4-inch above soil with clean scissors. Rinse gently under cool water, pat dry, and store in an airtight container with a paper towel to absorb moisture. Keep in the fridge for 5–7 days. For longer storage, freeze in ice cube trays with water—perfect for smoothies!
Can I reuse soil or trays for new batches?
Reuse trays after scrubbing with hot, soapy water and disinfecting (1 part bleach to 10 parts water). Soil? No—compost it. Old soil harbors bacteria and depletes nutrients. Fresh, sterile potting mix ensures healthy regrowth every time. Pro tip: Label trays to track varieties!
Wrapping up and next steps
Growing microgreens indoors is a game-changer—no sunlight, no yard, just fresh, nutrient-packed greens in just 7 days! Whether you’re a busy parent, urban dweller, or simply craving homegrown goodness, this method proves you don’t need space or sunshine to cultivate flavor and health.
Start small, experiment with varieties, and soon you’ll be reaping the rewards of your tiny garden.
Ready to dive in? Pick your favorite microgreens and set up your first tray today—your future self (and taste buds) will thank you! 🌱