Pruning
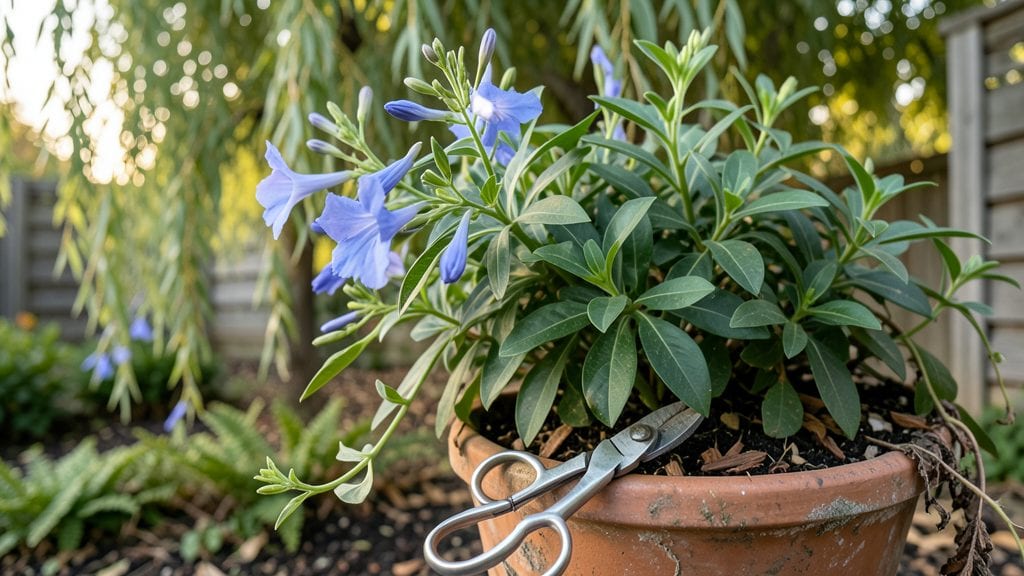
Pruning plumbago plants is the secret to those shockingly lush blue blooms that last all summer. 🌿 I learned the hard way that skipping this step leads to leggy, sparse plants with half the flowers—so I developed a foolproof routine that keeps mine thriving.
The key isn’t just cutting back; it’s timing those cuts right and shaping the plant to encourage dense growth where the blooms appear.
You’ll need just three things: sharp bypass pruners (dull blades tear stems), clean rubbing alcohol to sterilize them between cuts, and a sunny morning to work.
The best time to prune is right after the first flush of blooms fades in early summer, but you can also give it a light trim in late winter to shape it before new growth starts. This two-step approach keeps your plumbago compact and flowering continuously.
After pruning, you’ll notice fresh green shoots emerging within days—these are your future blooming stems. The plant responds by putting energy into bushier growth instead of long, bare branches. Within weeks, you’ll have a wall of vibrant blue flowers that attract butterflies and keep blooming until frost.
Just avoid cutting into old wood (the bare stems), as it won’t regrow.
This method works for plumbago grown in containers or planted in the ground, and it’s especially effective in warm climates where the plant grows aggressively. Once you master it, you’ll wonder how you ever let your plumbago look anything but its best. Ready to transform yours?
📚 In This Guide
- What you need
- Instructions
- Tips and common mistakes
- Wrapping up and next steps
What you need
- ● Sharp bypass pruners – 1 pair (sterilized, with clean, sharp blades to avoid crushing stems). Look for ergonomic handles for comfort during extended use.
- ● Hand pruners or shears – 1 pair (for smaller branches or deadheading spent blooms). Opt for bypass-style for precision cuts.
- ● Disinfectant solution – 1 small bottle (70% isopropyl alcohol or a 10% bleach-water mix to sterilize tools between cuts).
- ● Garden gloves – 1 pair (nitrile or leather, cut-resistant for protection against thorns or rough stems).
- ● Rubbing alcohol or hydrogen peroxide – Small bottle (for cleaning tools before and after pruning).
- ○ Pruning saw – 1 (optional but helpful) (for thick, woody stems over ½ inch in diameter). Choose a curved blade for better control.
- ● Garden twine or plant ties – Small roll (to secure heavy stems after pruning if needed).
- ● Compost bin or bag – 1 (for collecting pruned debris—plumbago clippings can be composted!).
- ● Plant food or fertilizer – 1 small container (balanced 10-10-10 or slow-release granules to nourish the plant post-pruning).
- ● Spray bottle with water – 1 (to mist leaves and reduce stress on the plant during trimming).
- ● Notebook & pen – 1 (to jot down notes on pruning patterns, growth habits, or dates for future reference).
- ● Check the weather: Prune on a dry, overcast day or early morning to reduce stress on the plant.
- ● Gather tools first: Lay everything out in a clean, organized workspace to avoid scrambling mid-prune.
- ● Wear long sleeves: Plumbago can have sharp thorns—protect your arms!
Step-by-Step guide to pruning plumbago for vibrant, long-lasting blooms
Pruning plumbago isn't just about cutting back—it's about encouraging those stunning blue flowers to keep coming all season.
✂️ Step 1: Time Your Pruning for Maximum Impact
Plumbago thrives with two pruning sessions per year. The first happens right after the last frost in spring, when new growth emerges. Look for fresh, bright green shoots pushing through the soil—that's your cue. I always prune in the morning when the plant is hydrated and the air is cool, which reduces stress on the plant.
Wait until after flowering to do your second pruning in late summer. This gives the plant time to set buds for next year's blooms. Never prune when flowers are already open—you'll sacrifice that season's display. If you're in a warm climate, you might spot a third flush of growth in fall, but hold off until then unless you're pruning for shape.
✂️ Step 2: Gather the Right Tools for Clean Cuts
Sharp, clean tools make all the difference. Use bypass pruners for stems thicker than a pencil and hand pruners for finer growth. I sterilize my tools with rubbing alcohol between cuts to prevent spreading disease—plumbago is tough, but it doesn't need extra stress from bacterial infections.
Wear gloves if your plumbago has thorny stems (some varieties do). You'll want to avoid those sharp points while working. Keep a small bucket nearby to collect trimmings—you can compost them later or use them as mulch around other plants. Never use dull tools; they crush stems instead of making clean cuts, which invites rot.
✂️ Step 3: Prune for Shape and Airflow
Start by removing any dead, damaged, or crossing branches. These compete for energy and can block sunlight from reaching the center of the plant. Aim for an open, rounded shape—this encourages airflow and prevents fungal issues. Cut just above a leaf node (the bump where leaves grow) at a 45-degree angle to prevent water from pooling on the wound.
For established plants, trim back about one-third of the current season's growth. You'll see thicker stems and more compact growth as a result. Avoid cutting into old wood—plumbago blooms on new growth, so focus on the freshest stems. If your plant looks leggy, you can prune even harder, but don't remove more than half the foliage at once.
🌿 Step 4: Encourage New Growth After Pruning
Water deeply right after pruning to help the plant recover. The roots need moisture to support the fresh cuts and new growth. I like to add a balanced fertilizer (10-10-10) at half strength to give the plant a gentle boost. Avoid heavy fertilizers right after pruning—they can burn tender new shoots.
Watch for new growth within 2-3 weeks. You'll see fresh, bright green leaves emerging from the pruned areas. This is your signal that the plant is healing well. If you notice yellowing leaves or wilting, you might have pruned too aggressively. In that case, give the plant extra time to recover before fertilizing again.
☀️ Step 5: Maintain Through the Season
After the initial pruning, keep an eye out for spent blooms. Deadhead them regularly by pinching off the faded flowers with your fingers or small pruners. This encourages the plant to produce more blooms instead of setting seed. I do this every 2-3 weeks during the blooming season to keep my plumbago looking its best.
Adjust your pruning as needed throughout the year. If the plant starts to look overgrown or leggy, a light trim can bring it back into shape. The key is to prune just enough to maintain the plant's health and encourage continuous blooming. With the right care, your plumbago will reward you with months of stunning blue flowers.
Tips & tricks for perfect plumbago pruning
These precision-focused tips will help you transform your pruning routine into a blooming success story.
Timing is Everything: The two-pruning schedule in Step 1 works because it aligns with plumbago's natural growth cycles. In spring, you're encouraging new growth by cutting back just as the plant wakes up from dormancy. In late summer, you're shaping the plant for next year's blooms while allowing current flowers to fully develop. I've seen plants that missed the spring pruning struggle to produce vibrant blooms later in the season—don't skip this first cut!
Tool Technique: Step 2 emphasizes clean cuts, but here's what nobody tells you about your tools: Always wipe your pruners with rubbing alcohol between plants, not just between cuts. I sterilize my tools before starting on a new plant to prevent cross-contamination. For thorny varieties, consider using pruning shears with a longer handle—they give you better leverage and keep your hands safer.
Shape Matters More Than You Think: When you're aiming for that open, rounded shape in Step 3, think of it like styling a bush. The goal is to create a dome shape that allows sunlight to reach all parts of the plant. I like to visualize removing branches that would cast shadows on other growth. This isn't just about looks—proper airflow prevents fungal diseases that can ruin your blooms.
Post-Pruning Care: The 2-3 week window for new growth in Step 4 is your best indicator of whether you pruned correctly. If you see fresh green leaves emerging within this timeframe, you're on the right track. If you notice yellowing leaves instead, you might have pruned too aggressively. In that case, reduce fertilization and give the plant extra time to recover—it's better to be patient than to push it too hard.
Pro Tips for Plumbago Plant Pruning
- These precision-focused tips will help you transform your pruning routine into a blooming success story.
- Timing is Everything: The two-pruning schedule in Step 1 works because it aligns with plumbago's natural growth cycle...
- Tool Technique: Step 2 emphasizes clean cuts, but here's what nobody tells you about your tools: Always wipe your pru...
Frequently asked questions
Got questions about keeping your Plumbago looking its best? Here are answers to the most common pruning dilemmas—so you can enjoy those stunning blue blooms all season long!
When is the best time to prune a Plumbago plant?
Prune your Plumbago in early spring (before new growth starts) or after flowering in late summer. Avoid heavy pruning in fall—it can stimulate tender new growth that won’t survive winter. Light trimming to shape can happen anytime, but major cuts should wait for the right season!
How often should I prune my Plumbago?
For most varieties, once or twice a year is enough—spring for shaping and late summer for post-flower cleanup. If your plant gets leggy between blooms, a light trim every 6–8 weeks keeps it bushy. Over-pruning stresses the plant, so aim for removing no more than 1/3 of the foliage at a time.
Can I prune Plumbago in winter? What about cold climates?
In mild climates (Zones 9–11), a light pruning in winter helps tidy up, but avoid heavy cuts. In colder zones (below 8), wait until spring—pruning too early can damage dormant buds. If your plant is woody, prune back to healthy brown stems to encourage fresh growth in warmer months.
What if my Plumbago won’t bloom after pruning?
If your plant skips flowers, it might be over-pruned or underfed. Try these fixes:
- Feed it: Use a balanced fertilizer (10-10-10) in spring.
- Prune less aggressively: Leave some old wood—Plumbago blooms on both new and old growth.
- Check sunlight: Ensure it gets 6+ hours of sun daily.
Can I propagate Plumbago from pruned cuttings?
Softwood cuttings
(from spring/summer pruning) root easily. Dip the cut end in rooting hormone, plant in moist potting mix, and keep in bright, indirect light. Mist daily to maintain humidity. In 4–6 weeks, you’ll have new plants ready to transplant!
Wrapping up and next steps
Pruning your plumbago plant isn’t just about keeping it tidy—it’s the secret to vibrant, long-lasting blue blooms year after year! 🌸 By following the right timing, techniques, and tools, you’ll encourage healthier growth and a showstopping display.
Whether you’re a seasoned gardener or just starting, a little precision goes a long way.
Ready to give your plumbago the TLC it deserves? Grab your shears, dust off your gloves, and get trimming! Then, why not share your progress with fellow plant lovers or explore more pruning tips for other favorites? Your garden’s next masterpiece starts with a single cut! ✂️