Container Gardens
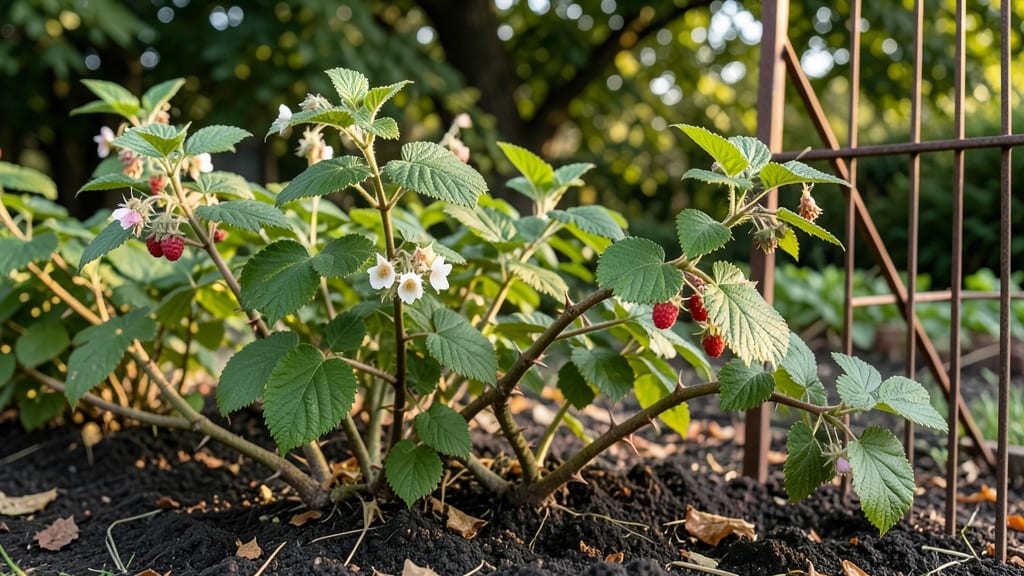
My potted raspberry plants thrive on my patio, delivering sweeter berries than my in-ground patch—here’s how to mimic their natural growing conditions with the right containers, soil, and varieties. 🌱 Everbearing types like 'Heritage' or 'Boyne' fruit twice a year, while summer-bearing varieties need more winter care but reward with bigger harvests.
Start with a 5-gallon minimum container (bigger is better for established plants) and drainage holes—raspberries hate soggy roots. Use a mix of 60% potting soil, 30% compost, and 10% perlite to keep moisture even while preventing compaction.
Most garden centers sell raspberry-specific mixes, but this DIY blend works just as well and costs half as much.
You’ll notice new canes emerging in spring, and with proper pruning, those turn into heavy fruit clusters by midsummer. The secret to container success? Consistent watering—about 1 inch per week—and a balanced fertilizer every 4-6 weeks.
Even in winter, everbearing varieties keep producing if you protect them with frost cloth or move pots to a garage.
This method works for urban balconies, rural patios, or even greenhouses. The only trade-off is smaller harvests than in-ground plants, but the flavor and convenience make up for it. Let’s get those containers planted!
📚 In This Guide
- What you need
- Instructions
- Tips and common mistakes
- Wrapping up and next steps
What you need
- ● Potted Raspberry Plants: 1-3 bare-root or container-grown plants (choose Rubus idaeus varieties like 'Heritage,' 'Boyne,' or 'Caroline' for containers).
- ● Containers: At least 15-gallon pots (or larger) with drainage holes. Use fabric grow bags or plastic/ceramic pots (2-3 plants per container for pollination).
- ● Potting Mix: 1 part compost + 1 part peat moss or coconut coir + 1 part perlite/sand (sterilized and well-draining). Pre-mixed raspberry/berry soil works too!
- ● Fertilizer: Balanced 10-10-10 or 5-10-10 fertilizer (organic options like fish emulsion or worm castings are great!).
- ● Slow-release granules (e.g., Osmocote) for steady nutrition.
- ● Mulch: 2-3 inches of straw or wood chips (retains moisture and regulates temperature).
- ● Support System: Trellis, wire cage, or sturdy stakes (4-6 ft tall) to guide vines upward.
- ● Pruners: Sharp, clean bypass pruners (sterilize with rubbing alcohol).
- ● Garden Gloves: Heavy-duty gloves to protect against thorns.
- ● Watering Can or Hose: With a gentle spray nozzle (raspberries hate soggy roots!).
- ● pH Test Kit: Ideal soil pH: 5.5–6.5 (adjust with lime or sulfur if needed).
- ○ Optional Extras: Drip irrigation kit for consistent moisture.
- ● Mycorrhizal fungi (boosts root health).
- ● Row cover or frost cloth (for colder climates).
- ● Compost tea (natural nutrient boost).
- ● Sunlight: 6–10 hours of full sun daily (partial shade in hot climates).
- ● Location: Place pots in a spot with easy access to water and protection from strong winds.
- ● Climate Note: Raspberries thrive in USDA Zones 3–9 but need winter protection in colder zones (move pots to a garage or insulate with burlap).
Step-by-Step guide to growing potted raspberry plants
Here’s the foolproof method I use to coax sweet berries from container-grown raspberries—even in small spaces.
🪴 Step 1: Select the Right Containers and Drainage
Raspberries need deep roots, so choose containers that are at least 18-24 inches deep and 12-15 inches wide—this ensures enough space for the root system to spread. I prefer fabric grow bags because they allow excess water to evaporate through the sides, reducing root rot risk. If using traditional pots, make sure they have multiple drainage holes—raspberries despise soggy roots.
Line the bottom of the container with 2-3 inches of gravel or broken pottery to create a reservoir for water while preventing clogging. This layer is critical: it keeps roots from sitting in water but still allows them to access moisture when needed. For 4 plants, you’ll need 4 containers of this size—don’t skimp on depth, or your vines will become root-bound and stressed.
🌱 Step 2: Fill With Well-Draining Potting Mix
Fill the containers ¾ full with a lightweight, airy potting mix designed for acid-loving plants (raspberries thrive in pH 5.5-6.5). I blend equal parts peat moss, perlite, and compost to create a mix that drains fast but retains enough moisture for deep roots. Avoid garden soil—it compacts in containers and suffocates roots.
Moisten the mix thoroughly with lukewarm water until it’s damp like a wrung-out sponge. You’ll know it’s right when water drips freely from the drainage holes but doesn’t pool at the bottom. This step is non-negotiable: poor drainage = root rot = dead plants. Tap the container gently to settle the soil without compacting it—roots need air as much as water.
☀️ Step 3: Plant Bare-Root or Potted Raspberries
If planting bare-root raspberries, soak the roots in lukewarm water for 1-2 hours before handling. This revives dormant roots and encourages faster establishment. For potted plants, remove them from their nursery containers and gently loosen the root ball to encourage outward growth. Place each plant in its container so the crown (where stems meet roots) sits just above soil level—burying it too deep causes rot.
Spread the roots outward in the container and backfill with the remaining potting mix, pressing lightly to eliminate air pockets. Leave 3-4 inches of space at the top for watering. I always plant one cane per container to avoid overcrowding—raspberries need room to spread. Water deeply right after planting to settle the soil and eliminate air gaps around the roots.
💧 Step 4: Water and Fertilize for Strong Growth
Water deeply every 2-3 days until the top 2 inches of soil feel dry—raspberries have deep roots and need consistent moisture. Use a soaker hose or watering can with a narrow spout to avoid disturbing the soil. Mulch the surface with 2 inches of pine bark or straw to retain moisture and regulate soil temperature. This layer also suppresses weeds, which compete for nutrients.
Fertilize every 4-6 weeks during the growing season with a balanced, slow-release fertilizer (10-10-10 ratio). I mix in ½ cup of organic fertilizer per container at planting, then switch to liquid feedings in early summer. Watch for yellowing leaves—this is your signal to reduce nitrogen and increase phosphorus (for fruiting). Over-fertilizing leads to lush foliage but few berries.
✂️ Step 5: Prune and Train for Maximum Fruit
Raspberries need annual pruning to encourage fruiting. In late winter or early spring, remove all dead or weak canes at the base. For summer-bearing varieties, cut back old canes to the ground after harvest—they won’t produce again. Leave the new green canes, which will fruit next season. I prune with clean, sharp shears to avoid tearing the bark, which invites disease.
Train vines to a trellis or sturdy wire frame as they grow—this improves air circulation and makes harvesting easier. You’ll see new primocanes (year-old canes) emerge in summer—these are next year’s fruit producers. Thin canes to 3-4 per container to focus energy on fruit production. Harvest berries when they’re fully red and plump—waiting too long makes them soft and seedy.
Tips & tricks for thriving potted raspberry plants
Container gardening with raspberries is all about getting the details right—these tricks will help you avoid the most common pitfalls and maximize your harvest.
Container Depth is Non-Negotiable: Those 18-24 inch containers aren't just recommendations—they're essential for raspberry roots that can grow 3-4 feet deep. I've seen beginners use 12-inch pots and wonder why their plants struggle. The deeper the container, the more stable your plant will be through fruiting season, and the better it will handle summer heat. If you're working with limited space, opt for fabric grow bags—they allow roots to breathe while preventing the soil from compacting over time.
Soil Mix Secrets: The equal parts peat moss, perlite, and compost blend in Step 2 isn't just arbitrary—it creates the perfect balance of moisture retention and aeration. Pro tip: Add a handful of worm castings to this mix for an extra nutrient boost without overloading with nitrogen. And here's what nobody tells you: if your mix feels too dense after wetting, add another 20% perlite—raspberry roots need oxygen as much as water.
Root Revival Technique: That 1-2 hour soak for bare-root raspberries in Step 3 isn't just about hydration—it's about waking up dormant roots. I've found that adding a splash of seaweed extract to the soaking water gives roots an instant energy boost. After soaking, gently shake the roots to remove excess water before planting—they need to establish contact with soil, not sit in a puddle.
Fertilizer Timing Matters: The 4-6 week feeding schedule is crucial, but here's the nuance: switch to a phosphorus-heavy fertilizer (like 5-10-10) as soon as you see flower buds forming. Yellowing leaves? That's your plant screaming for help—reduce nitrogen immediately and increase phosphorus. I've seen raspberries go from lush foliage to fruit factories just by making this one adjustment. And remember: organic fertilizers release nutrients slowly, so don't double up doses!
Pro Tips for Potted Raspberry Plants
- Container gardening with raspberries is all about getting the details right—these tricks will help you avoid the most...
- Container Depth is Non-Negotiable: Those 18-24 inch containers aren't just recommendations—they're essential for rasp...
- Soil Mix Secrets: The equal parts peat moss, perlite, and compost blend in Step 2 isn't just arbitrary—it creates the...
Frequently asked questions
Got questions about growing potted raspberry plants? You’re not alone! Here are answers to the most common concerns—from planting to harvest—to help you grow delicious fruit in containers with confidence.
Can raspberries grow well in pots long-term?
With the right container (at least 18–24 inches deep and 12–18 inches wide), well-draining soil, and proper care, raspberries thrive in pots for years. Just repot every 2–3 years to refresh nutrients and space. Dwarf or semi-dwarf varieties (like ‘Heritage’ or ‘Boyne Gold’) are ideal for containers.
When is the best time to plant potted raspberries?
Plant bare-root raspberries in early spring (just as buds swell) or container-grown plants in late winter/early spring for best root establishment. If you’re in a mild climate, fall planting (4–6 weeks before frost) also works. Avoid extreme heat—root shock is less likely in cooler weather.
Do potted raspberries need winter protection?
Yes! In USDA Zones 5–7, protect pots with mulch (straw or leaves) and move them to a sheltered spot or wrap containers in bubble wrap. In colder zones, dig up containers and store them in a garage or cold frame with minimal soil. Everbearing varieties are slightly more cold-hardy but still benefit from winter care.
Why aren’t my potted raspberries fruiting?
Common culprits include:
- Insufficient sunlight: Raspberries need 6–8 hours of sun daily—move pots to a sunnier spot.
- Overcrowding: Prune canes to 3–5 per plant and thin out old growth.
- Nutrient deficiency: Feed with balanced fertilizer (10-10-10) in early spring and high-phosphorus (5-10-10) in summer.
- Immaturity: Raspberries can take 1–2 years to fruit after planting.
What can I plant with raspberries in a pot to save space?
Companion plants that thrive in containers with raspberries:
- Herbs: Thyme, oregano, or mint (repel pests naturally!)
- Flowers: Nasturtiums (deter aphids) or marigolds (brighten pots).
- Edibles: Bush beans or lettuce (shallow roots won’t compete).
Wrapping up and next steps
Growing potted raspberry plants is a rewarding way to enjoy fresh, sweet berries—even in small spaces! With the right container, soil, and care, you’ll harvest delicious fruit year-round. Start small, experiment with varieties, and don’t hesitate to troubleshoot along the way.
Now that you’re ready to plant, take the next step: pick your container, prep your soil, and get those roots growing! 🌱 Whether you’re a beginner or a seasoned gardener, your potted raspberry adventure starts today.