Companion Plants
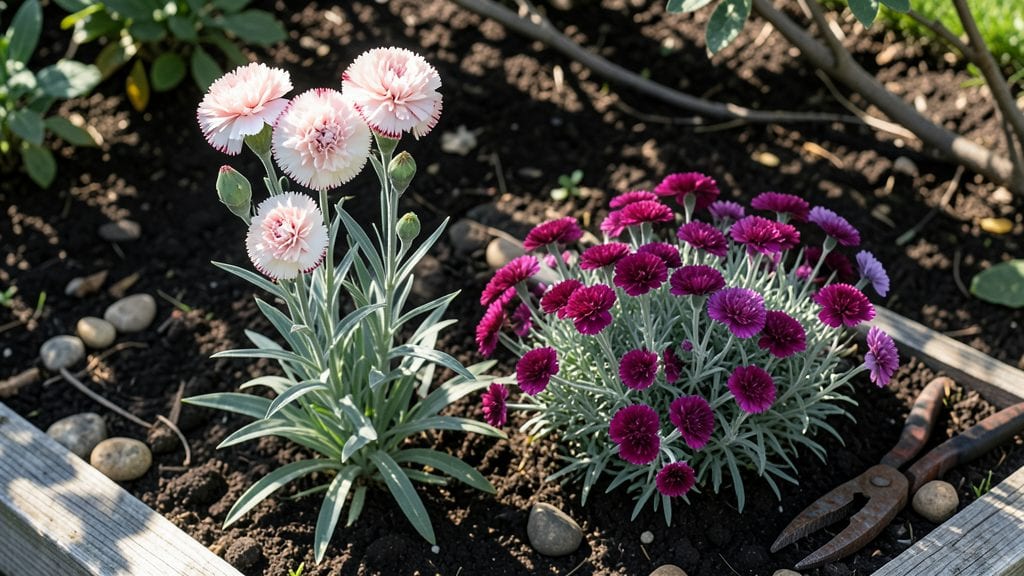
My first encounter with dianthus and carnation plants changed how I think about fragrant perennials—these tough little beauties thrive where others fail, and their sweet scent draws bees like a magnet. 🌿 The secret lies in their love for well-drained soil and full sun, which most gardeners overlook when planting.
I’ve grown them in everything from rocky slopes to containers, and they always bounce back with vibrant blooms.
Start with soil that mimics their Mediterranean roots: mix in coarse sand or perlite to prevent soggy roots, and choose a spot with at least 6 hours of sunlight daily. Water deeply but infrequently—these plants despise wet feet—and fertilize lightly in spring with a balanced formula.
Pruning spent blooms keeps them flowering all season, and dividing clumps every 3-4 years prevents them from getting leggy.
By summer, you’ll have a cloud of fragrant pink, red, or white blooms that last from early June through frost. The foliage stays lush and aromatic, making them perfect for borders, rock gardens, or even as cut flowers. Plus, their nectar-rich blooms support pollinators when other plants are fading.
For cooler climates, mulch heavily in fall to protect roots, and in hot zones, provide afternoon shade to prevent wilting. The biggest mistake? Overwatering—these plants are drought-tolerant once established. With the right care, they’ll reward you with years of effortless beauty and that intoxicating carnation scent.
📚 In This Guide
- What you need
- Instructions
- Tips and common mistakes
- Wrapping up and next steps
What you need
- ● Dianthus or carnation plants/seeds: Choose Dianthus barbatus (sweet William) or Dianthus caryophyllus (carnation) varieties suited to your climate.
- ● Seeds: 1–2 packets (50–100 seeds per packet) or 3–5 young plants from a nursery.
- ● Well-draining potting mix: 5–10 gallons (for containers) or amend garden soil with compost (2–3 inches) and perlite/sand (1 part perlite to 3 parts soil) to prevent root rot.
- ○ Containers (optional but helpful): For seedlings: 4–6 inch pots (1 per seedling).
- ● For mature plants: 10–12 inch pots or in-ground beds with 6–12 inches of spacing between plants.
- ● Fertilizer: Balanced 10-10-10 or 20-20-20 fertilizer (1 tbsp per gallon of water, applied every 4–6 weeks).
- ● Phosphorus-rich fertilizer (e.g., 5-10-10) at planting to encourage root growth.
- ● Mulch: 1–2 inches of organic mulch (straw, pine needles, or shredded bark) to retain moisture and suppress weeds.
- ● Hand trowel or transplanting spade for digging and planting.
- ● Garden gloves (to protect against thorns on some carnation varieties).
- ● Watering can or hose with a gentle spray nozzle (avoid soaking the foliage).
- ● Pruning shears (for deadheading and shaping).
- ○ pH testing kit (optional but helpful—ideal soil pH: 6.0–7.0).
- ● Sunlight: Full sun (6–8 hours daily) for optimal blooms.
- ● Watering routine: Keep soil evenly moist but not soggy (drought-tolerant once established).
- ● Pollinator-friendly location: Plant near bees, butterflies, and hummingbirds to attract beneficial insects!
- ● Cold hardiness: Most dianthus thrive in USDA Zones 3–9 (check your variety’s specific needs).
Step-by-step guide to planting Dianthus and carnations for year-round beauty
Here’s how to grow these fragrant perennials with minimal fuss—perfect for pollinators and long-lasting color.
🌱 Step 1: Choose the Right Location and Soil
Dianthus and carnations thrive in full sun—at least 6-8 hours daily. Pick a spot with well-draining soil; these plants hate soggy roots. If your soil is heavy clay, mix in 2-3 inches of coarse sand or perlite per square foot to improve drainage. I always test soil pH first—aim for 6.0-7.0, slightly acidic to neutral.
Loosen the top 6 inches of soil with a garden fork to break up compaction. Remove rocks and weeds, then spread 2-3 inches of compost over the area. Work it into the soil lightly—don’t over-till, or you’ll disrupt the root zone. This prep ensures strong root establishment, which means healthier plants and more blooms.
🪴 Step 2: Plant Bare-Root or Container-Grown Plants
For bare-root plants, soak the roots in lukewarm water for 30 minutes before planting. This jumpstarts hydration and reduces transplant shock. Dig holes twice as wide as the root ball but only as deep as the top of the root crown—burying too deep suffocates the plant. Space plants 12-18 inches apart for carnations and 18-24 inches for dianthus to allow airflow and prevent disease.
Gently place the plant in the hole, then backfill with soil, pressing lightly to remove air pockets. Water deeply right after planting to settle the soil. If using container-grown plants, remove them from pots carefully—tap the sides to loosen roots if needed. Avoid disturbing the root ball more than necessary; these plants establish slowly if roots are damaged.
☀️ Step 3: Water and Mulch for Retention
Water deeply once a week (or more in extreme heat) to encourage deep root growth. Check soil moisture by sticking your finger 2 inches down—if it’s dry, water again. Avoid overhead sprinkling, especially in the evening, to prevent fungal diseases like powdery mildew. Dianthus and carnations are drought-tolerant once established, but consistent moisture in the first 4-6 weeks is critical.
Apply 2-3 inches of organic mulch (like straw or shredded bark) around each plant, keeping it 2 inches away from the stem. Mulch conserves moisture, regulates soil temperature, and suppresses weeds. Replenish mulch as it breaks down—this keeps roots cool in summer and insulated in winter. Just don’t let it pile up against the stems; that’s a recipe for rot.
✂️ Step 4: Prune and Deadhead for Continuous Blooms
Pinch back new growth by ⅓ in early spring to encourage bushier plants. Remove spent blooms regularly—snip stems ½ inch above a leaf node—to prompt more flowers. This isn’t just about looks; deadheading redirects the plant’s energy into producing new buds instead of setting seed. I do this every 7-10 days during peak bloom season to keep my plants looking fresh.
After the first frost, cut back woody stems by half to tidy the plant and prepare it for dormancy. In late winter, prune again to remove any dead or crossing branches. This spring cleanup ensures stronger regrowth and prevents overcrowding. Dianthus and carnations are tough, but a little pruning goes a long way in keeping them thriving year after year.
🌿 Step 5: Fertilize and Protect for Long-Term Health
Feed plants once in early spring with a balanced, slow-release fertilizer (10-10-10 ratio). Sprinkle ½ cup per plant around the base, then water deeply to activate the granules. Avoid high-nitrogen fertilizers—they promote leafy growth at the expense of flowers. I also side-dress with compost in late summer for a gentle nutrient boost without risking overfeeding.
Watch for pests like aphids or spider mites, which love the tender new growth. Spray plants with neem oil at the first sign of trouble—it’s organic, effective, and won’t harm pollinators. If deer or rabbits are a problem in your area, consider installing chicken wire fencing around the bed. These plants are fragrant and beautiful, but they’re also a tasty snack for wildlife—don’t let them become a buffet!
Tips & tricks for perfect Dianthus and carnation planting
These simple yet game-changing tips will help you get the most vibrant blooms and longest-lasting plants from your dianthus and carnations.
Soil Prep Secret: Before amending your soil with sand or perlite, consider adding a handful of mycorrhizal fungi to the planting holes. These beneficial fungi form a symbiotic relationship with your plants' roots, helping them absorb nutrients more efficiently. I've noticed my dianthus plants bloom more profusely when I use this trick—especially in the first growing season. Just sprinkle a little into each hole before planting.
Root Soaking Hack: That 30-minute soak for bare-root plants isn't just about hydration—it's also a great time to give the roots a quick inspection. Remove any damaged or mushy roots before planting, and trim healthy roots by about an inch if they're extremely long. This encourages a more compact root system that establishes faster. I learned this the hard way after planting some roots that were too long and saw them growing in circles!
Watering Wisdom: The "stick your finger 2 inches down" test is perfect, but I've found an even better way to check moisture: press your thumb gently into the soil. If it springs back slowly, your plants need water. If it springs back immediately, wait another day. This method gives you a more consistent reading than just the finger test, especially in sandy soils where moisture can be deceiving. Remember, these plants are drought-tolerant once established, but that critical 4-6 week period needs consistent moisture.
Pruning Timing: When you're deadheading every 7-10 days, pay attention to the time of day you do it. Early morning is ideal because it gives the plants plenty of time to recover before evening moisture could encourage fungal growth. Also, always use clean, sharp pruners—dull tools can crush stems and create entry points for disease. I keep a small bottle of rubbing alcohol nearby to wipe down my pruners between cuts, and it's made a noticeable difference in plant health.
Pro Tips for Dianthus Carnation Plants
- These simple yet game-changing tips will help you get the most vibrant blooms and longest-lasting plants from your di...
- Soil Prep Secret: Before amending your soil with sand or perlite, consider adding a handful of mycorrhizal fungi to t...
- Root Soaking Hack: That 30-minute soak for bare-root plants isn't just about hydration—it's also a great time to give...
Frequently asked questions
Got questions about growing Dianthus and carnation plants? You're not alone!
Here are answers to the most common queries from gardeners just like you.
How do I keep my Dianthus plants blooming all season?
Prune spent blooms regularly to encourage new flowers. Dianthus thrives with deadheading—simply pinch off faded blossoms with your fingers or shears. For long-lasting blooms, fertilize lightly with a balanced, low-nitrogen formula every 4-6 weeks. Mulch around the base (but avoid touching stems) to retain moisture and deter weeds.
When is the best time to plant Dianthus or carnations?
Plant Dianthus in early spring (after the last frost) or early fall for best results. Carnations prefer cooler weather, so avoid planting in scorching summer heat. If starting from seeds, sow them indoors 8-10 weeks before the last frost. Hardened-off seedlings can then be transplanted outdoors.
Are Dianthus plants good for attracting pollinators?
Absolutely!
Both Dianthus and carnations are pollinator magnets, especially for bees and butterflies. Their fragrant, clustered flowers provide nectar and pollen. For extra buzz, pair them with lavender, catmint, or coneflowers. Just avoid overusing pesticides—let the pollinators feast!
Why are my Dianthus leaves turning yellow or brown?
Yellowing leaves often signal overwatering or poor drainage. Let the soil dry slightly between waterings—Dianthus prefers well-draining, sandy soil. Brown edges may indicate underwatering or heat stress. Move plants to partial shade if leaves crisp in hot afternoons. Fungal issues (like rust) can also cause browning—remove affected leaves and improve airflow.
Can I grow Dianthus in containers, or do they need a garden bed?
Yes! Dianthus thrives in containers with proper care. Use pots with drainage holes and a mix of potting soil + perlite/sand (50/50 ratio). Choose compact varieties like Dianthus barbatus (sweet Williams) for containers. Place pots in full sun and water when the top inch of soil feels dry. Containers dry out faster, so monitor moisture closely.
Pro Tip:
For longer-lasting cut flowers, harvest Dianthus blooms early in the morning and place stems in cool water with a drop of bleach (1 tsp per gallon) to extend vase life. Change the water every 2 days!
Wrapping up and next steps
Growing dianthus and carnation plants is a rewarding way to add fragrant, pollinator-friendly beauty to your garden while enjoying vibrant blooms year after year.
These hardy perennials thrive with minimal fuss—just a little sunlight, well-draining soil, and occasional care—and they’ll repay you with stunning color and sweet scents that attract bees and butterflies. Whether you’re a beginner or a seasoned gardener, now’s the perfect time to plant, nurture, and enjoy these charming companions!
Ready to get started? Pick your favorite variety, grab your gloves, and transform your garden into a pollinator paradise—one fragrant bloom at a time! 🌸🐝